
How to capture and verify user’s phone number using Auth0 Actions

Search for a command to run...
Great article. BTW, Can u please explain if we could tweak the process such way that we can do it without redirecting to external webpage? We do email password login from flutter SDK. But I didnt find any way to verify sms without SMS action. It would be very helpful if we could do such thing with api instead of redirecting to a web page
In the world of software development, the title "Senior Developer" is often seen as a milestone in a developer's career. But what does it truly mean to be a senior developer? It's more than just years of experience or advanced coding skills. Being a ...

Background Answering questions in Auth0 community forum is one of the ways I give back to the community and also learn more about common problems or confusions Auth0 users face. Recently, I came across a question asking how to customize the Auth0 ema...

In the dynamic world of software development, effective knowledge sharing is key to the success and growth of any team. With rapidly evolving technologies and complex projects, it's crucial to have strategies and tools in place to facilitate seamless...

What is PKCE? PKCE (Proof Key for Code Exchange) is an extension to the OAuth 2.0 protocol that prevents authorization code interception attacks. It is a simple, lightweight mechanism that can be implemented in any application that requests an author...

In this article, we look at how to improve the security of a system by implementing Risk-based Authentication. To achieve this we will integrate have i been pwned APIs into our login flow using Auth0 Actions. What is Risk-based Authentication? To put...

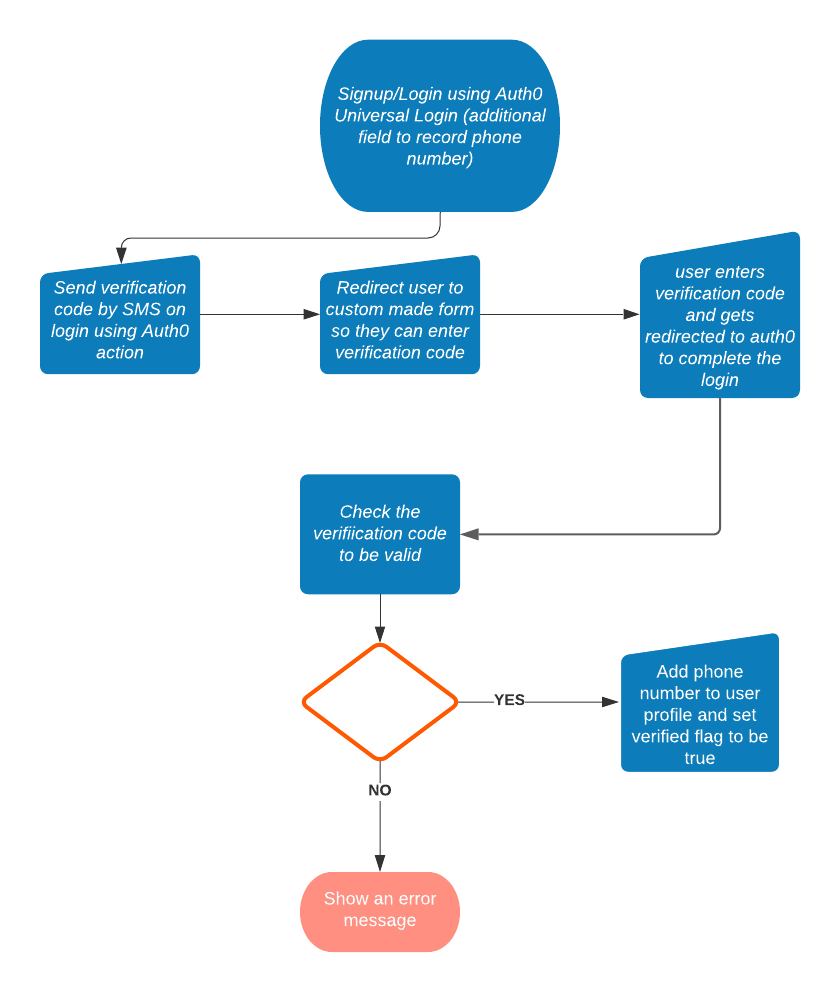
For various scenarios, a business might need to record & verify a user’s phone number before they can provide a service.
This example demonstrates how you can capture and verify the user’s phone number as part of Sign up (First login) using Auth0 Actions.
Auth0 Actions are secure, tenant-specific, versioned functions written in Node.js that execute at certain points during the Auth0 runtime. Actions are used to customize and extend Auth0’s capabilities with custom logic. https://auth0.com/docs/customize/actions
Here is a diagram showing how the solution works.
If you are looking for Multi-Factor Authentication using SMS , it’s supported out of the box with Auth0. This solution is just a suggestion to get around the mobile verification issue. I found some users on the Auth0 forum asking for this feature so I decided to see if I can use Auth0 Actions to provide a solution.
 https://community.auth0.com/t/mobile-verification/65206
We need the following pieces to make this flow work:
A Twilio account. Twillio provides the APIs that we need to send the verification SMS and also to verify the code after the user submits it.
Custom signup form with an extra field to record the user’s phone number.
Auth0 Action that will execute on login and make use of the recorded phone number to send a verification code to the user’s device using SMS. This Action is also responsible for the redirect to the code verification form.
A simple web application that will host the form to get the verification code from the user and redirect the user along with the code to Auth0 to finish the login.
To create an account go to https://www.twilio.com/try-twilio and create a free account.
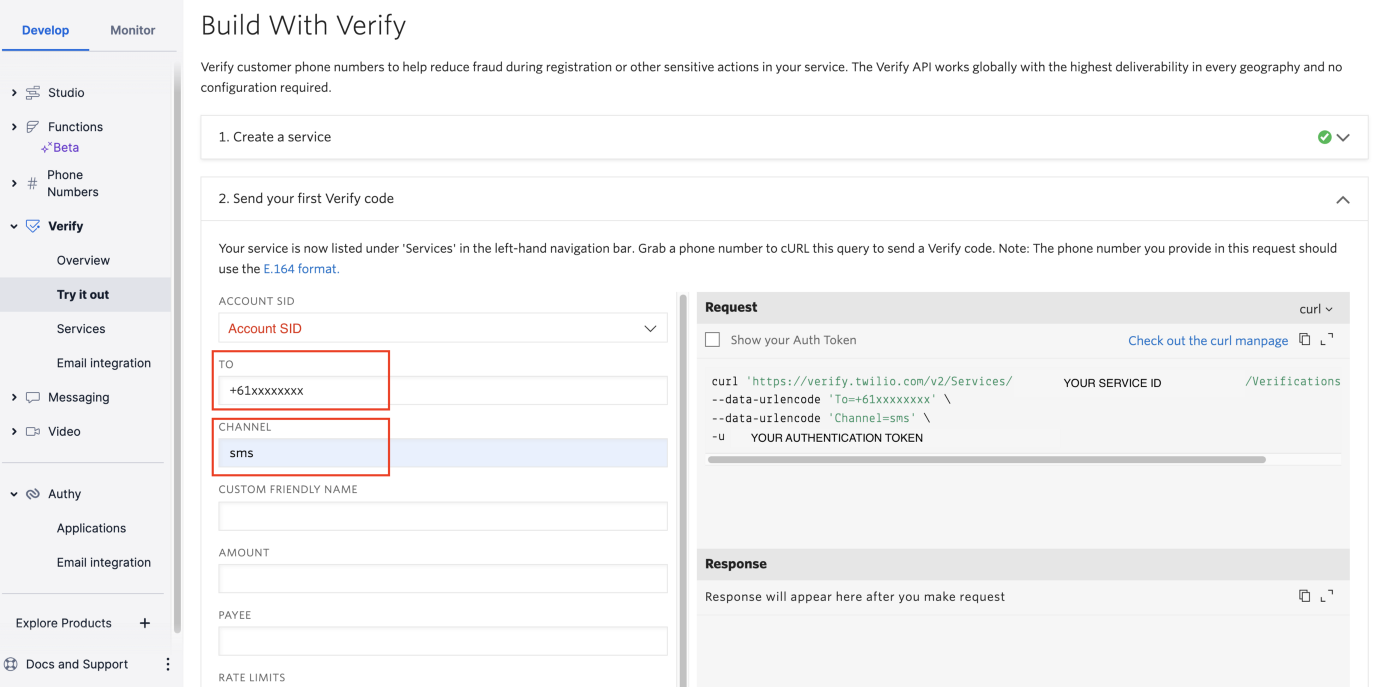
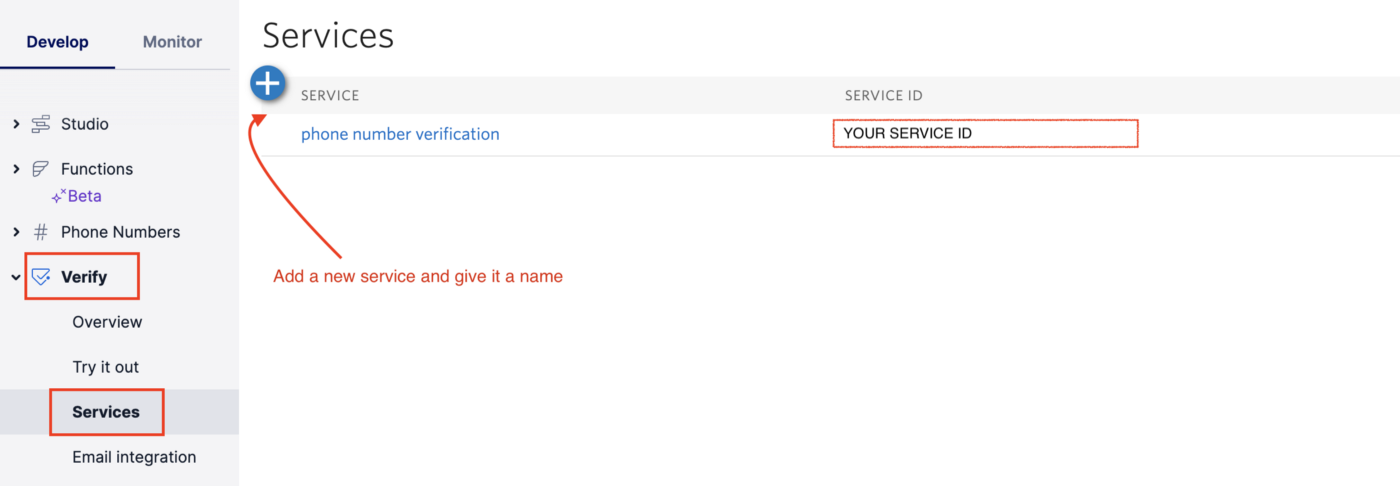
After login, click on the verify from the side menu. This is where we can add a verification service. This service will help us to send an SMS to the user phone number and use the code in that SMS for verifying the number.
Click Verify -> Try it out and create a new service.
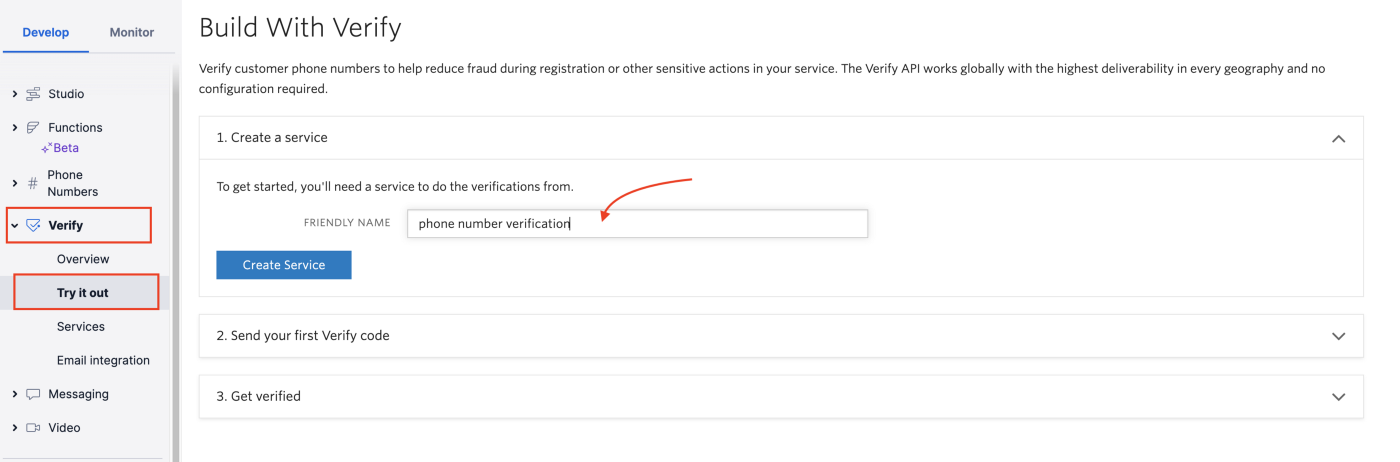
In the second and third steps, you get a chance to test your newly created service in the console. This helps you to verify the URL you need to call and the parameters you need to pass for the payload. After you have tested your new service and you are happy that it all works, we are done with the Twillio setup.
If you need to see your service id at any later stage you can come back to verify and it will be listed under services.
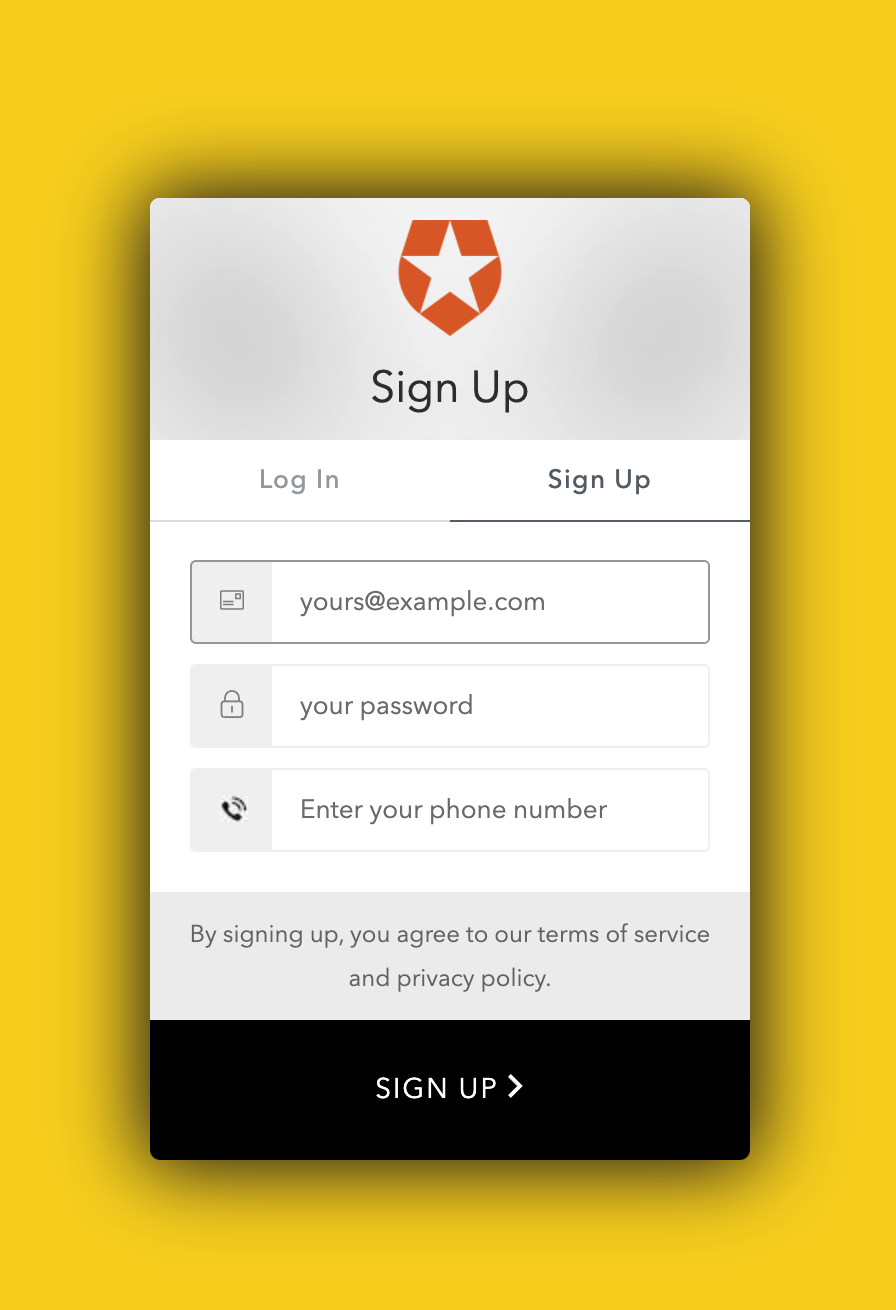
There are multiple ways you can customise your login/signup form. In this example, I am using the Auth0 lock and passing the configuration for extra fields.
To learn more about other ways you can customise the signup experience check this page.
This is the configuration you can pass to the Auth0 lock to add an extra field.
And You will get a signup form like this:
Now after the user signs up, the phone number will be added to the user profile under the user_metadata .
At this stage, we have not verified the phone number yet.
Next step we need a login Action to read the phone number from the user profile and send a verification SMS to the user’s phone number.
Among the Auth0 Action triggers Login is the only one that supports redirect which is what we need for this flow. Since the phone number verification happens only once users will only go through it the first time they log in.
For the subsequent logins, the Action will check if the phone number exists and is verified for a particular user and if so it will just ignore the rest.
To start you need an Auth0 account. If you don’t already have one, follow these instructions for setting up one.
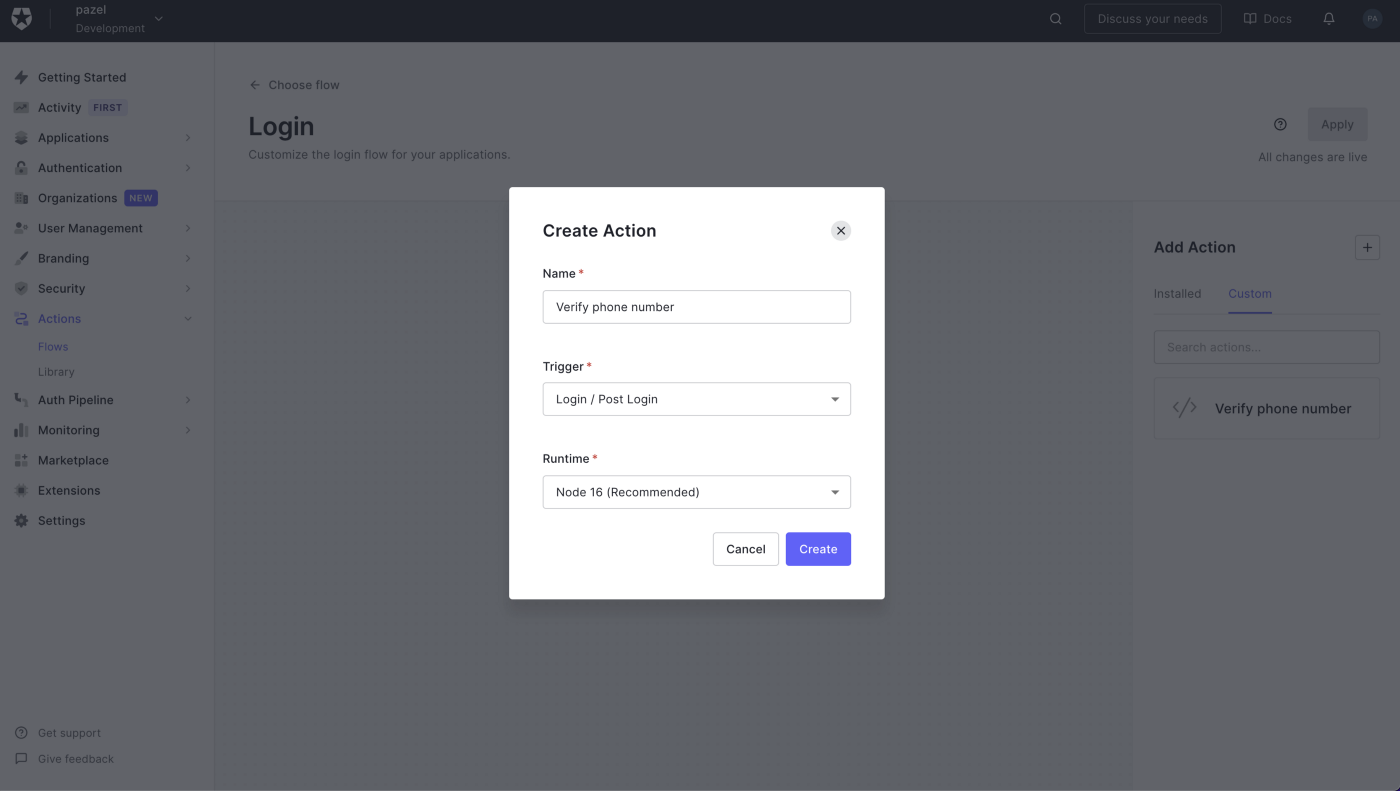
To create the login Action Click on the Actions > Flows > Login
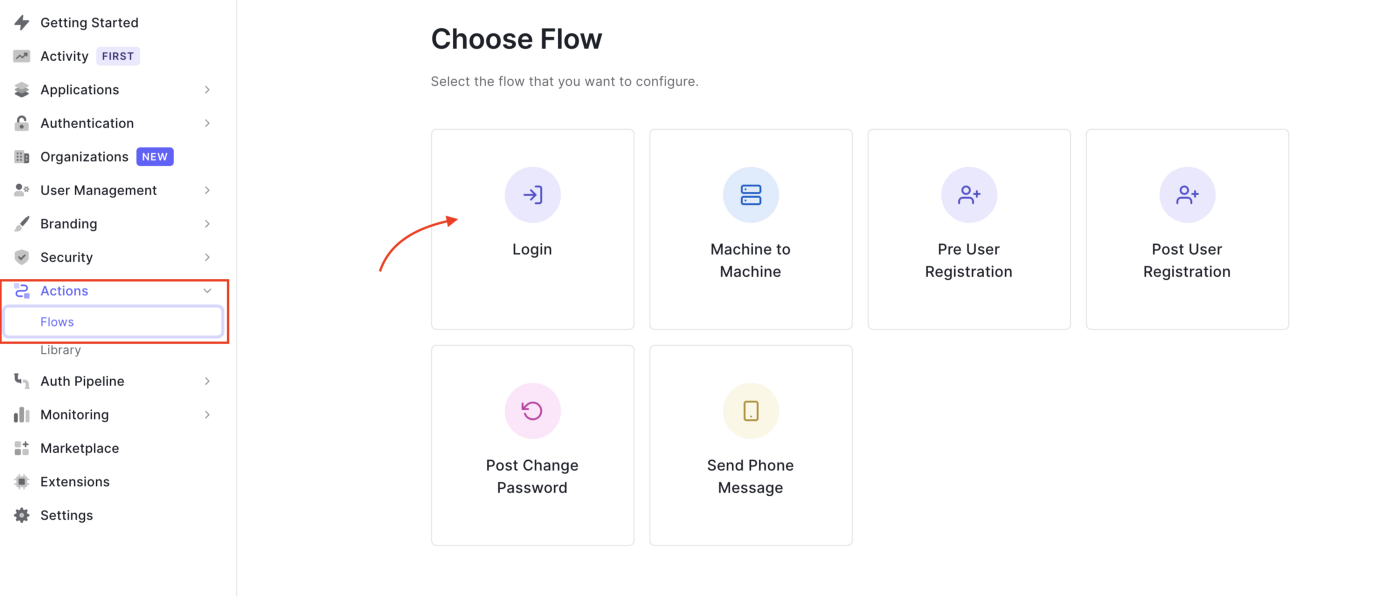
This creates a post-login trigger that runs as part of the Login flow.
It is executed after a user logs in and when a Refresh Token is requested.
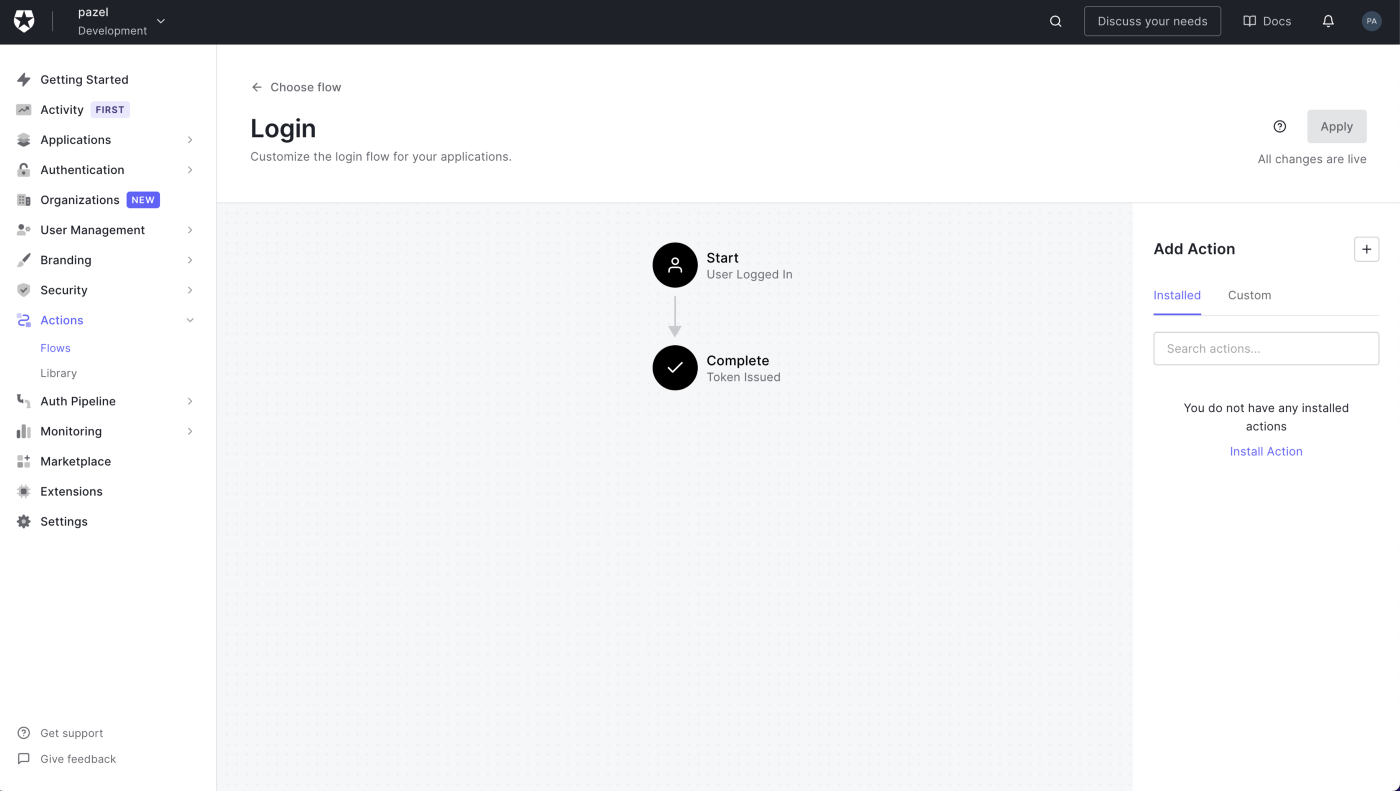
Click on the + button in Add Action and select Build Custom. Call it Verify phone number and leave the rest as is.
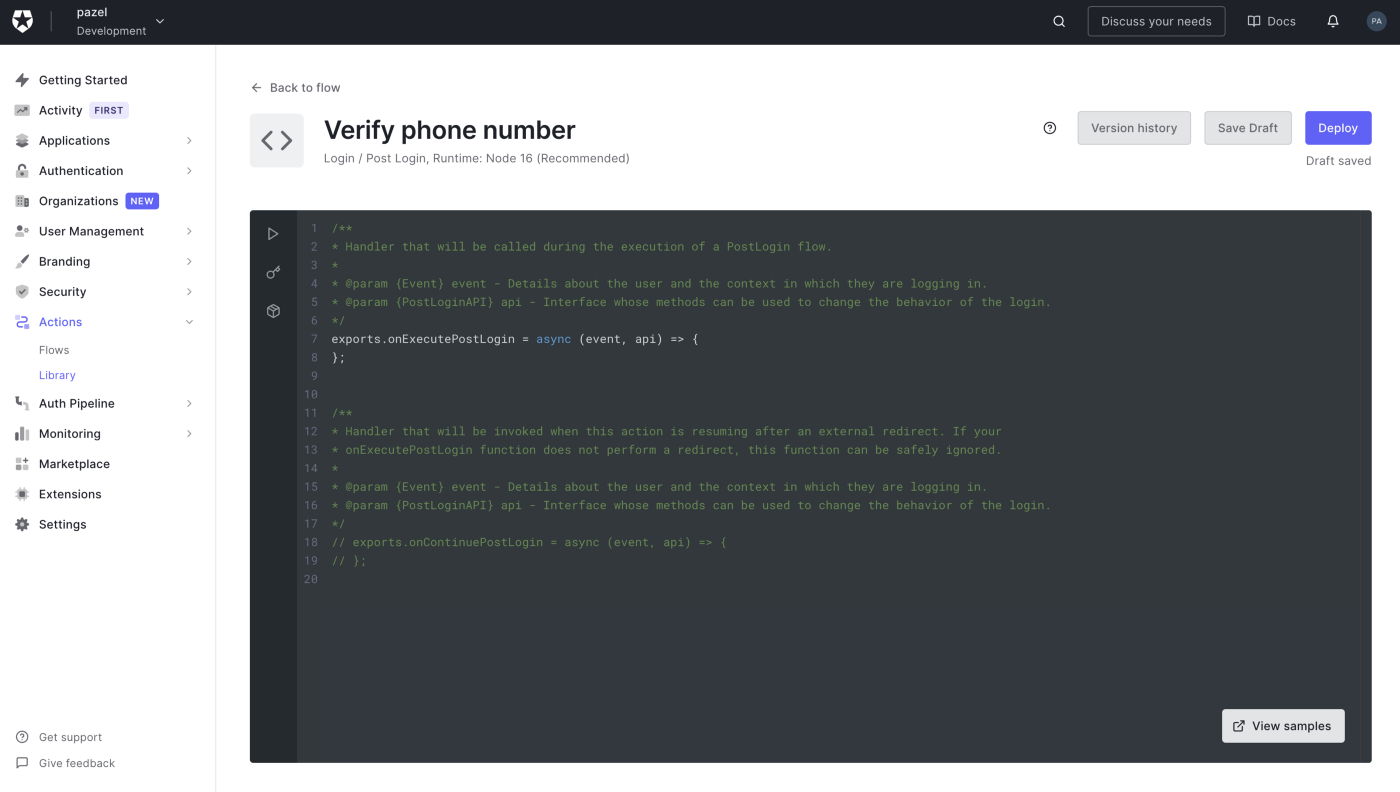
After Creation, you come to the edit screen. Here you can edit the code and write the logic to call Twilio APIs to send a verification code and verify it.
To do this we need to write two separate functions.
onExecutePostLogin — Handler that will be called during the execution of a PostLogin flow.
onContinuePostLogin — Handler that will be invoked when this Action is resuming after an external redirect.
1- In onExecutePostLogin function Code is simply reading the phone number from the user user_metadata and sending an SMS to the phone number using Twilio REST API.
After sending the SMS successfully, this function will redirect the user to the webform to enter the verification code we just sent them. This webform is simply a web application that you need to create and host yourself.
It doesn't need to be anything fancy, as long as it can get the verification code and redirect the user back to Auth0.
2- The onContinuePostLogin comes into play after the user is redirected back to Auth0. At this point, you will have the verification code sent to the function from the webform using a redirect.
So we can use the code and call another REST API from Twilio to verify it.
If all goes well and you get a successful response from Twillio the phone number is verified and we will add this information to the user profile but this time under the app_metadata .
Tip: user_metadata can be edited by the logged-in user but the user cannot edit app_metadata.
Here is the code for the Action.
The code verification form is a basic HTML page with a small bit of JavaScript to handle the form submission. (based on Dylan Swartz example for consent form)
In this example, we will use Vercel to host the form but you use any hosting provider.
If you haven’t done so already, sign up for a Vercel account and install the Vercel CLI with npm i -g vercel.
While you’re in the same directory as the index.html, simply run the following command to spin it up in Vercel:
$ vercel
Press enter for each prompt the vercel command gives you to select the defaults. The output of this command will contain the URL of your newly hosted code verification form.
Here is the code for this web application.
There you have an end-to-end solution to verify phone numbers as part of your Auth0 login and account creation.
There are more things to consider to make this a production-ready solution.
Error handling
You need to consider and handle different errors that can happen.
The example Action code makes use of api.access.deny() to reject the login in case an error happens.
Setting up different environments(tenants) for different stages When you set up Auth0 tenant or Twilio service you need to separate your dev and prod environments.
Keeping your Secret(API) keys safe All the secrets used in this solution only exist on the server-side of the code (action.js and verify.js) which makes it easier to keep them safe. Make sure you do not expose the sensitive keys in your client-side code or commit them to your repo.
Actions have secret management built-in to keep your secrets safe and provide a convenient way to access them in your action code.
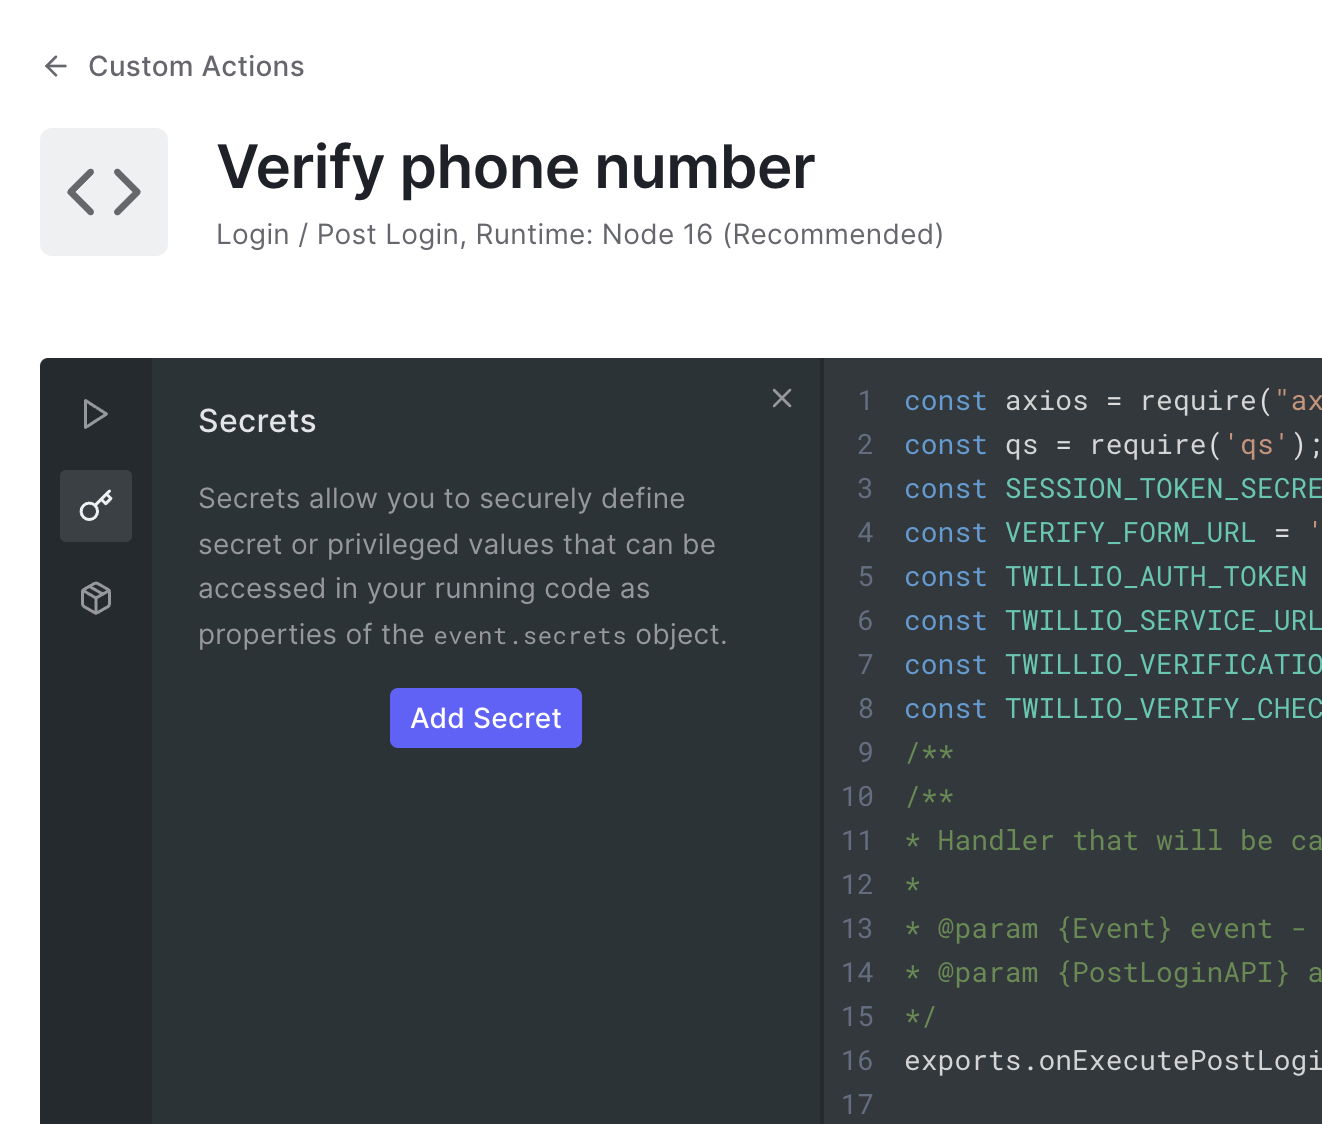
and you can access them like this
event.secrets.SESSION_TOKEN_SECRET
Trusted Callback URL (quoting from Dylan Swartz example )
Our sample Action and consent form makes one security compromise for the sake of convenience: the rule passes the Auth0 domain (i.e. your-tenant.auth0.com) to the form website and the form uses that to construct a callback URL (i.e. https://your-tenant.auth0.com/continue) for returning to the rule. This is essentially an open redirect and should not be used in production scenarios.
You can lock this down by configuring your form website implementation to only return to a specific URL (i.e. just your Auth0 tenant) instead of one that’s generated from a query param. You can then simplify the rule too so it no longer passes the Auth0 domain.
Data Integrity (quoting from Dylan Swartz example )
As stated, this is a very basic example of using an Action Redirect to invoke a consent form. That said, at Auth0 we take security very seriously. The confirm field (which has the value of yes) that is being passed back to auth0 as a signed token using a shared SESSION_TOKEN_SECRET.
In production scenarios where you need assurances of the integrity of the data being returned by the external website (in this case in our hosted code verification form). For example, if you want to be sure that the data truly came from a trusted source, then it should be signed. If the data is sensitive, then it should be encrypted. A good mechanism for doing this is to use a JWT (JSON Web Token). You can build a JWT with claims (that you can optionally encrypt) and then sign it with either a secret shared with your Auth0 Action or with a private key, whose public key is known by the action. The Action can then verify that the claims are legit and decrypt them, if necessary.
Social logins This solution needs some adjusting if you want to offer social logins/signup. In the case of social login, users will not use our signup form, so we need to capture the phone number through a separate form in our application.
Thanks for reading this article. Please reach out here or on Twitter if you have any feedback or questions.
Here is the link to my example code repository: https://github.com/pazel-io/auth0-twilio-phone-verification