Build a PWA Map application using Ionic and Leaflet 🗺 🧭
Featuring Google address search integration, GPS and layer switcher. (Step by step guide)

Hello friends 👋
Parham here, with another step-by-step guide. This time, we will build an Ionic PWA app that shows a map, but that is not all.
A quick preview of what is the final results:
Here are the app features, what you can expect to learn implementing each part and the difficulty level of each part:
Create a blank app using Ionic CLI.
You will learn how to use Ionic CLI to create an Ionic/Angular app. (Difficulty level: simple)
Adding a leaflet map to your Ionic app.
You will learn how to implement a basic map integration with Ionic, Leaflet & Angular. (Difficulty level: simple)
Add a base layer switcher to switch between different base maps
You will learn how to interact with basic Leaflet APIs like
TileLayer,LayerGroupand Map methods. (Difficulty level: Intermediate)Geolocation API integration to use device GPS and find user current location.
You will learn how to use Geolocation API to find device locations and handle related errors. (Difficulty level: Intermediate)
Address search to find a location using google address search.
You will learn how to use Google Places APIs to address search and find the coordinates related to an address. (Difficulty level: Intermediate)
Make it a PWA
You will learn how to use
@angular/pwato make your app an installable PWA. (Difficulty level: Intermediate)Bring it all home
What is the point of building all this if we cannot show it off? Let's deploy your new app using Vercel and show it off to our friends 😀 (Difficulty level: simple)
Here is the demo: demo deployed using Vercel
Here is the Github code repository: ionic-angular-leaflet-offline-map-pwa
Let's start
1. Create the base app using Ionic CLI
If you have not installed Ionic CLI before, please head to https://ionicframework.com/docs/intro/cli and follow the instructions to install the CLI.
Next, let's create an app using CLI by running ionic start ionic-leaflet-offline-map-pwa. CLI should prompt you to choose the front end tech and more options.
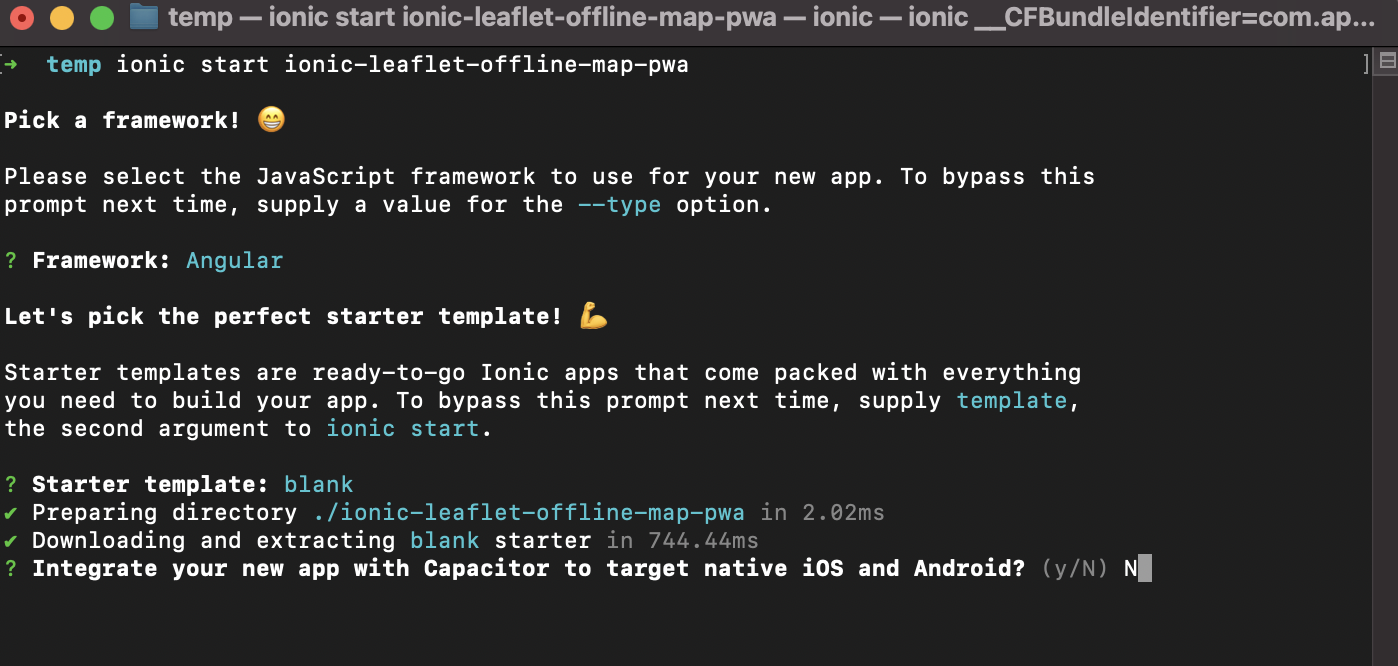
I am going with Angular and the blank starter project. Ionic CLI asks if you like Capacitor integration. It's not required for this tutorial. After selecting the options, CLI will download all required npm packages. (this might take few minutes)
Ionic CLI asks if you would like a free Ionic account after the npm package install. It's not required for this tutorial. You will eventually see some logs indicating that the setup is done.
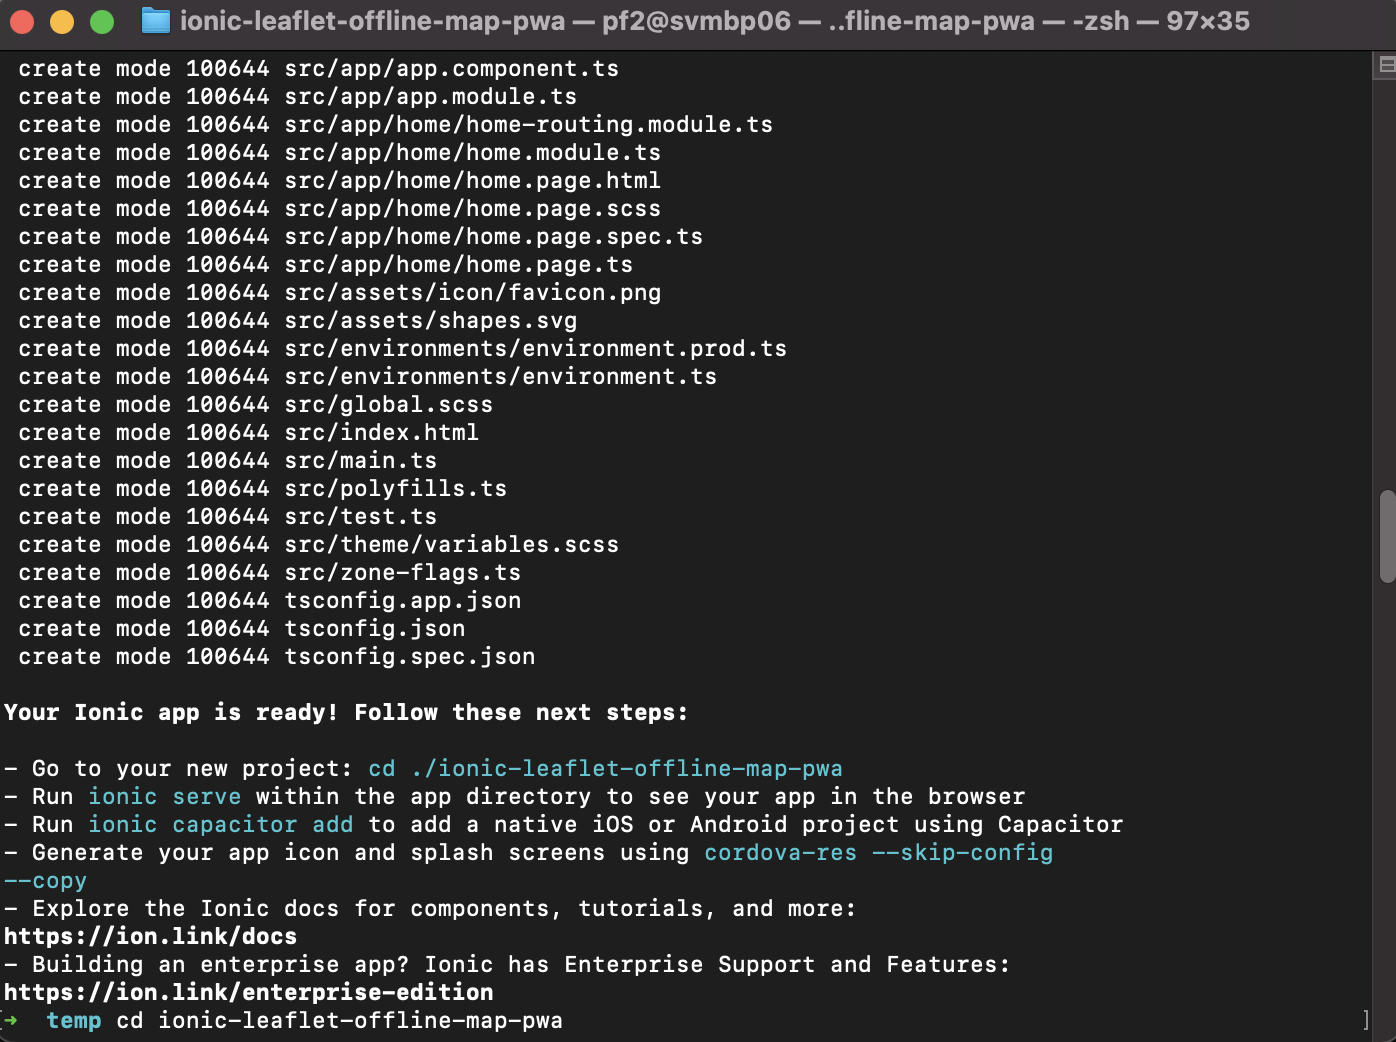
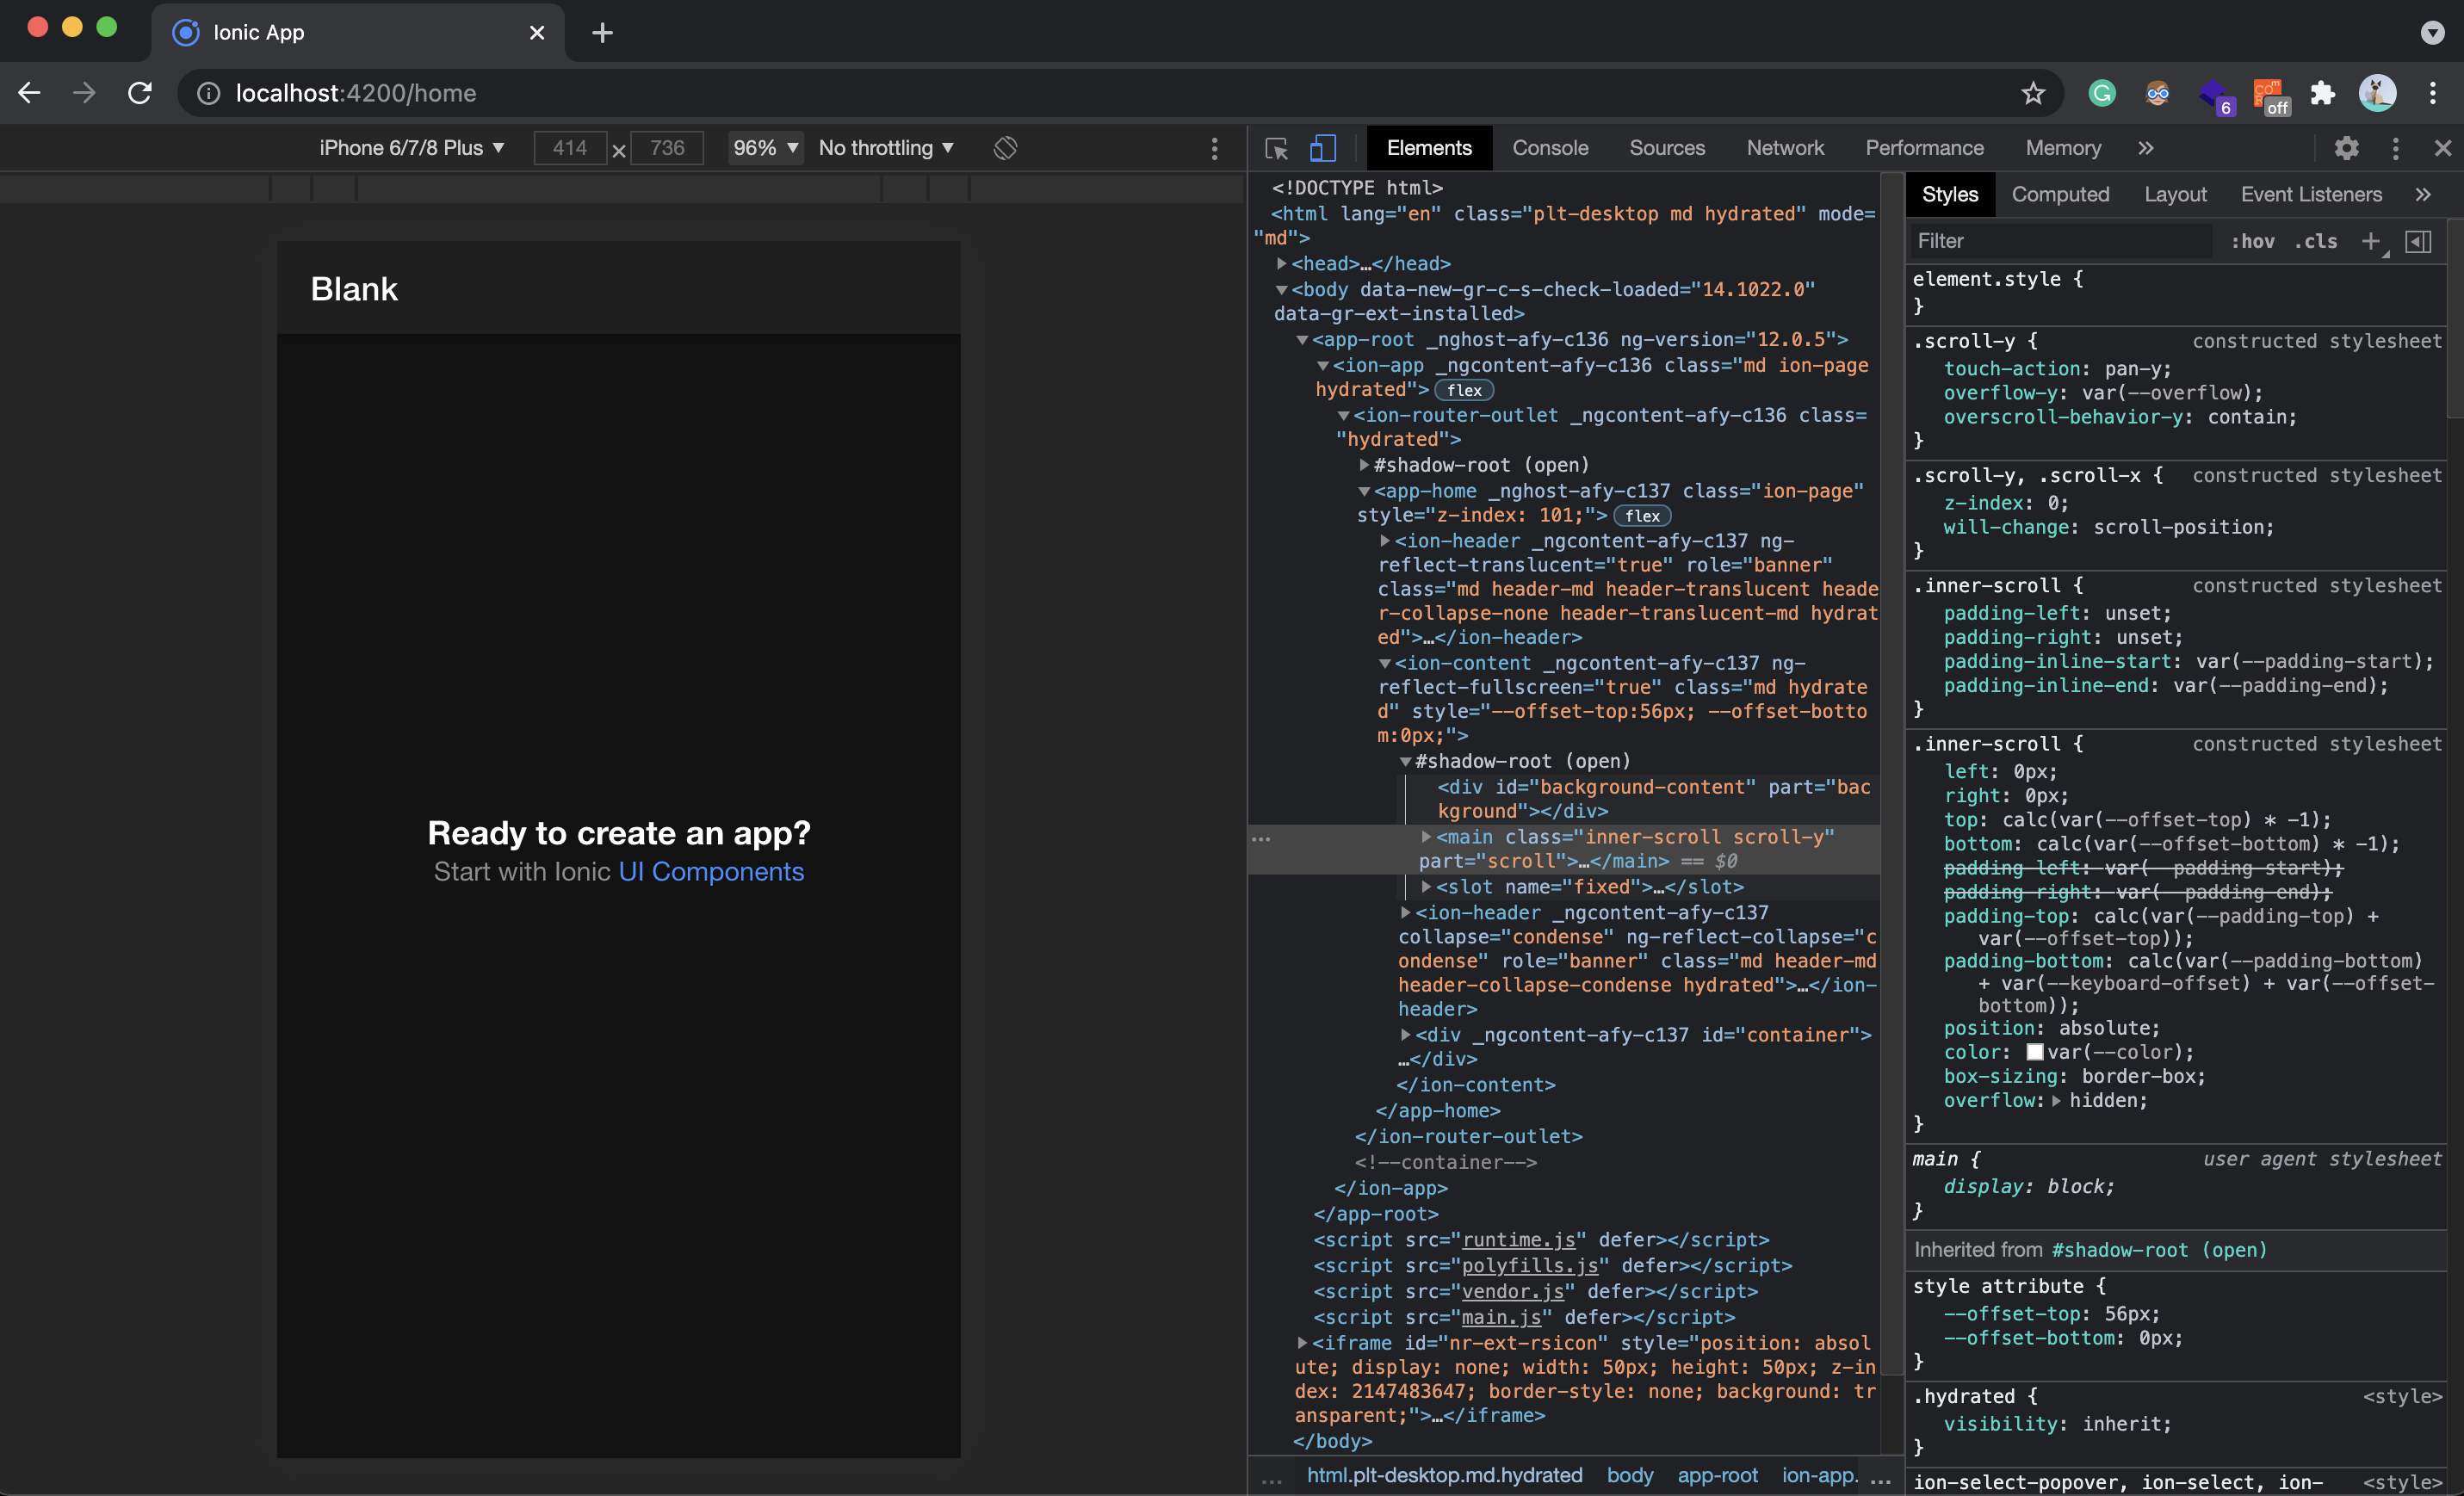
Let's cd to the new project we just created and run ionic serve. This will run a local web server and open the app in your default browser. (by default port 8100)
2. Add a map using Leaflet
Leaflet is an open-source JavaScript library for mobile-friendly interactive maps. It offers heaps of cool features to work with maps. Using the features we need to show the map, and we are gonna just scratch the surface. So it's relatively easy.
We use the Angular Leaflet wrapper for easier integration here. We will use the @asymmetrik/ngx-leaflet project. This package is not an official part of Angular, but it is reliable, and I have used it in many prod apps.
Run npm i leaflet @asymmetrik/ngx-leaflet to install both leaflet and ngx-leaflet.
We love TypeScript so let's add appropriate typings for Leaflet.
Run npm i @types/leaflet -D to install the typings as a dev dependency.
OK, we are done with the installation. Let's add a map to our Angular app!
I will add the map to our HomePage(home.page.ts) component. This is easy.
Add LeafletModule to the imports array in HomePageModule(home.module.ts)
import { NgModule } from '@angular/core';
import { CommonModule } from '@angular/common';
import { LeafletModule } from '@asymmetrik/ngx-leaflet';
import { IonicModule } from '@ionic/angular';
import { FormsModule } from '@angular/forms';
import { HomePage } from './home.page';

import { HomePageRoutingModule } from './home-routing.module';


@NgModule({
  imports: [
    CommonModule,
    FormsModule,
    IonicModule,
    LeafletModule,
    HomePageRoutingModule
  ],
  declarations: [HomePage]
})
export class HomePageModule {}
Add map options and OnMapReady
options define things like map centre, maxZoom, baseLayer and more.
onMapReady will be called when the leaflet map is ready and receive the map instance. We will need this instance to interact with the map later.
import { Component } from '@angular/core';
import { Map as LMap, TileLayer } from 'leaflet';

@Component({
  selector: 'app-home',
  templateUrl: 'home.page.html',
  styleUrls: ['home.page.scss'],
})
export class HomePage {

  public map: LMap;
  public center = [
    -28.690259,
    131.5190514,
  ];

  public options = {
    zoom: 5,
    maxZoom: 18,
    zoomControl: false,
    preferCanvas: true,
    attributionControl: true,
    center: this.center,
    layers: [
      new TileLayer('http://{s}.tile.openstreetmap.org/{z}/{x}/{y}.png')
    ],
  };

  constructor() {}

  public async onMapReady(lMap: LMap) {
    this.map = lMap;
    setTimeout(() => lMap.invalidateSize(true), 0);
  }

}
Add the map container in our home.page.html.
<ion-header [translucent]="true">
  <ion-toolbar>
    <ion-title>
      Ionic Leaflet Map
    </ion-title>
  </ion-toolbar>
</ion-header>

<ion-content [fullscreen]="true">
  <div class="leaflet" leaflet
       [leafletOptions]="options"
       (leafletMapReady)="onMapReady($event)">
  </div>
</ion-content>
Add the leaflet CSS to the list of our global CSS.
Open the angular.json file in the root of the project and update line 34 from
"styles": ["src/theme/variables.scss", "src/global.scss"],
to
"styles": ["src/theme/variables.scss", "src/global.scss", "./node_modules/leaflet/dist/leaflet.css"],
and add the map container CSS to home.page.scss. The updated file looks like this.
.leaflet {
  height: 100%;
  width: 100%;
  position: absolute;
  z-index: 0;
}
Restart your server to make sure the new CSS loads properly. You should see a screen like this.
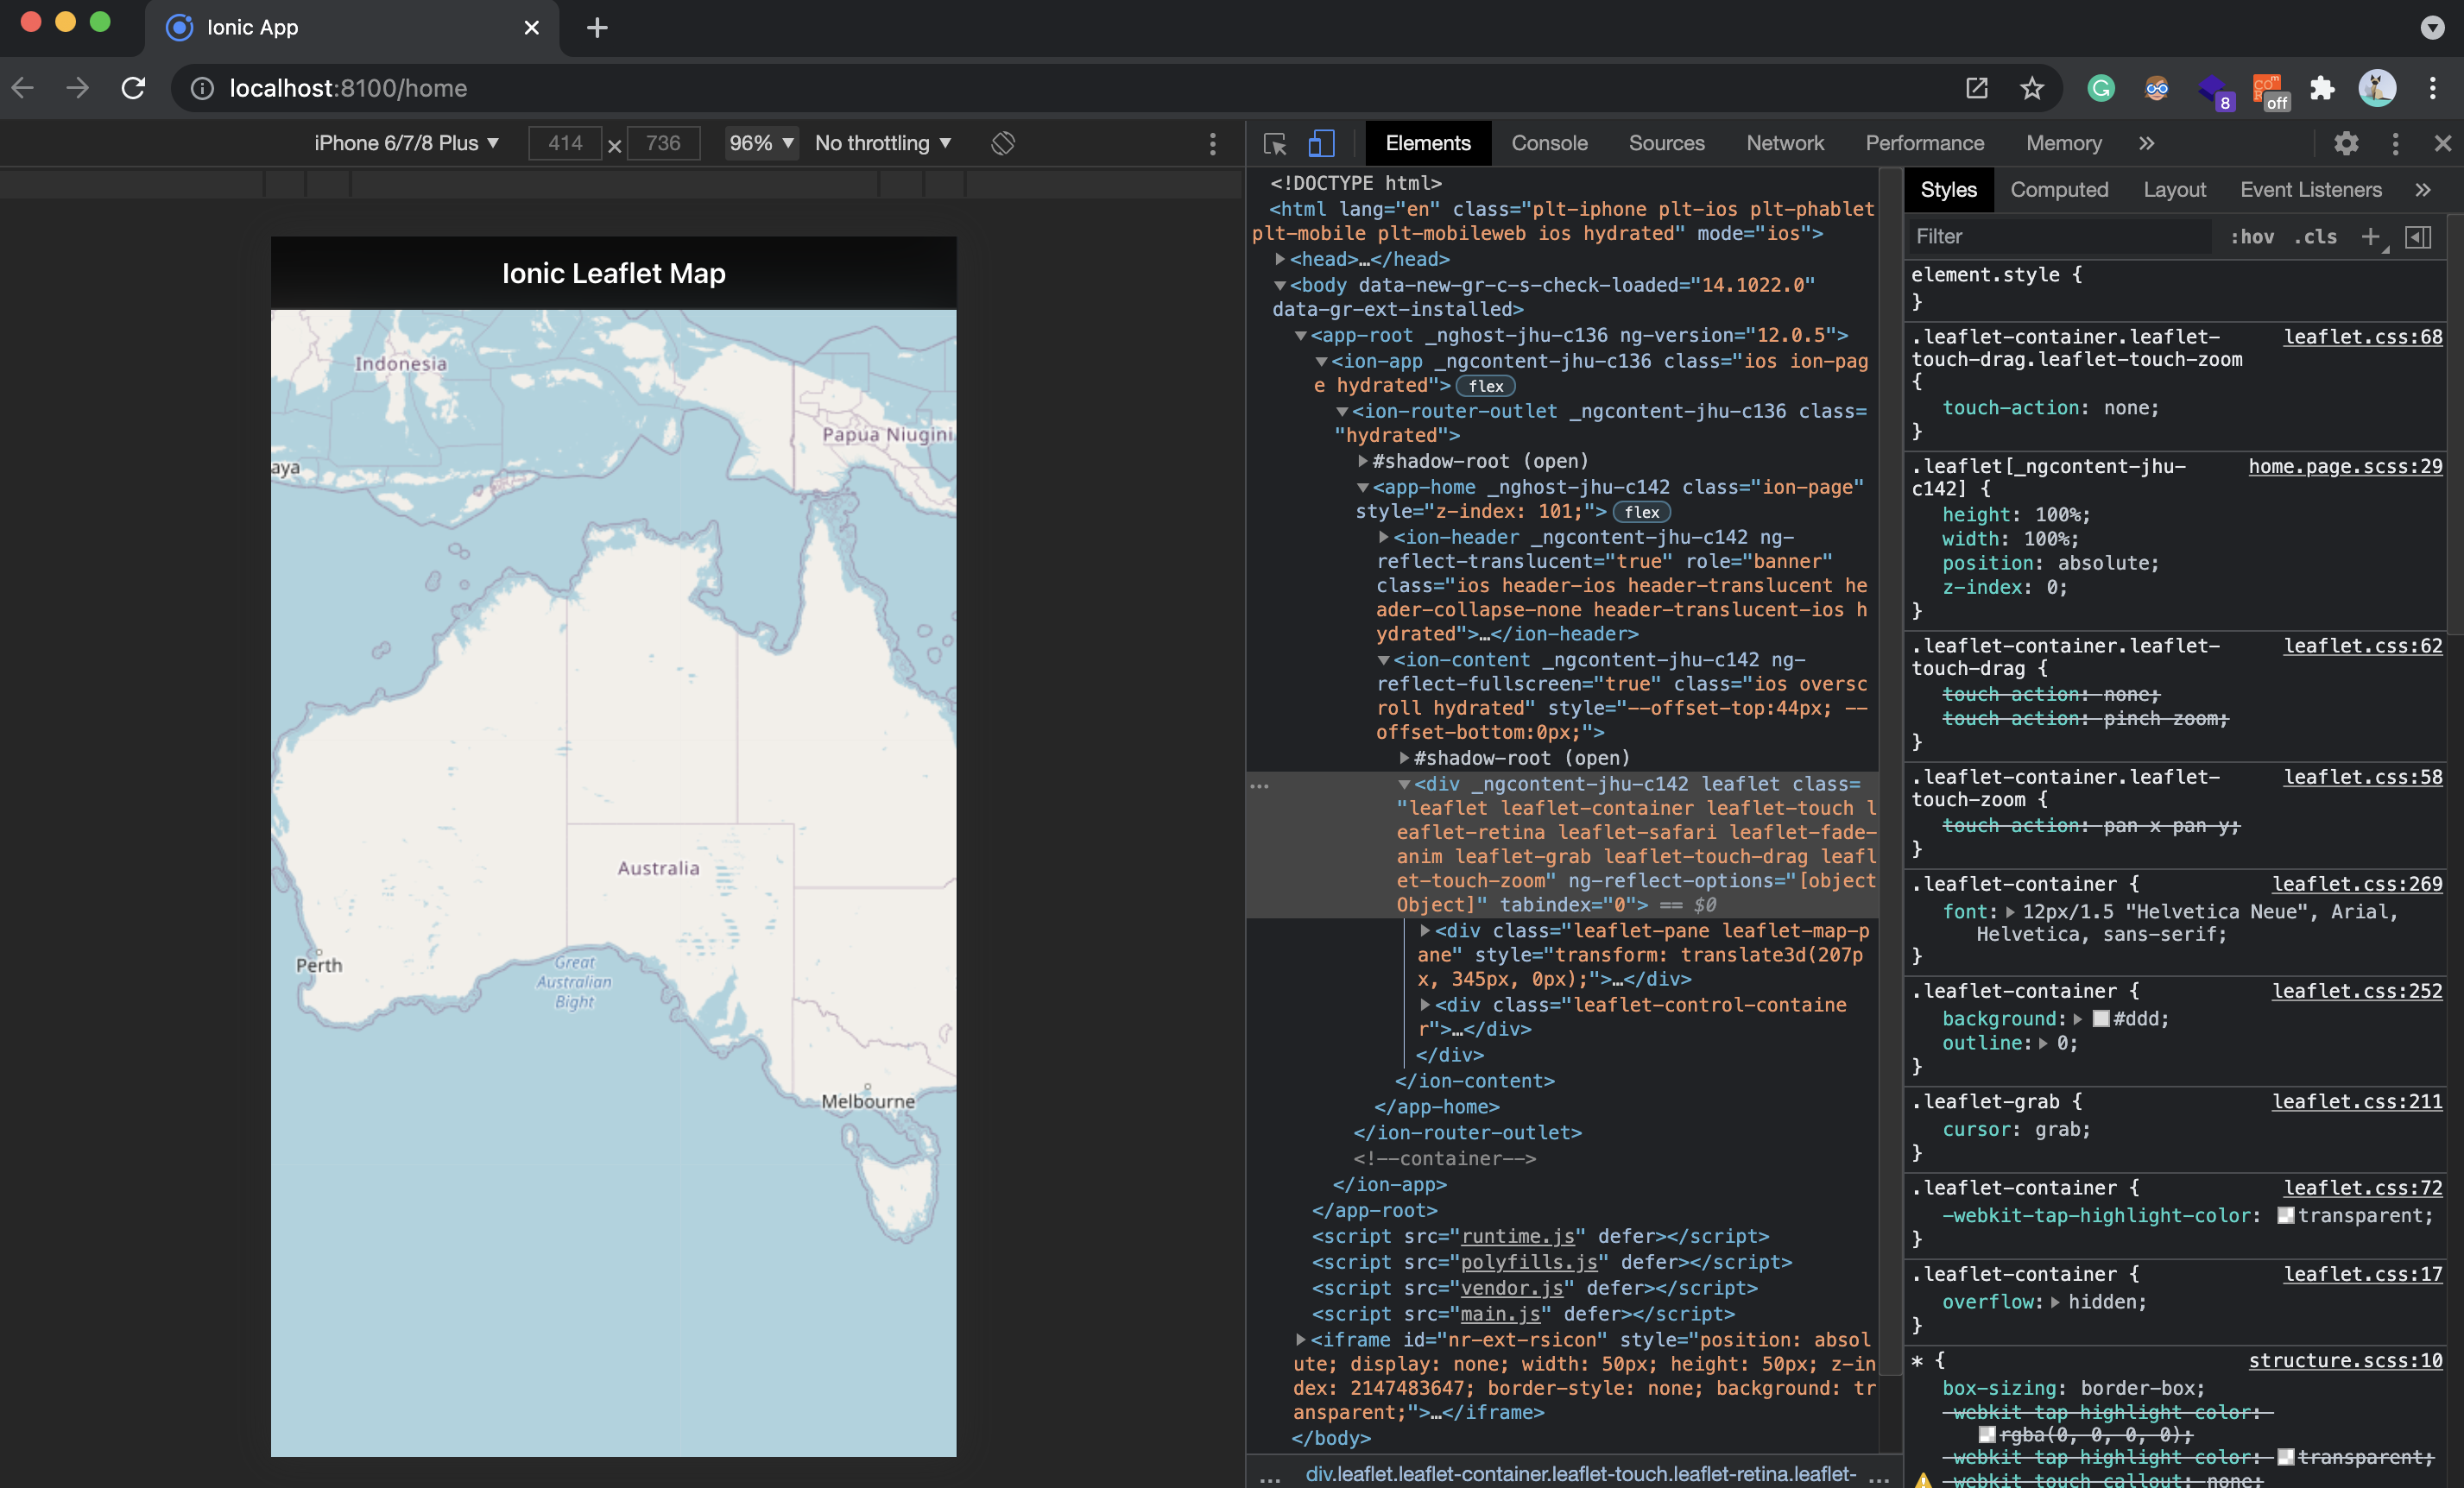
Congrats!! 🎉 👏
Now we integrated a map into our Ionic app.
3. Add the ability to switch base maps
We have already added one base map in the options we defined.
I want to change it and use Cycling and Transport base maps and use a button to switch between them.
Let's be fancy and add a FAB button from Ionic to do the layer switching. Go ahead and add a FAB button with a list of options inside your <ion-content>. The updated code looks like this.
<ion-header [translucent]="true">
  <ion-toolbar>
    <ion-title>
      Ionic Leaflet Map
    </ion-title>
  </ion-toolbar>
</ion-header>

<ion-content [fullscreen]="true">
  <ion-fab vertical="top" horizontal="end" slot="fixed">
    <ion-fab-button>
      <ion-icon name="layers-outline"></ion-icon>
    </ion-fab-button>
    <ion-fab-list side="bottom">
      <ion-fab-button color="danger">
        <ion-icon name="bicycle"></ion-icon>
      </ion-fab-button>
      <ion-fab-button>
        <ion-icon name="car"></ion-icon>
      </ion-fab-button>
    </ion-fab-list>
  </ion-fab>
  <div class="leaflet" leaflet
       [leafletOptions]="options"
       (leafletMapReady)="onMapReady($event)">
  </div>
</ion-content>
The updated screen will have a FAB button on the top right with two options (cycling & transport) for selection.
We need to add the code to actually switch the base map when we click our new buttons. Don't worry. I have got you!
I will show you the updated code, and we will go through the changes one by one.
This is the new home.page.ts file.
import { Component } from '@angular/core';
import { LayerGroup, Map as LMap, TileLayer } from 'leaflet';
import { BaseLayer } from './BaseLayer.enum';

@Component({
  selector: 'app-home',
  templateUrl: 'home.page.html',
  styleUrls: ['home.page.scss'],
})
export class HomePage {

  public map: LMap;
  public center = [
    -37.8182711,
    144.9648731
  ];

  public options = {
    zoom: 15,
    maxZoom: 18,
    zoomControl: false,
    preferCanvas: true,
    attributionControl: true,
    center: this.center,
  };

  public baseMapUrls = {
    [BaseLayer.cycling]: 'http://c.tile.thunderforest.com/cycle/{z}/{x}/{y}.png',
    [BaseLayer.transport]: 'http://c.tile.thunderforest.com/transport/{z}/{x}/{y}.png',
  };

  public selectedBaseLayer = BaseLayer.cycling;

  public baseLayer = BaseLayer;

  private baseMapLayerGroup = new LayerGroup();

  constructor() {
  }

  public async onMapReady(lMap: LMap) {
    this.map = lMap;
    this.map.addLayer(this.baseMapLayerGroup);
    this.switchBaseLayer(this.selectedBaseLayer);
    setTimeout(() => lMap.invalidateSize(true), 0);
  }

  public switchBaseLayer(baseLayerName: string) {
    this.baseMapLayerGroup.clearLayers();
    const baseMapTileLayer = new TileLayer(this.baseMapUrls[baseLayerName]);
    this.baseMapLayerGroup.addLayer(baseMapTileLayer);
    this.selectedBaseLayer = BaseLayer[baseLayerName];
  }

}
I removed the layers array from the map options, and instead, I have added the baseMapUrls, an object. Keys are the map name, and values are the URL for map tiles. For keys, I am using a TypeScript Enum to make it easier when reusing the same string. Enum is in a new file called BaseLayer.enum.ts, and here is the code:
export enum BaseLayer {
  cycling = 'cycling',
  transport = 'transport',
}
Next, we have the selectedBaseLayer property to keep track of which the user selects the base layer. I have initialised it with the cycling base map using the same Enum.
Next, we have the baseLayer property pointing to the BaseLayer enum. This is to make the enum available to our map HTML template and use it there.
Next, we have the private baseMapLayerGroup = new LayerGroup();.
LayerGroup is a Leaflet way to group multiple layers and separate them from the rest of the layers on the map. Using it here makes it easier to manage base layers. We will use more LayerGroups later to add the address search and GPS search results.
Next, we have the switchBaseLayer method. It takes a base layer name and can switch the base layer. It first clears any layers in the layer group and then adds the new layer by finding the config from the baseMapUrls object. Notice that the layer we add is of type TileLayer. This special type of layer in Leaflet world can show tiles used for the base map.
And here are the changes you need in the HTML. Basically adding the click functions to buttons. Also, check the selectedBaseLayer to highlight the colour of the button representing selected base layer by changing it to red(danger). Notice I am using the same BaseLayer enum values to maximise reuse and not repeat myself.
<ion-header [translucent]="true">
  <ion-toolbar>
    <ion-title>
      Ionic Leaflet Map
    </ion-title>
  </ion-toolbar>
</ion-header>

<ion-content [fullscreen]="true">
  <ion-fab vertical="top" horizontal="end" slot="fixed">
    <ion-fab-button>
      <ion-icon name="layers-outline"></ion-icon>
    </ion-fab-button>
    <ion-fab-list side="bottom">
      <ion-fab-button [color]="selectedBaseLayer === baseLayer.cycling ? 'danger' : 'primary'"
                      (click)="switchBaseLayer(baseLayer.cycling)">
        <ion-icon name="bicycle"></ion-icon>
      </ion-fab-button>
      <ion-fab-button [color]="selectedBaseLayer === baseLayer.transport ? 'danger' : 'primary'"
                      (click)="switchBaseLayer(baseLayer.transport)">
        <ion-icon name="car"></ion-icon>
      </ion-fab-button>
    </ion-fab-list>
  </ion-fab>
  <div class="leaflet" leaflet
       [leafletOptions]="options"
       (leafletMapReady)="onMapReady($event)">
  </div>
</ion-content>
4. Use device GPS and find the user current location
We will use Geolocation API to find the device location. This is a standard web API. For privacy reasons, users will be asked to grant access to their location. So the user can grant access or deny, and we need to handle the potential errors in this process.
First, let's add a method to read the device's location.
  public async locate() {
    this.locationLayerGroup.clearLayers();
    if (!navigator.geolocation) {
      console.error('Geolocation is not supported by your browser');
      return;
    }
    await this.presentLoading();
    navigator.geolocation.getCurrentPosition(
      (position) => this.onLocationSuccess(position),
      (error) => this.onLocateError(error),
      {enableHighAccuracy: true}
    );
  }
As you might have noticed, I have added another LayerGroup for the GPS location to the map called locationLayerGroup.
Next, I am checking if the navigator.geolocation is supported. Notice, If it is not supported, I log an error and use the return statement to exit the function. This is a nicer alternative compared to doing if/else and makes your code more readable.
If it is supported, I show a loading message. Then, I call getCurrentPosition, which returns the device's current location (another method if you like to watch the location, which is good for tracking use case).
getCurrentPosition takes three parameters. First, the success callback function, which is called when the location is successfully fetched. The second is the error callback which will be called if there is an error. Like location access denied or timeout error if GPS satellite is not available. And third, the PositionOptions, which I use to enable the HighAccuracy location. Enabling this option will cause the location reading to take longer but will make it more accurate.
Here is the code for success callback
  private onLocationSuccess(position: GeolocationPosition) {
    const {accuracy, latitude, longitude} = position.coords;
    const latlng = [latitude, longitude];
    this.hideLoading();
    this.map.setView(latlng, 18);
    const accuracyValue = accuracy > 1000 ? accuracy / 1000 : accuracy;
    const accuracyUnit = accuracy > 1000 ? 'km' : 'm';
    placeLocationMarker(this.locationLayerGroup, latlng, `Accuracy is ${accuracyValue} ${accuracyUnit}`);
    const locationCircle = circle(latlng, accuracy);
    this.locationLayerGroup.addLayer(locationCircle);
  }
Here I read some properties from the GeolocationPosition I receive. I use the latitude and longitude to create a Leaflet LatLng array that can centre the map. I use the map's setView method for that, passing a LatLng and zoom level (18).
The accuracy we receive here is in metres, so I convert it to KM if it's bigger than 1000 so it's more readable when presented to the user.
I use placeLocationMarker to display a marker on the map for device location. I have extracted this function because I want to show a tooltip on the marker, which shows the accuracy. And since this is a Leaflet tooltip and the whole DOM creation is handled by Leaflet, there is a bit of complication around how to handle the touch events. This complexity is handled inplaceLocationMarker function.
And at last, I use the Leaflet circle function to draw a circle on the map, which shows the accuracy visually to the user. This circle is centred on the device location, and the radius is as big as accuracy.
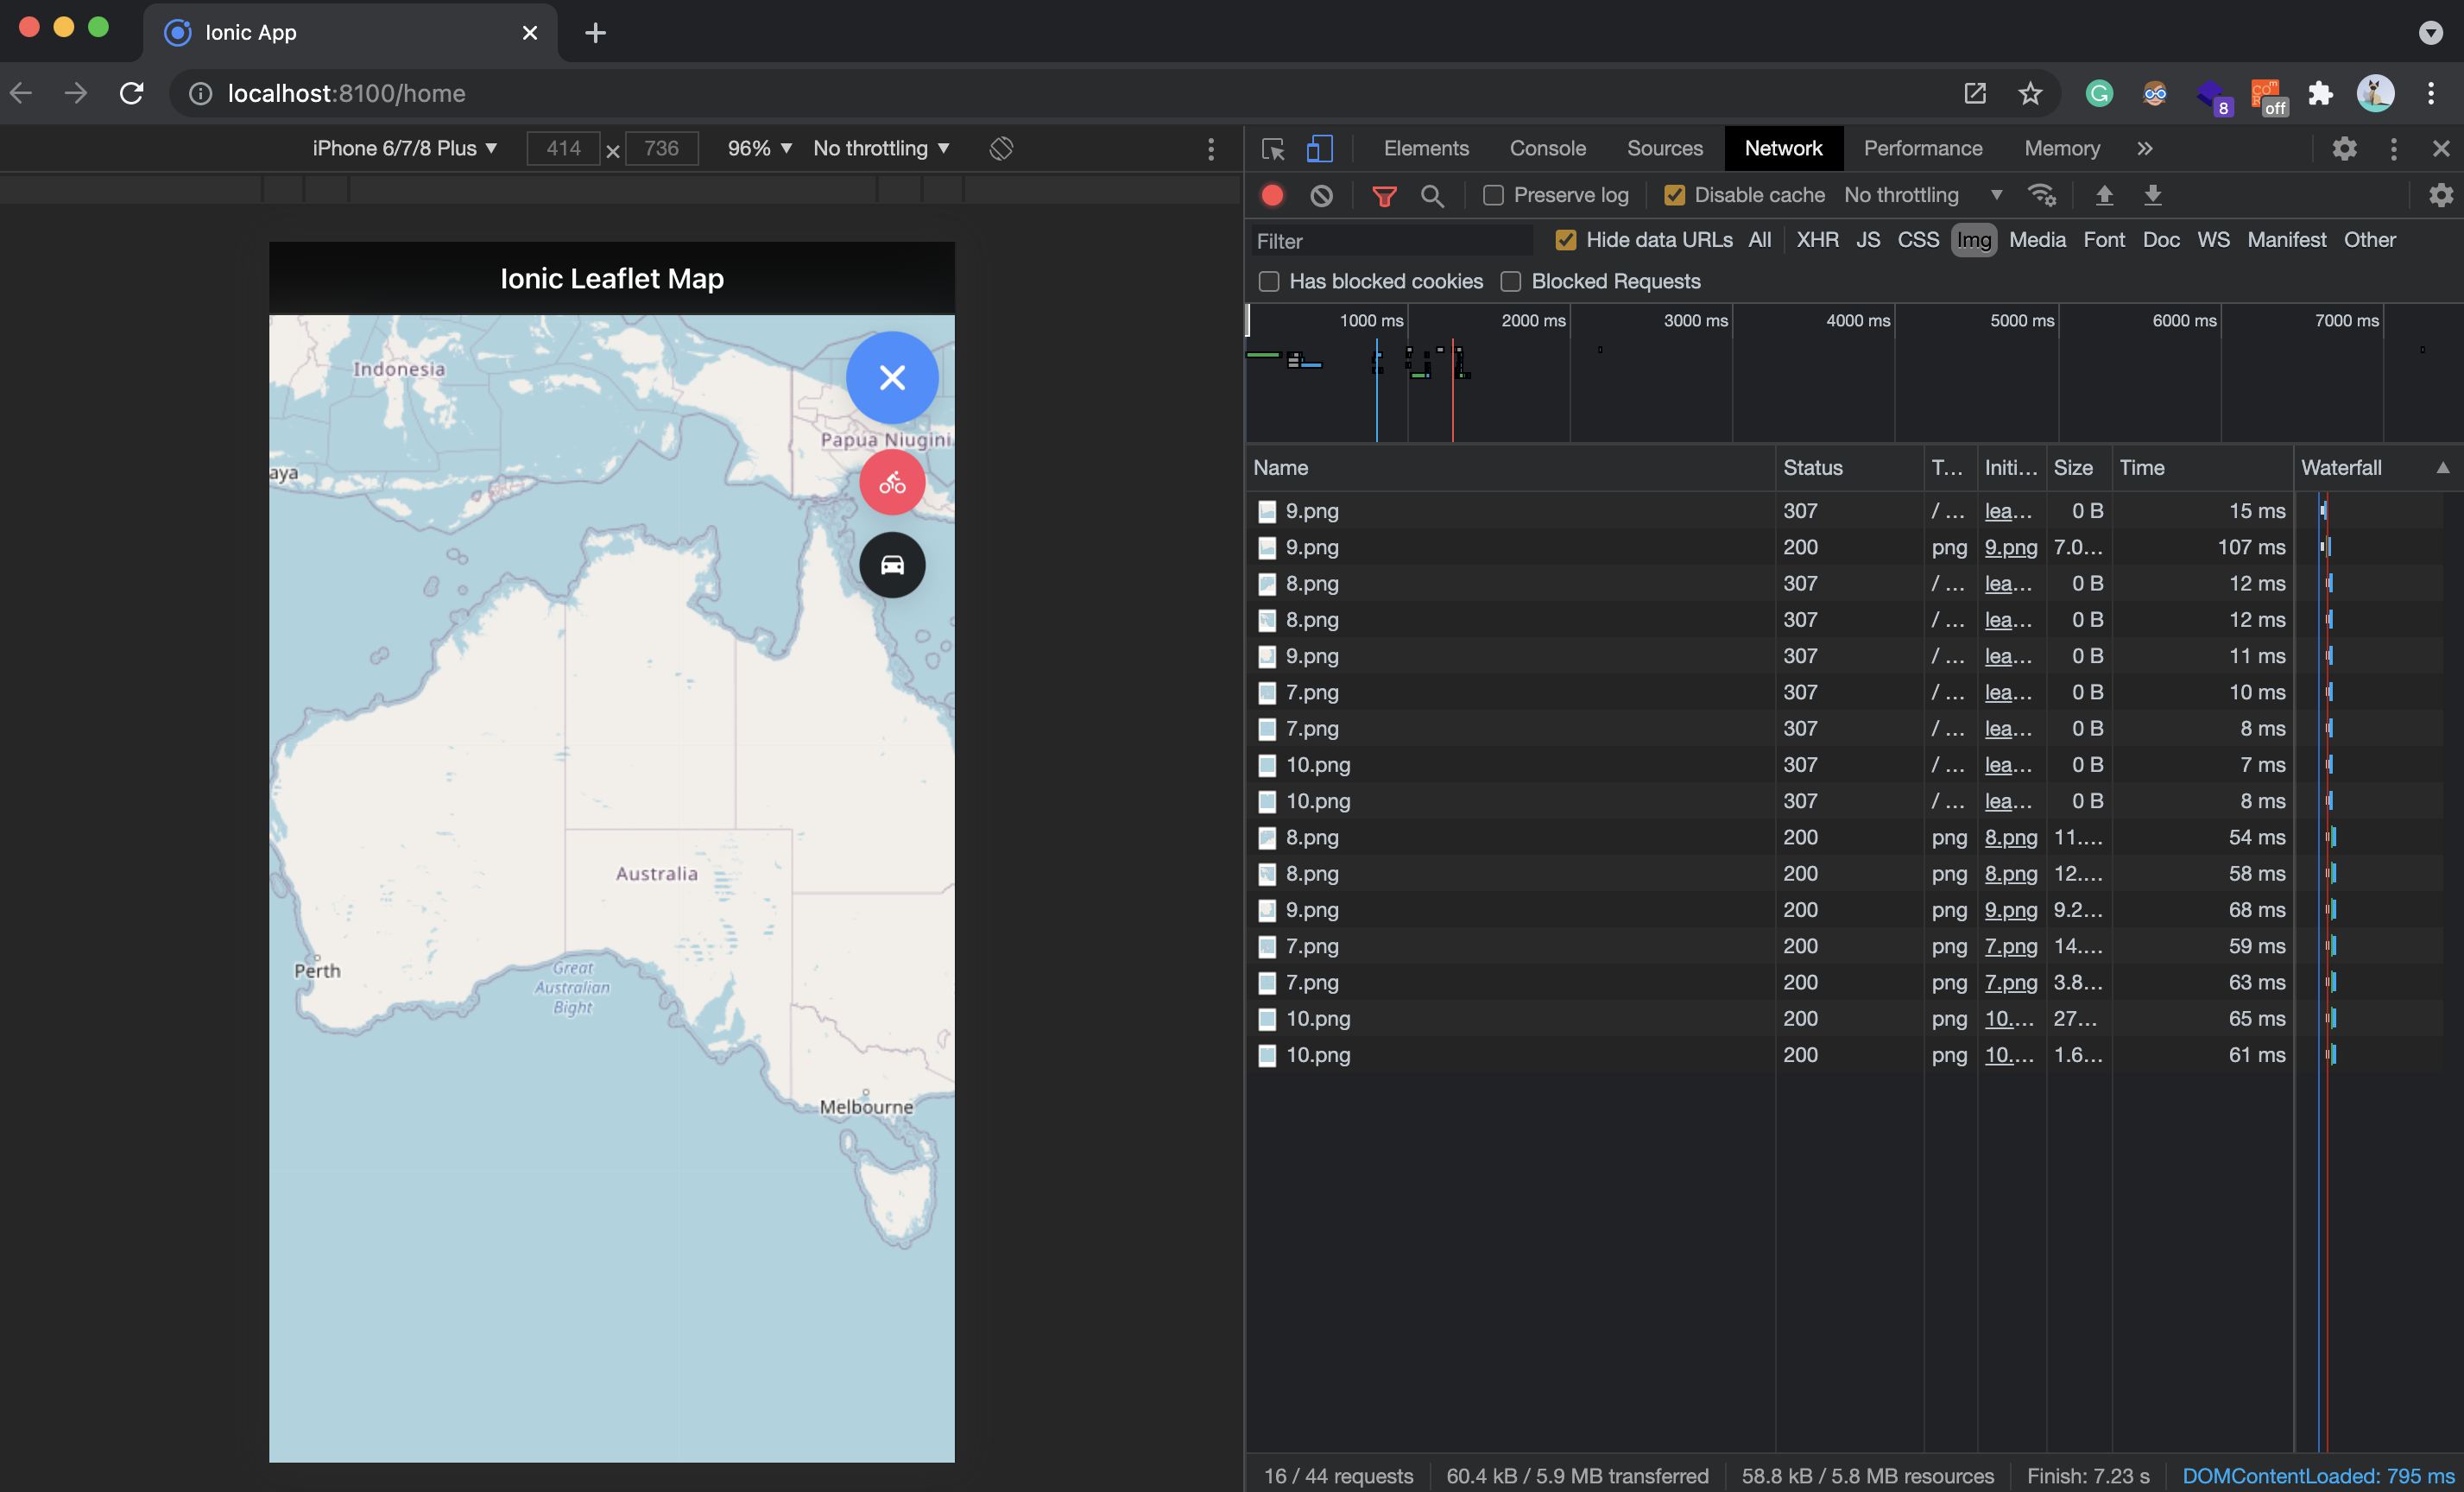
Before you get too bored, here is the result

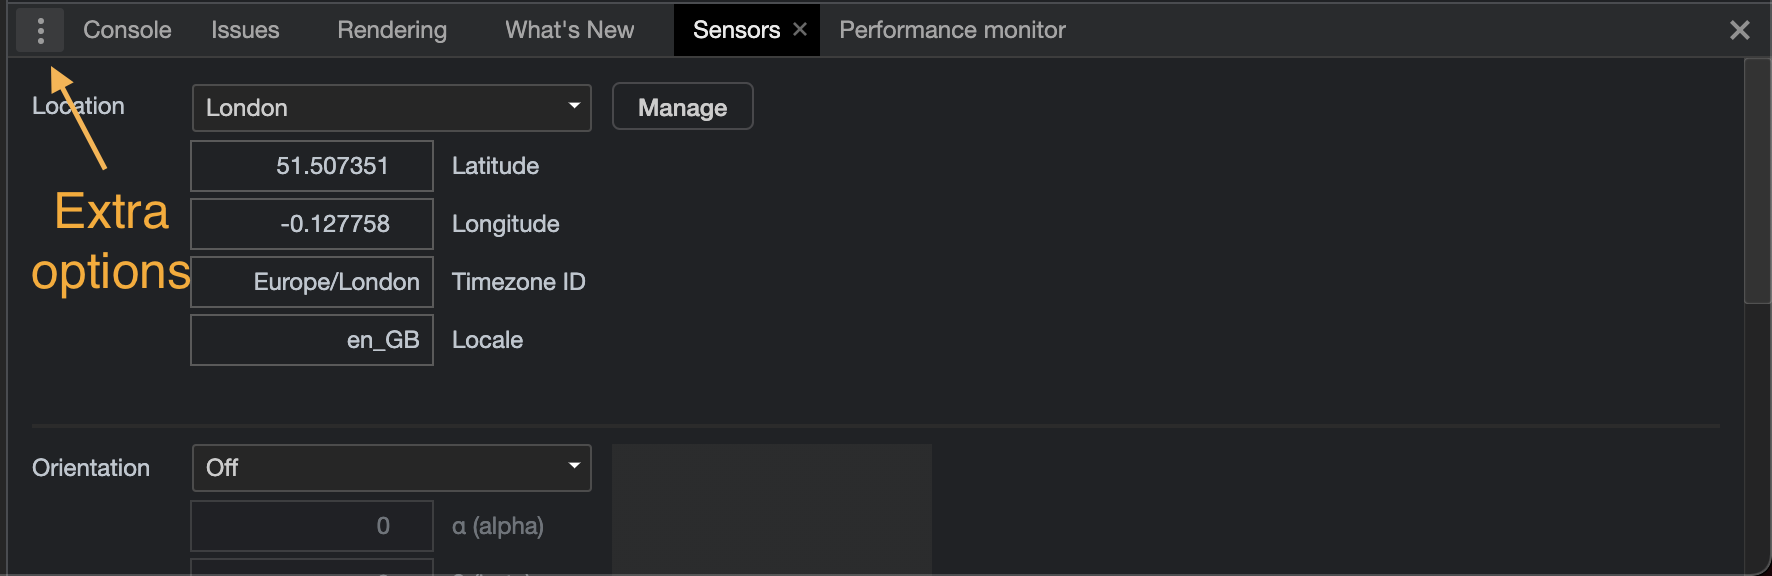
Notice that I am using Chrome Devtools to fake the GPS location. You can access this feature in the console tab by clicking three dots next to Console and choose Sensors.
Ok, Let's have a quick look at the error callback. This one is simple. On error, we hide the loading and use the Ionic's Alert component to notify the user about the problem. 3 errors can happen. PERMISSION_DENIED, TIMEOUT , POSITION_UNAVAILABLE. The first two are obvious, and the third can happen when there is faulty GPS hardware. For each error, you get a message and code. If you need to customise the message, use the code and draft your own message.
  private async onLocateError(error) {
    this.hideLoading();
    const alert = await this.alertController.create({
      header: 'GPS error',
      message: error.message,
      buttons: ['OK']
    });

    await alert.present();
  }
And finally, here is the code for the placeLocationMarker function. This code is located in a separate file with the same name. It does three things.
- Creates a Leaflet marker using a custom icon.
- Binds a leaflet popup to the marker that shows accuracy value and a delete link button. Why do we need the delete? Because when the user adds a marker to the map, they need a way to remove it when they are done.
- Listen to the click event on a specific marker popup to handle the delete button click. As mentioned, the DOM operations here are totally happening outside of the Angular world, so I use RxJS
fromEventfunction to filter and receive the click events from this delete button.
The subscription to the click event only happens when the popup is open, and it will unsubscribe as soon as it is closed.
Another good practice here is extracting the placeLocationMarker. This has made it as pure as possible. So this function only relies on its inputs to operate.
import { LatLng, LayerGroup, marker, Marker } from 'leaflet';
import { fromEvent, Subscription } from 'rxjs';
import { filter, map, tap } from 'rxjs/operators';
import { markerIcon } from './markerIcon';

const subscribeToDeleteLocationMarker = (id: string, marco: Marker, layerGroup: LayerGroup): Subscription => {
  return fromEvent(document, 'click')
    .pipe(
      tap((event) => event.stopPropagation()),
      map((event) => event.target),
      filter((target: HTMLElement) => target.id === id),
    )
    .subscribe(($event) => layerGroup.clearLayers());
};

const bindMarkerPopup = (marco: Marker, text: string, layerGroup: LayerGroup) => {
  const id = `location-marker-${Date.now()}`;
  marco.bindPopup(`
        <p>${text}</p>
        <div class="location-marker-popup__buttons">
            <a class="location-marker-popup__button" id="${id}">delete</a>
        </div>
      `,          {
    maxWidth: 200,
    maxHeight: 120,
    className: 'location-marker-popup',
  });
  let deleteMarkerSubscription;
  marco.on('popupopen', () => deleteMarkerSubscription = subscribeToDeleteLocationMarker(id, marco, layerGroup));
  marco.on('popupclose', () => deleteMarkerSubscription.unsubscribe());
  marco.openPopup();
};

export const placeLocationMarker = (layerGroup: LayerGroup, latLng: LatLng, text: string) => {
  layerGroup.clearLayers();
  const marco = marker(latLng, {icon: markerIcon()});
  layerGroup.addLayer(marco);
  bindMarkerPopup(marco, text, layerGroup);
};
5. Use Google Places Autocomplete Service to find an address and show it on the map
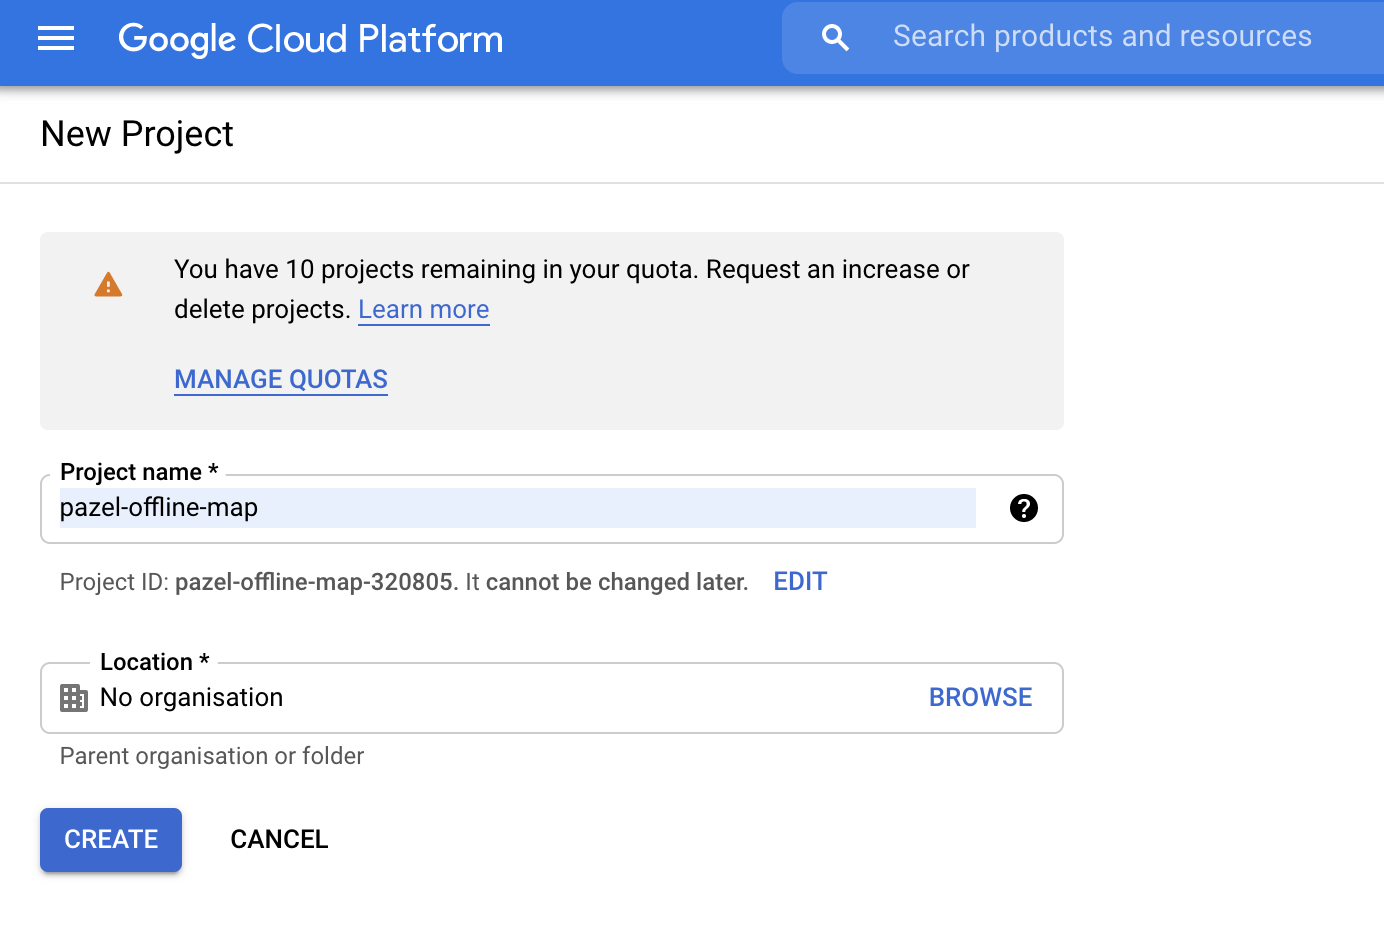
We will start by adding the Google Maps JavaScript API. To do this, you need a Google account and a Developer API Key.
Follow the instructions on the following instruction to get an API key. https://developers.google.com/maps/documentation/javascript/get-api-key
You will need to:
- Create a new project
- Get an API key. Make sure to restrict the key to APIs you will add and also restrict by HTTP referer. So you can make sure no one can take advantage of your API key and use your quota.

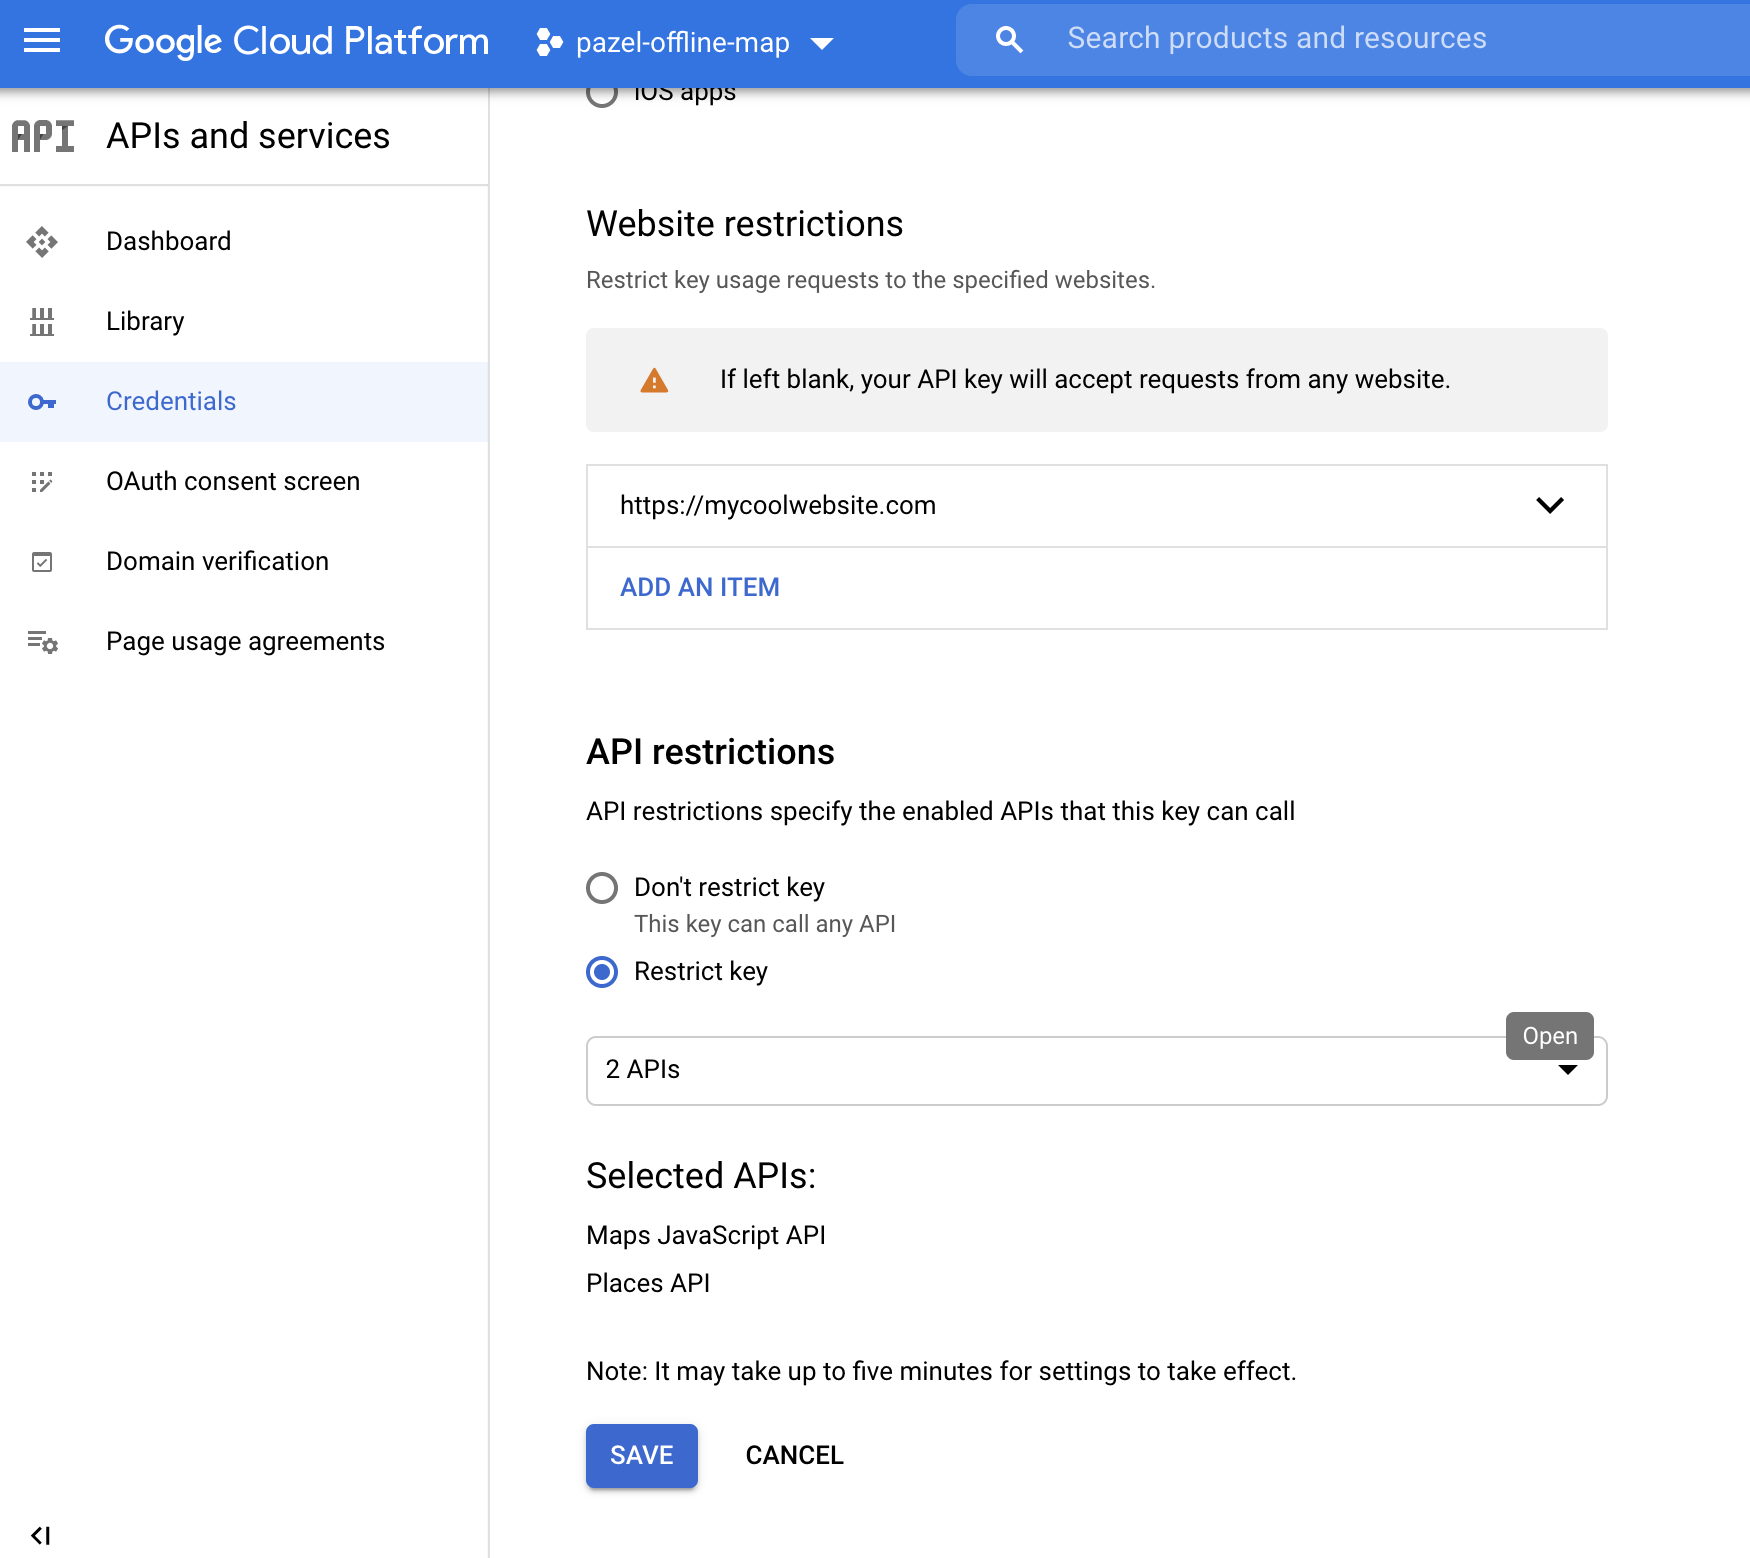
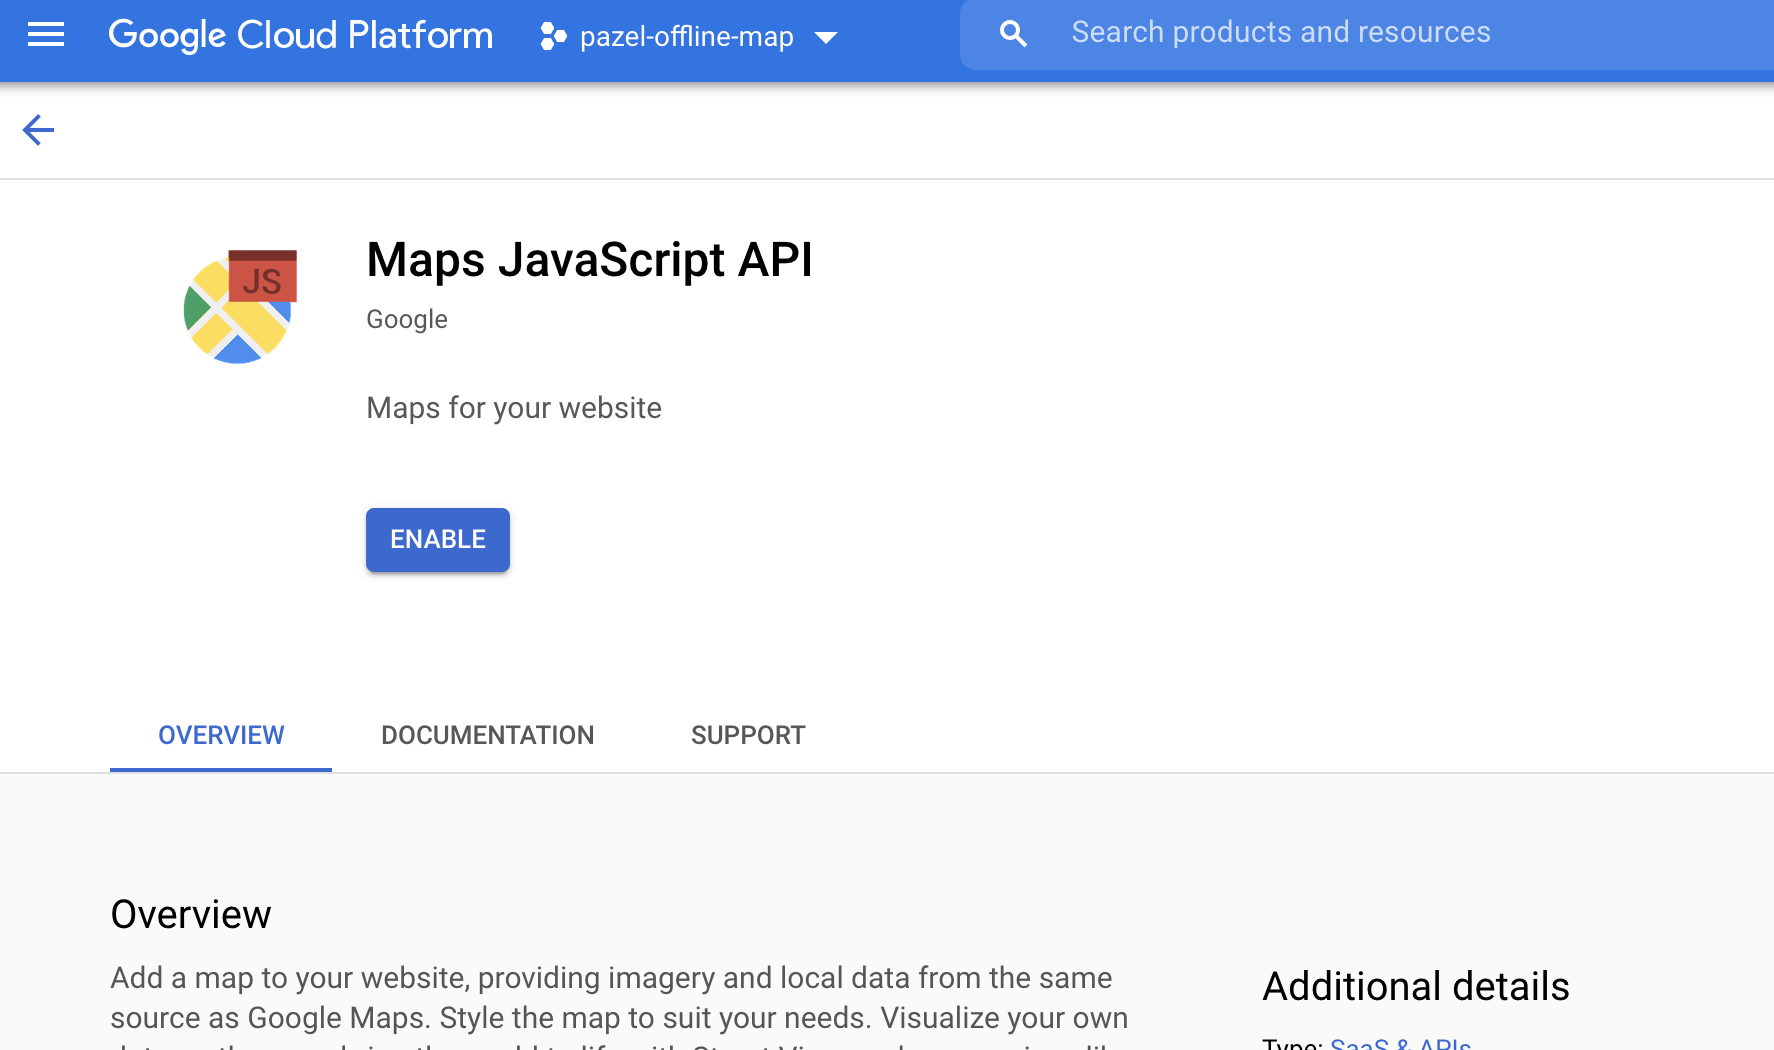
- Enable Places API and Maps API in the Google Cloud Console.

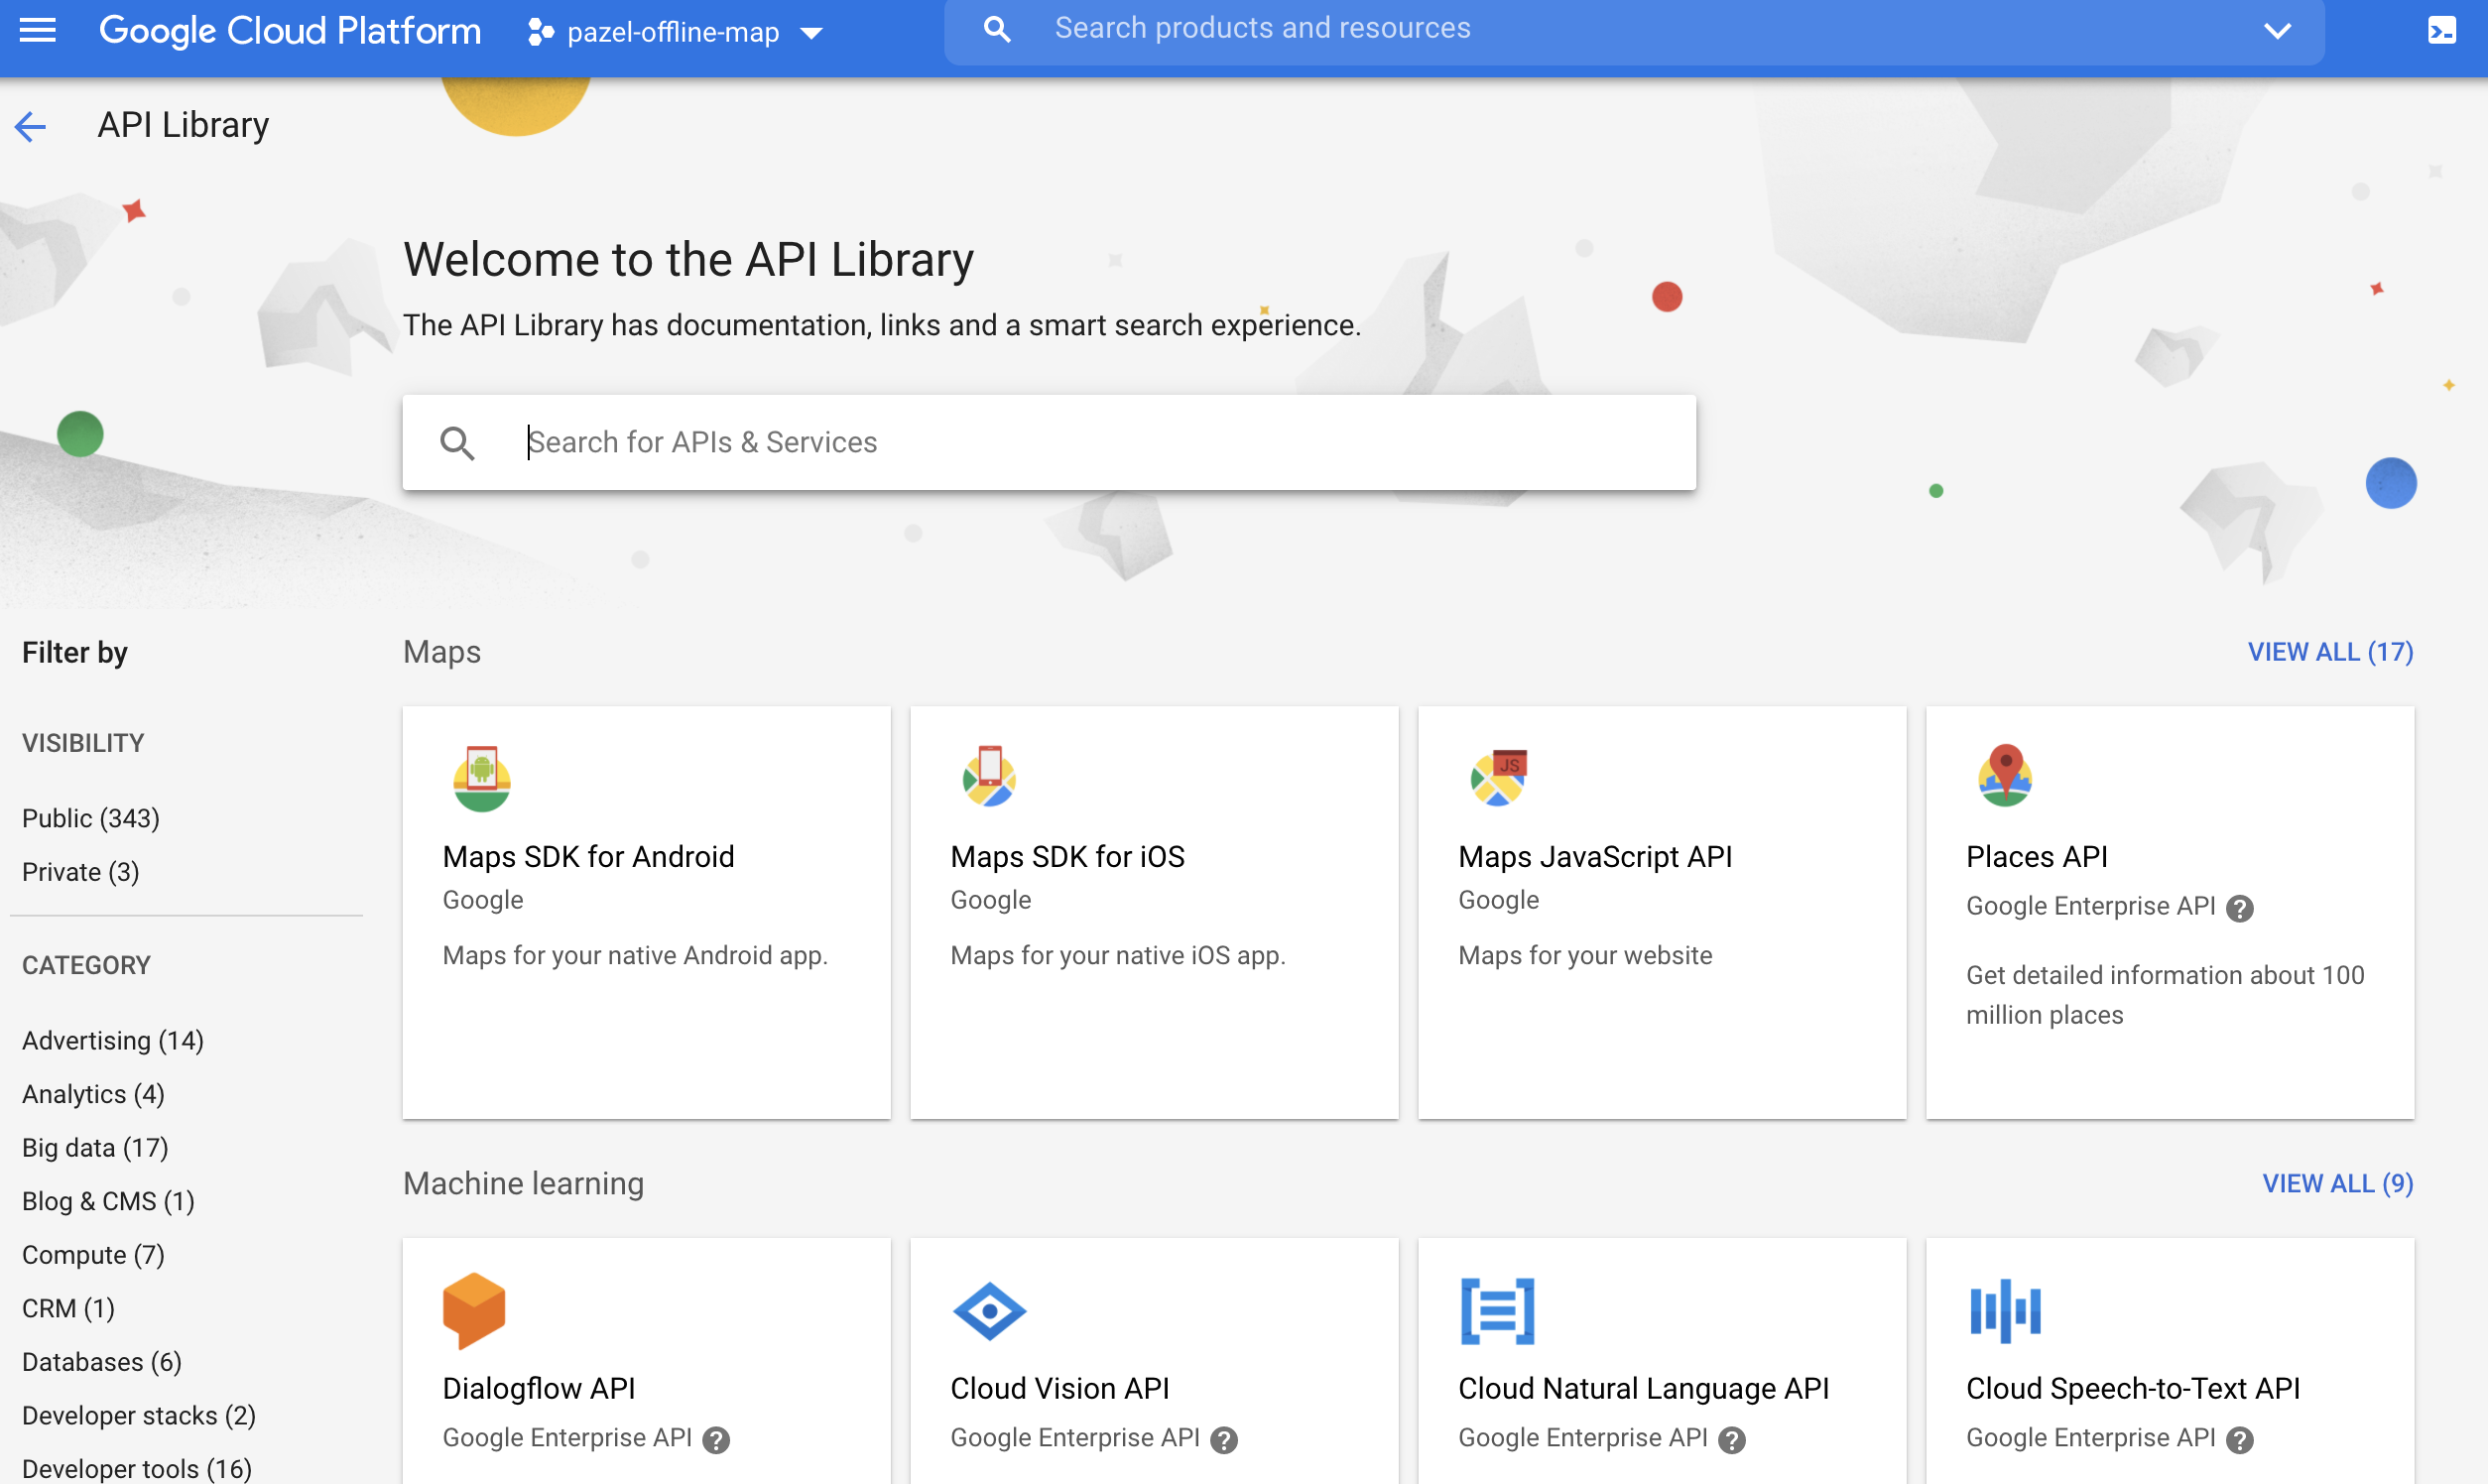
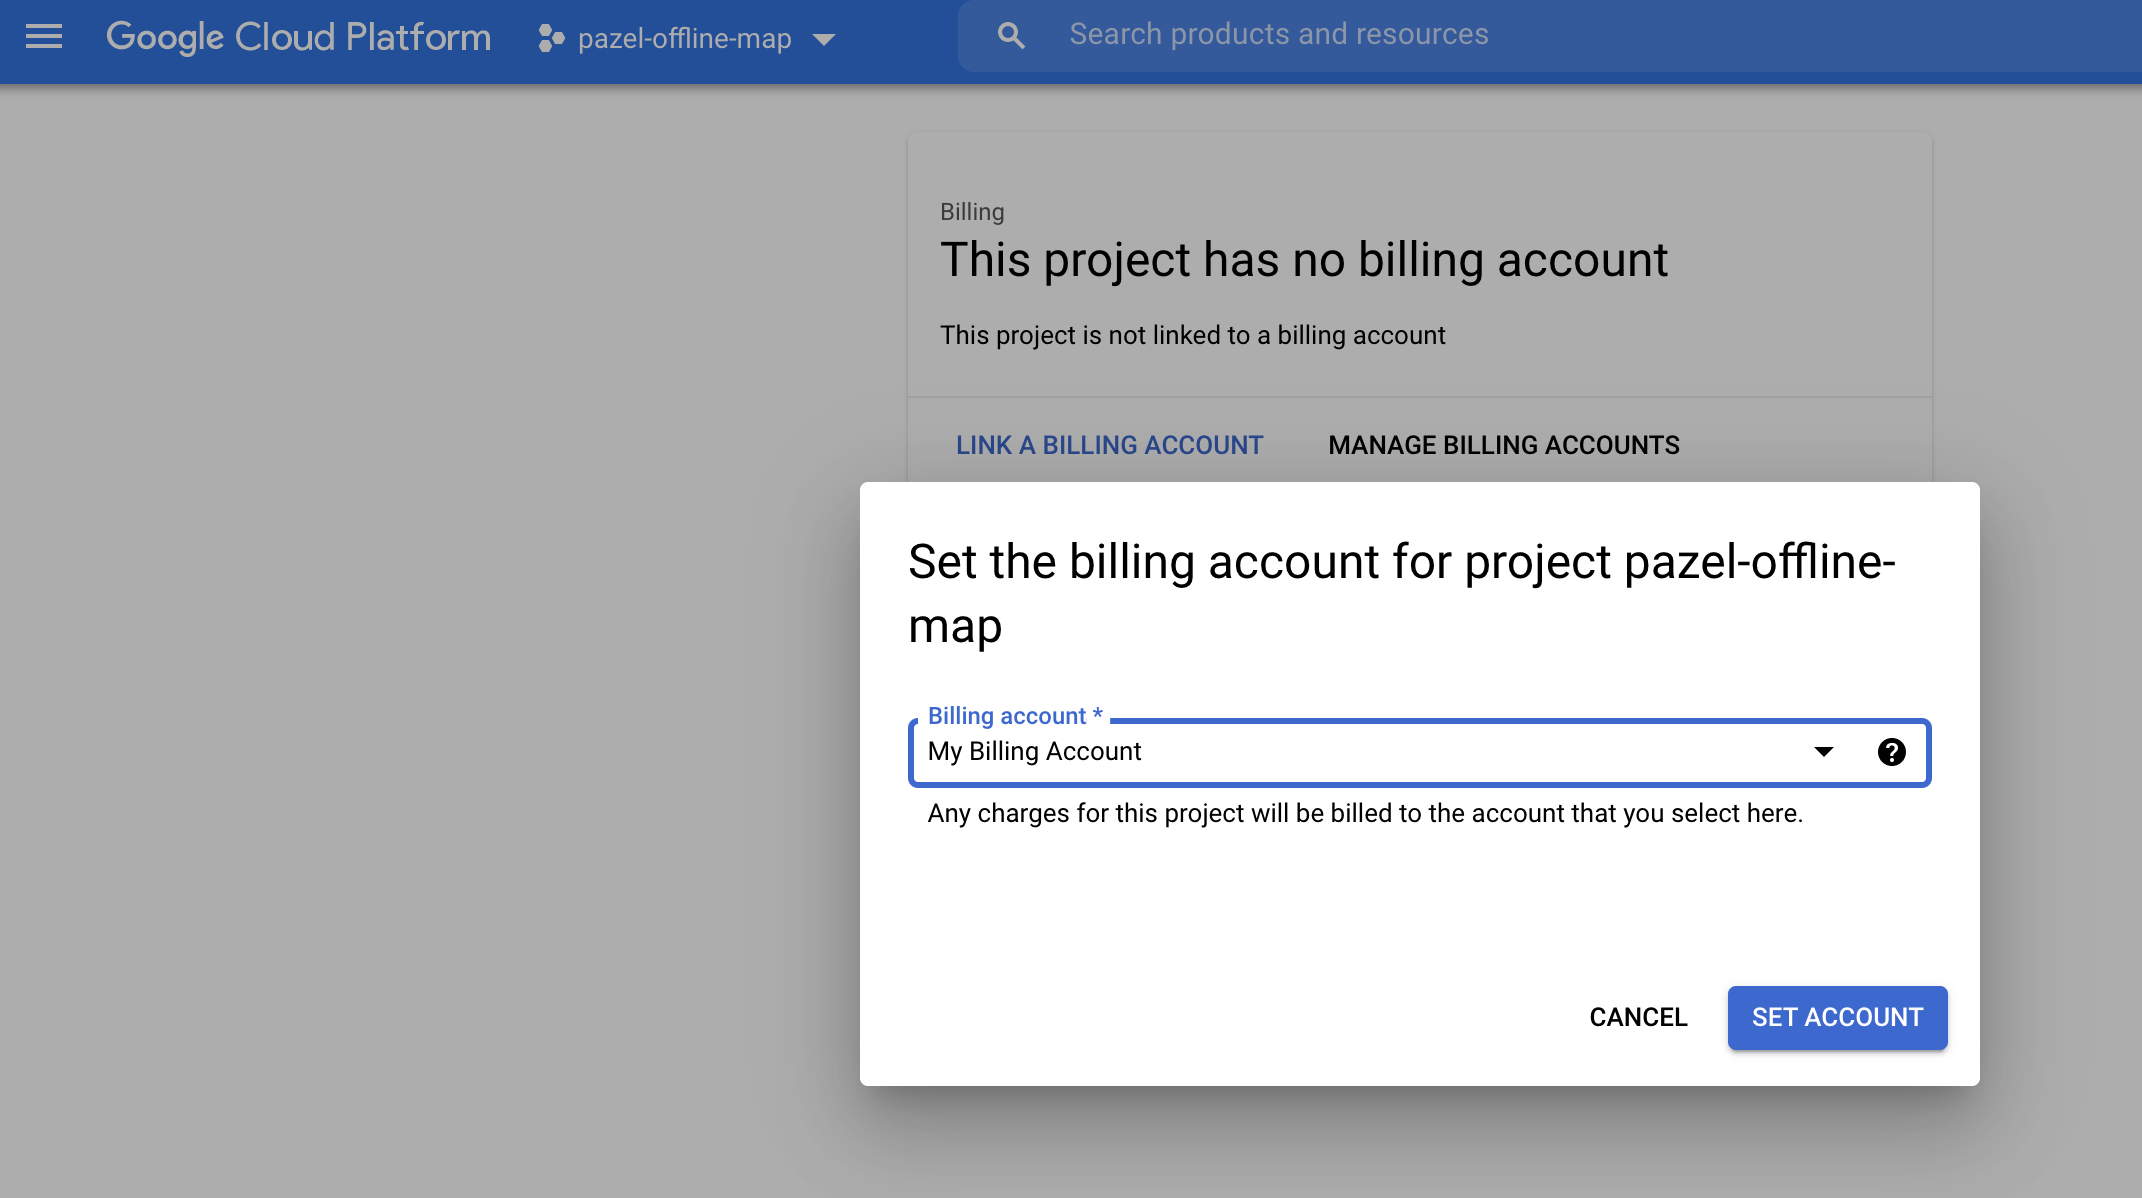
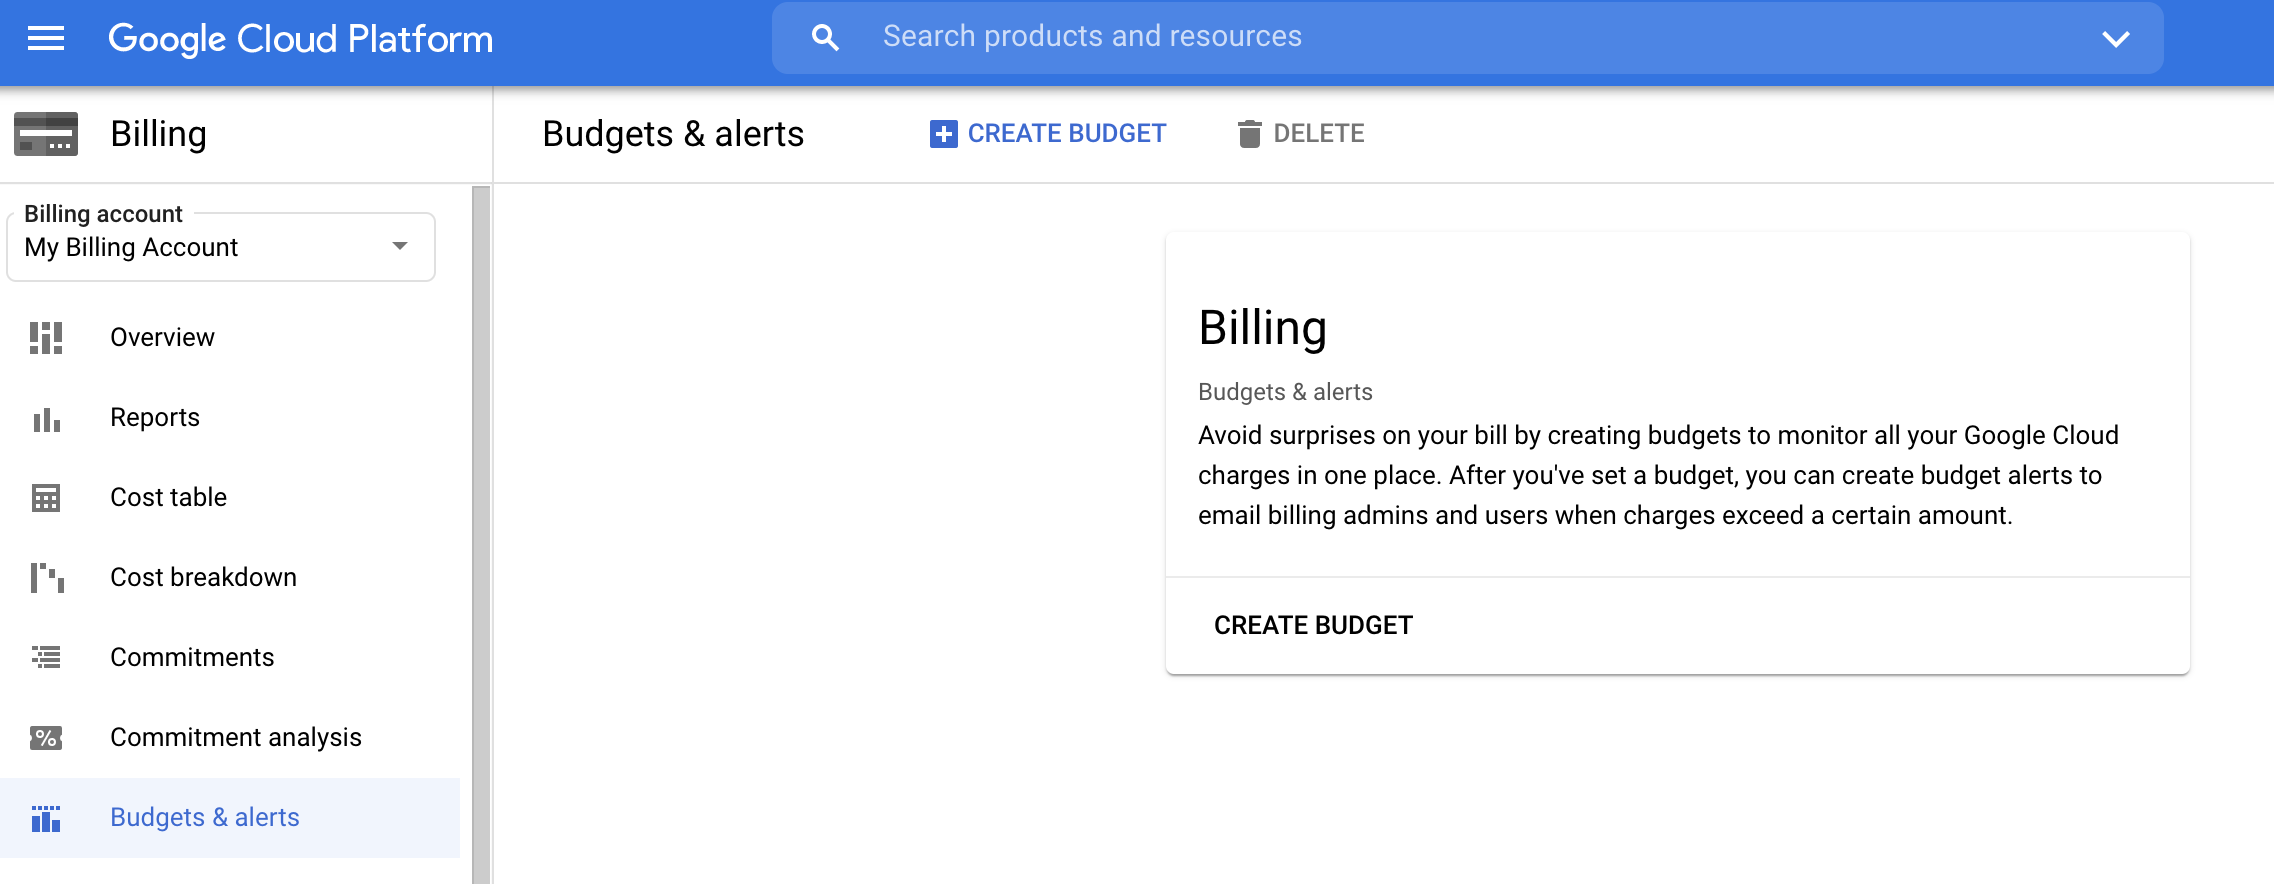
- Enable billing for the services you just added. Google cloud offers $200 free monthly usage which can be sufficient for testing or low usage websites. Plus, you can add quota usage alerts if you want to make sure your bill will not get too big.
This process can be a bit tricky, so please read the instruction carefully. Let me know if you get stuck in the comments. I will try to help you out.
After you have done the steps above, the next step is to add the Google Maps JavaScript API to your app. Open index.html and add this script.
<script async src="https://maps.googleapis.com/maps/api/js?key=YOUR_API_KEY&libraries=places"></script>
Next, install proper typings for Google APIs using npm i -D @types/google.maps. This will let us use the google global namespace in TypeScript without issues. There are multiple to use the TS definitions. It's described here. I use the second method adding this comment at the top of my file.
/// <reference types="google.maps" />
There are multiple ways to add the Google address search (Places Autocomplete) to your app.
- Adding an Autocomplete widget
- Adding a SearchBox widget
- Programmatically retrieving Place Autocomplete Service predictions
I will use the third method so I can create my own UI/UX.
I will create a component to separate this. Let's call it addressSearchComponent.
Go ahead and generate a new component with the same name using Angular CLI using the following command.
Note: It's always a good idea to use the
--dryRunflag if you are not sure. This will give you a chance to review the changes before it happens to avoid mistakes.

npx ng g component addressSearchComponent --create-module --spec=false
Next, we need to create an instance of AutocompleteService. This service provides two methods.
I will use the AutocompleteService.getPlacePredictions() method. This method takes a search query and returns an array of prediction objects.
Each suggestion has a place_id associated with it which can be used to get more details using PlacesService.getDetails() method. I will use the second service call the details of the place, including the geometry, which has the latitude and longitude of a place to show it on the map.
Here is the final result:
Here is the code for what I explained.
/// <reference types="google.maps" />

import { Component, EventEmitter, Output, ViewChild } from '@angular/core';
import AutocompleteResponse = google.maps.places.AutocompleteResponse;
import AutocompletePrediction = google.maps.places.AutocompletePrediction;

@Component({
  selector: 'app-address-search-component',
  templateUrl: './address-search-component.component.html',
  styleUrls: ['./address-search-component.component.scss'],
})
export class AddressSearchComponentComponent {
  @ViewChild('result') result: any;
  @Output() placeSelect: EventEmitter<any> = new EventEmitter();
  public predictions: AutocompletePrediction[] = [];
  public predictionsVisible = false;
  private autocompleteService: google.maps.places.AutocompleteService;
  private placesService: google.maps.places.PlacesService;
  private sessionToken: google.maps.places.AutocompleteSessionToken;

  constructor() {
  }

  public async lookupAddress(event) {
    if(event.target.value === ''){
      return;
    }
    const addressQuery = event.target.value;
    const autocompleteResponse = await this.getPlacePredictions(addressQuery);
    this.predictions = autocompleteResponse.predictions;
    this.predictionsVisible = this.predictions.length > 0;
    console.log('predictions', autocompleteResponse.predictions);
  }

  public showPredictions() {
    this.predictionsVisible = this.predictions.length > 0;
  }

  public clearPredictions() {
    this.predictionsVisible = false;
    this.predictions = [];
  }

  public getPlaceDetails(placeId: string) {
    this.predictionsVisible = false;
    this.getPlacesService().getDetails({
      placeId,
      sessionToken: this.getSessionToken(),
      fields: ['formatted_address', 'geometry'],
    }, (placeResult) => this.placeSelect.emit(placeResult));
  }

  private getPlacePredictions(addressQuery: string): Promise<AutocompleteResponse> {
    return this.getAutocompleteService().getPlacePredictions({
      componentRestrictions: {country: ['au']},
      input: addressQuery,
      sessionToken: this.getSessionToken(),
      types: ['address'],
    });
  }

  private getPlacesService() {
    if (this.placesService) {
      return this.placesService;
    }
    this.placesService = new google.maps.places.PlacesService(this.result.nativeElement);
    return this.placesService;
  }

  private getAutocompleteService() {
    if (this.autocompleteService) {
      return this.autocompleteService;
    }
    this.autocompleteService = new google.maps.places.AutocompleteService();
    return this.autocompleteService;
  }

  private getSessionToken() {
    if (this.sessionToken) {
      return this.sessionToken;
    }
    this.sessionToken = new google.maps.places.AutocompleteSessionToken();
    return this.sessionToken;
  }
}
And here is the template and CSS files:
<ion-searchbar
  mode="ios"
  type="search"
  inputmode="search"
  placeholder="Enter address"
  [animated]="true"
  (ionChange)="lookupAddress($event)"
  (ionClear)="clearPredictions()"
  (ionFocus)="showPredictions()"
></ion-searchbar>
<div #result style="display: none;"></div>
<ion-list [hidden]="!predictionsVisible">
  <ion-item *ngFor="let prediction of predictions"
            (click)="getPlaceDetails(prediction.place_id)">{{prediction.description}}</ion-item>
</ion-list>
:host {
  position: absolute;
  height: 60px;
  top: 60px;
  left: 5%;
  width: 90%;
  z-index: 1000;
  display: block;
  background-color: #121212;
  border-radius: 10px;
}

ion-list {
  margin-top: -7px;
  padding: 15px 5px 5px 5px;
  border-bottom-right-radius: 10px;
  border-bottom-left-radius: 10px;
}

ion-item {
  --inner-padding-bottom: 5px;
  --inner-padding-top: 10px;
}
6. Make it a PWA
This step is easy because Angular CLI does all the heavy lifting for you.
Just run npx ng add @angular/pwa. This command will add all the required packages to your project, configure your service worker, and add the default assets for caching. The only file that you might need to interact with is the ngsw-config.json.
This file tells the Angular service worker, what assets to cache and what caching strategy to use.
For example, all JS files are cached eagerly when all the image assets are cached lazily. You can read more about managing this file in Angular docs for Service worker configuration.
{
  "$schema": "./node_modules/@angular/service-worker/config/schema.json",
  "index": "/index.html",
  "assetGroups": [
    {
      "name": "app",
      "installMode": "prefetch",
      "resources": {
        "files": [
          "/favicon.ico",
          "/index.html",
          "/manifest.webmanifest",
          "/*.css",
          "/*.js"
        ]
      }
    },
    {
      "name": "assets",
      "installMode": "lazy",
      "updateMode": "prefetch",
      "resources": {
        "files": [
          "/assets/**",
          "/*.(eot|svg|cur|jpg|png|webp|gif|otf|ttf|woff|woff2|ani)"
        ]
      }
    }
  ]
}
And as always, make sure to test your PWA locally. To do this, run the build command ionic build.
This will generate the www folder. The application in this folder is a PWA. You can use a local server like serve to run it.
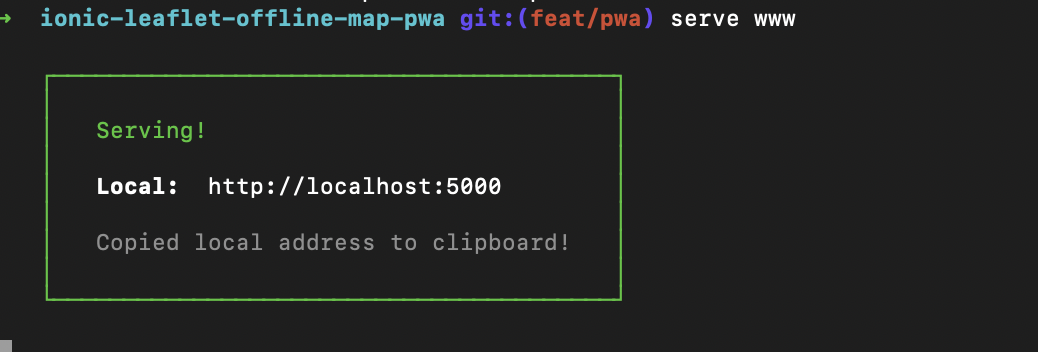
Service Workers require the app to be hosted in a secure context. To serve the build, we use a local node server. Install the npmjs.com/package/serve by running npm i serve -g.
Next, we can run the serve www command. This runs the app on http://localhost:5000, and luckily, with localhost is considered safe, and you do not need HTTPS origin to test our PWA now.
Open an incognito window in chrome and open the http://localhost:5000. You will notice another issue. When you refresh the page, the app will not load. This is because the serve tries to find localhost:5000/home and expect a home folder with an index.html file in it, and this file does not exist. There are multiple ways to fix this issue. For this tutorial, I will use hash routing.
All you need to change is to go to your app-routing.module.ts file and add useHash: true to your router options. Now page URL will look like localhost:5000/#/home, and you can refresh without an issue.
import { NgModule } from '@angular/core';
import { PreloadAllModules, RouterModule, Routes } from '@angular/router';

const routes: Routes = [
  {
    path: 'home',
    loadChildren: () => import('./home/home.module').then( m => m.HomePageModule)
  },
  {
    path: '',
    redirectTo: 'home',
    pathMatch: 'full'
  },
];

@NgModule({
  imports: [
    RouterModule.forRoot(routes, { preloadingStrategy: PreloadAllModules, useHash: true })
  ],
  exports: [RouterModule]
})
export class AppRoutingModule { }
After fixing the routing issue, open the http://localhost:5000.Then open Chrome Devtools, open the Lighthouse tab and generate a report for the Progressive web app. This is my test result which shows the PWA app has an issue that needs to be fixed.
- There is no apple-touch-icon.
Add the following code to your index.html in the head tag to fix the second and third issues.
<link rel="apple-touch-icon" href="/assets/icon/icon-192x192.png">
We are all set. Let's build and test the PWA app one more time. Run ionic build and then serve www. Open the Chrome incognito window and test using Lighthouse.
You should see a result like this one, indicating that your PWA is ready and installable.
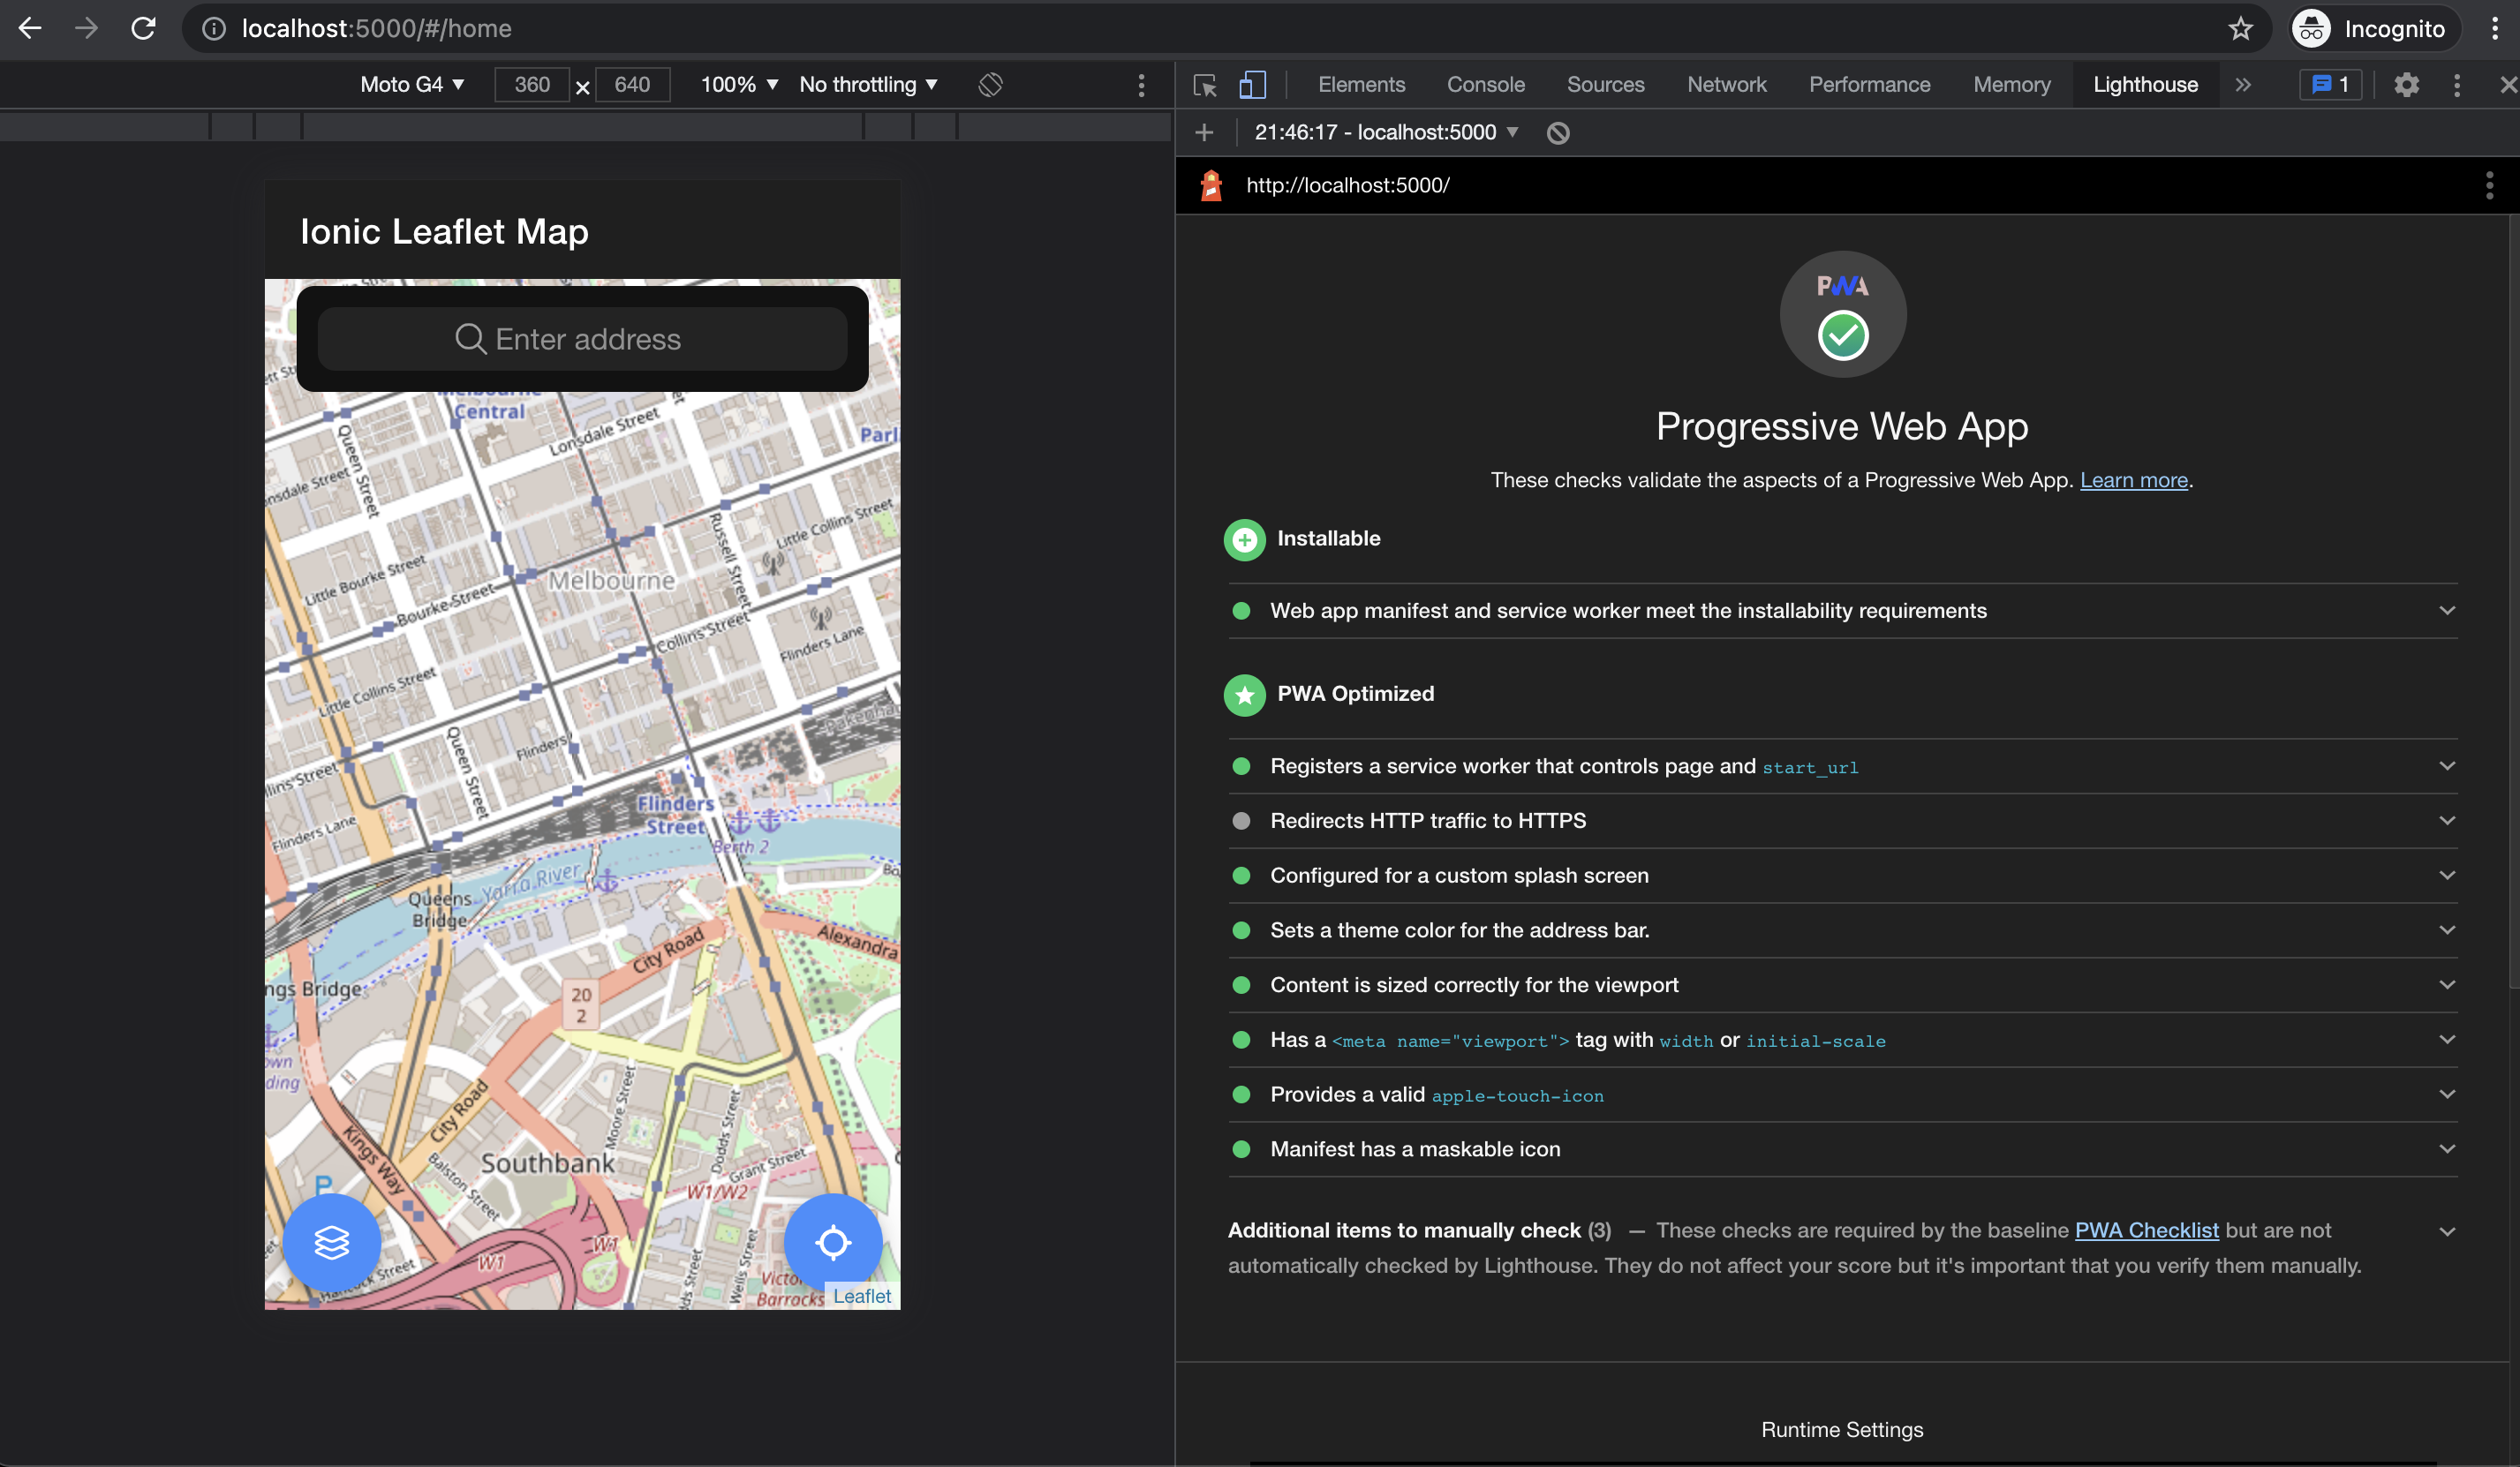
If you want to test the install, you can open your app on a normal window (not incognito), and you should be able to see the install button in the Chrome address bar.
7. Deploy your new app using Vercel in less than 5 mins
To test our PWA on the phone, it would be easier to deploy the app to access it through a URL over HTTPS easily. I will use Vercel for this. Vercel is a zero-configuration cloud CI/CD that can understand the structure of our Ionic project and deploy it out of the box.
To do this, please go to vercel.com and register for a free account.
Log in, and you have the option to import a project from your Git repo. I am using Github, as mentioned before. So I will import the project from my Github.
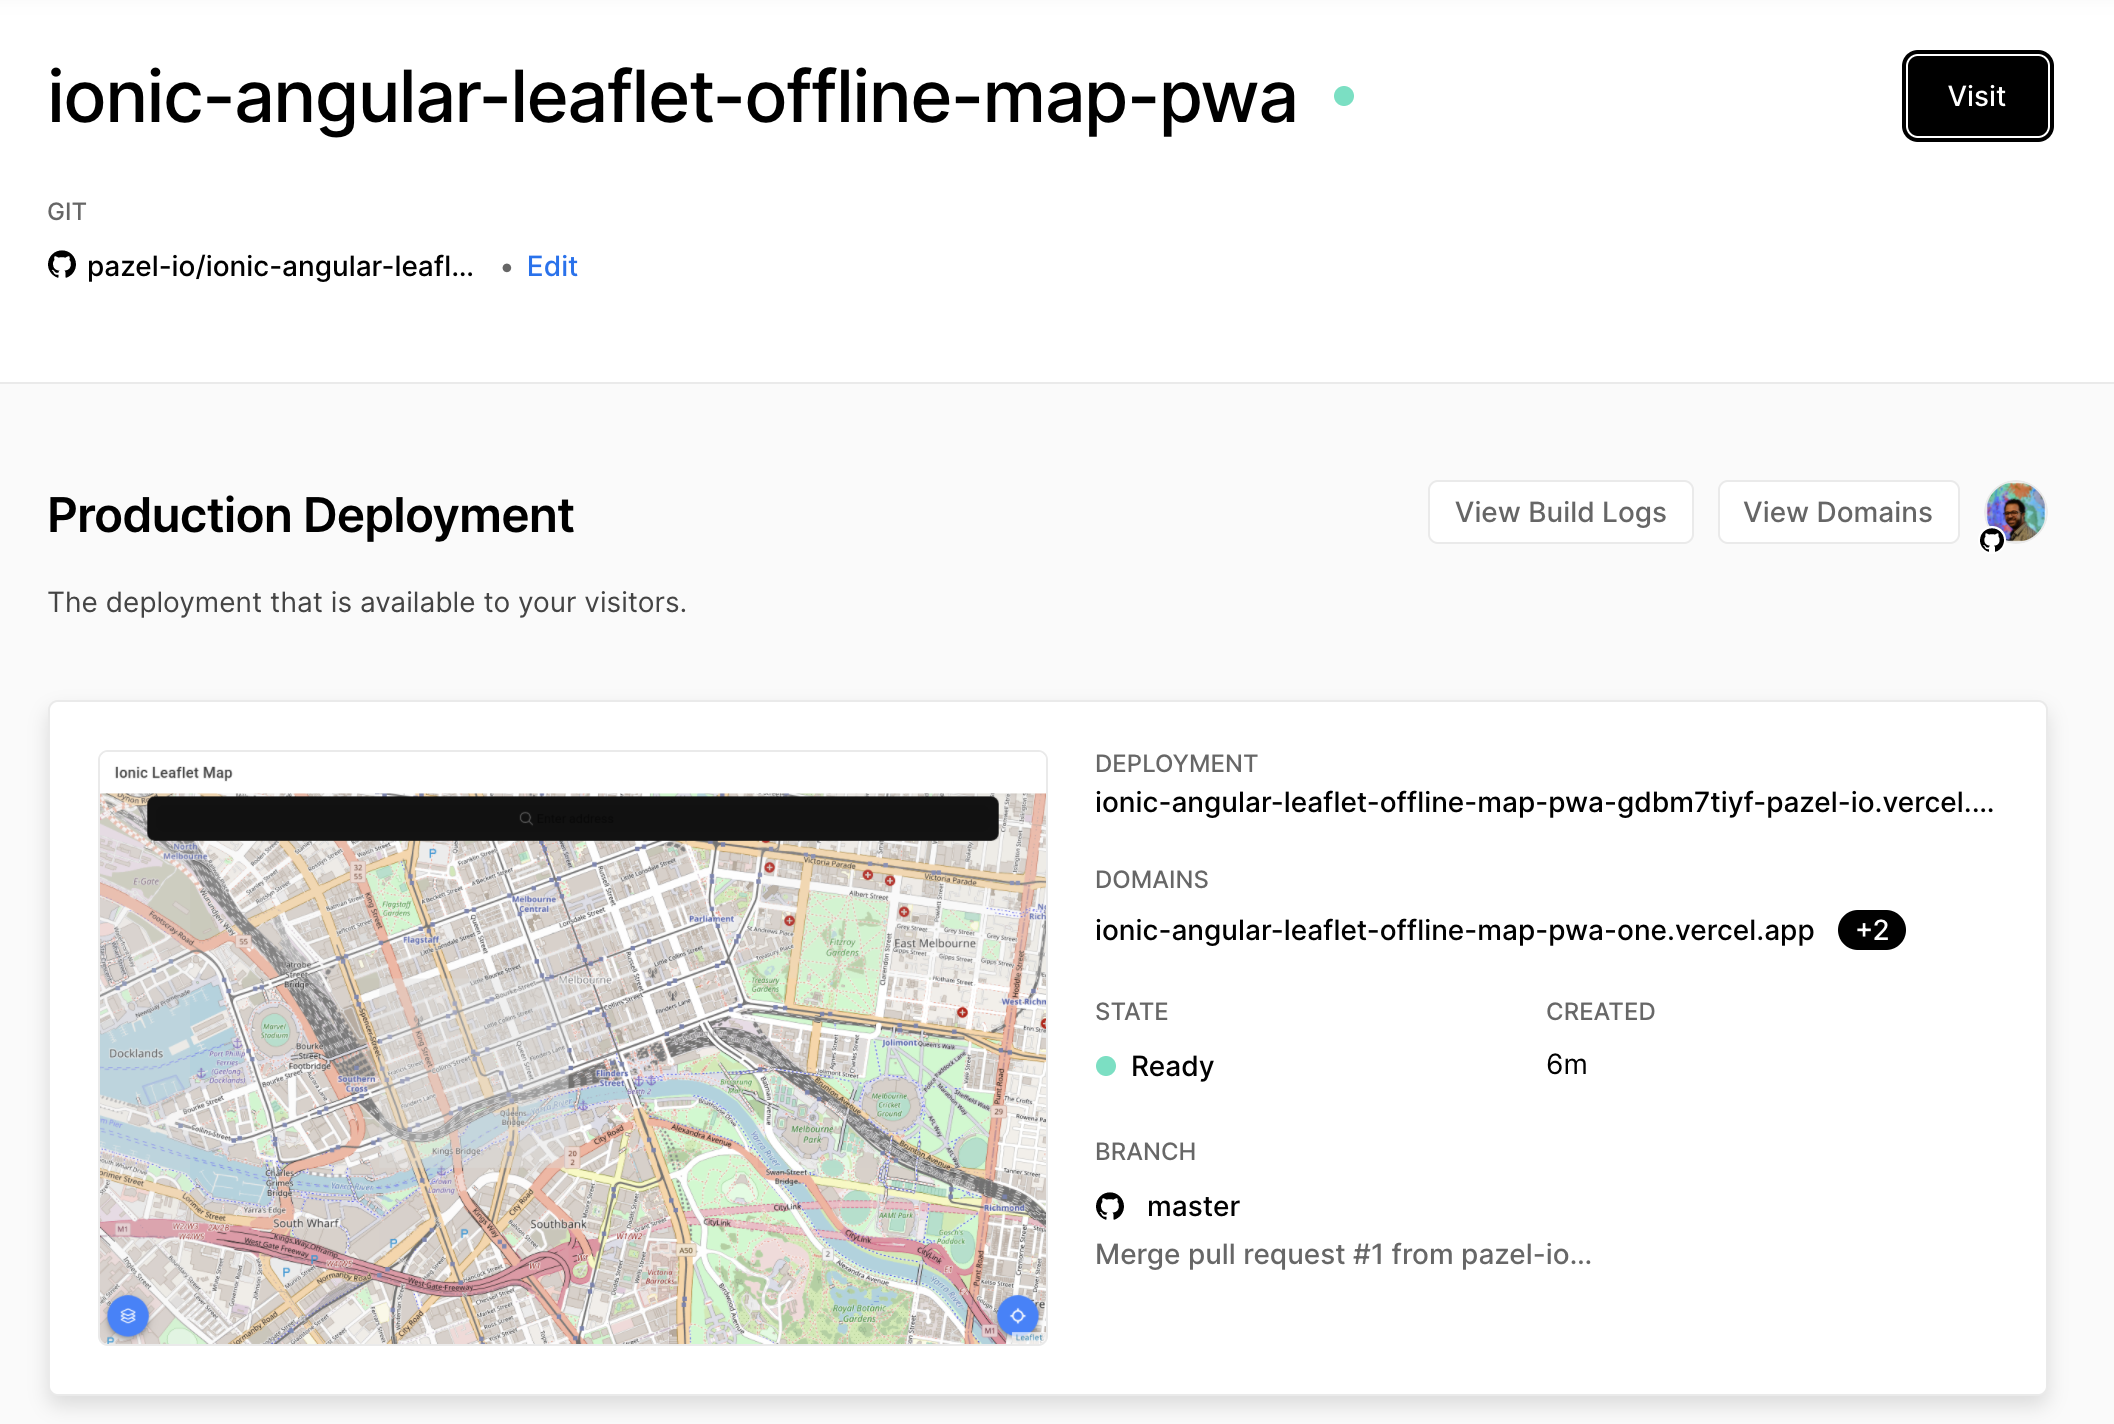
Vercel already knows that your project is Ionic Angular and knows what command to run to build it. Just go ahead and click deploy. This will run the build and give you a URL that your project will be available on.
Simply click the button that says "Visit" to access your deployed app.
Congratulations if you have made it this far through the tutorial. 👏 🙌
Thanks for reading. As usual, if you have any questions, please leave me a comment here or DM me on Twitter.
Here is the demo: demo deployed using Vercel
Here is the code repository: ionic-angular-leaflet-offline-map-pwa
Twitter: _pazel