Ionic, React PWA with Auth0 login for web and mobile (no plugin required)
A step by step guide on how to integrate Auth0 into your Ionic PWA app.

This article builds an Ionic PWA app that uses Auth0 for authentication.
We will go through a step by step guide on how to do this.
Here is the final demo.
Git repo: https://github.com/pazel-io/ionic-auth0-react-pwa
Configuring Auth0
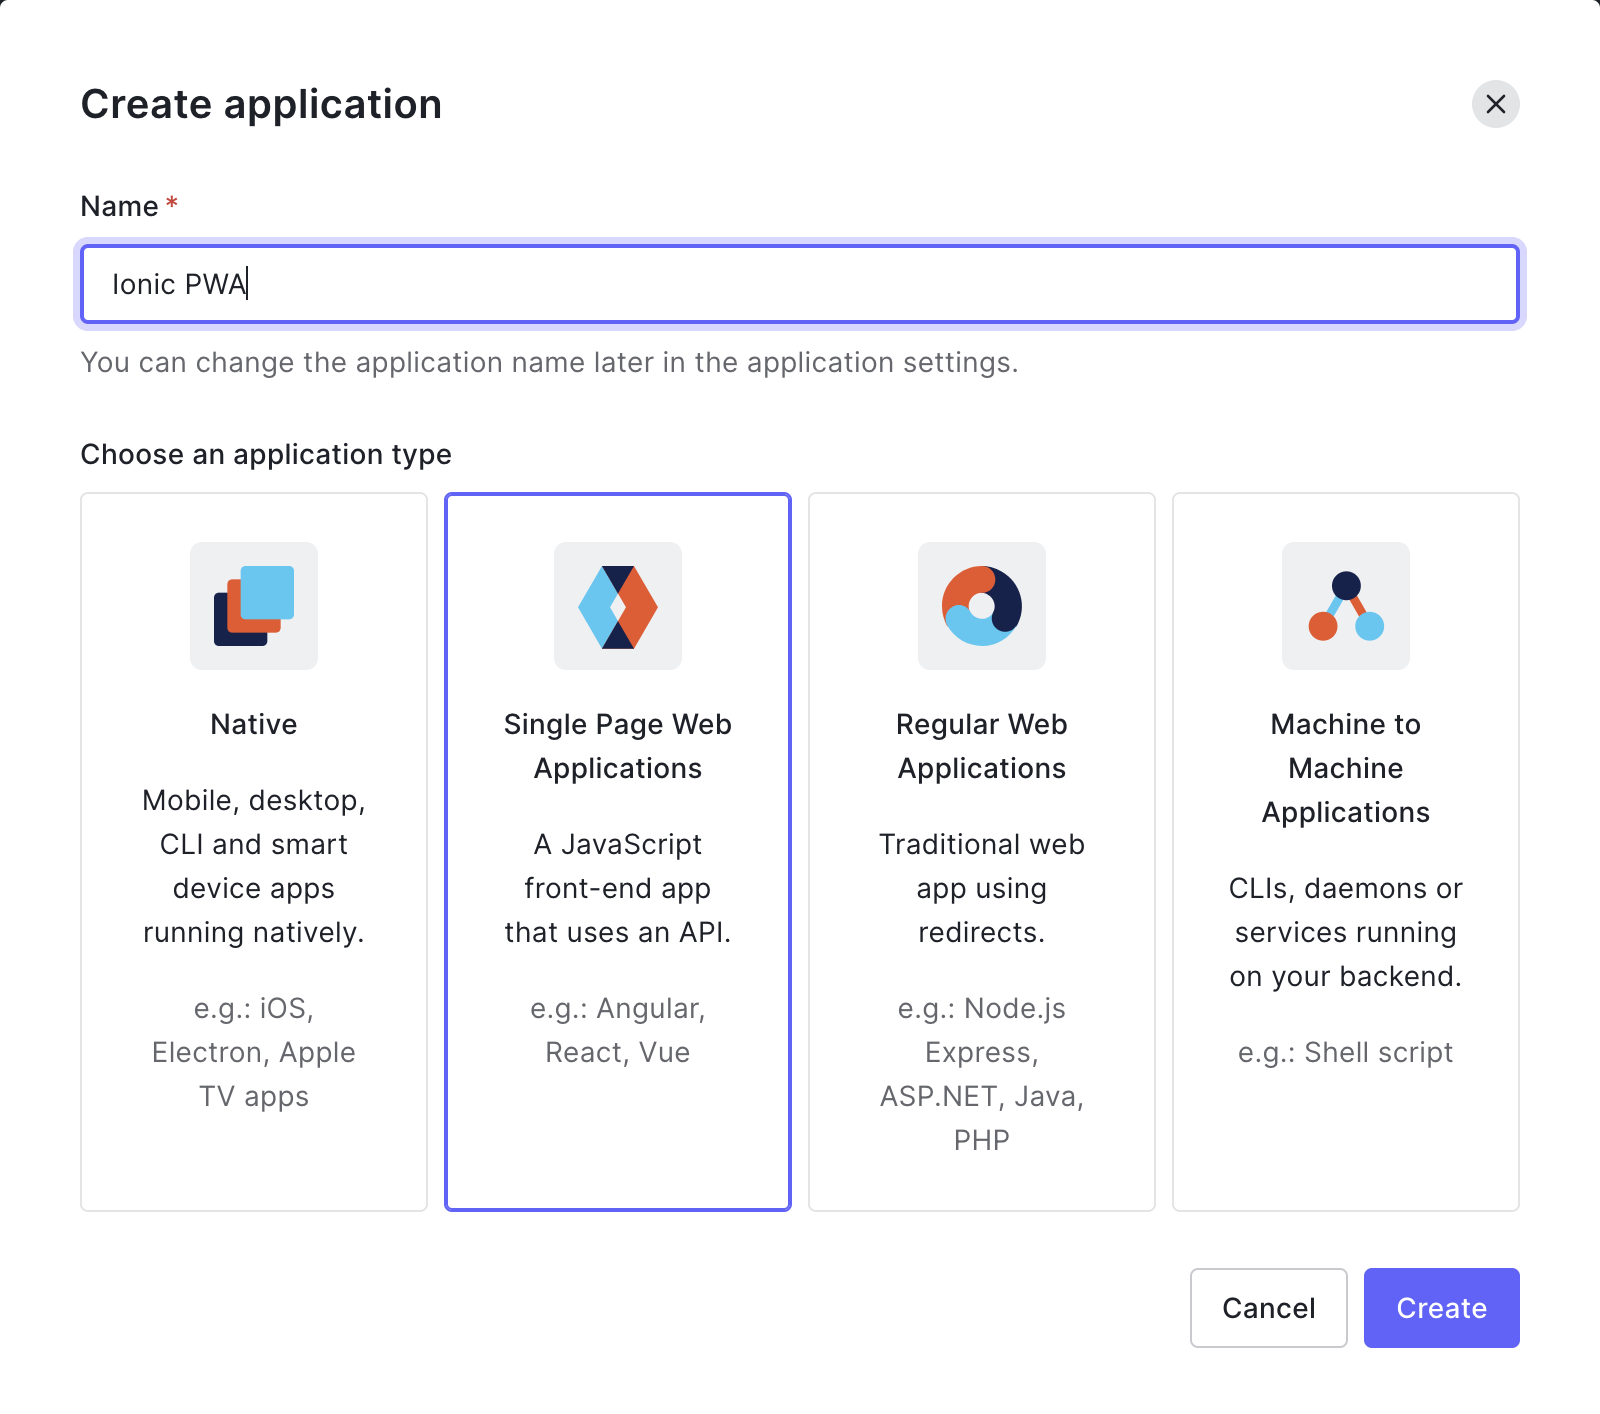
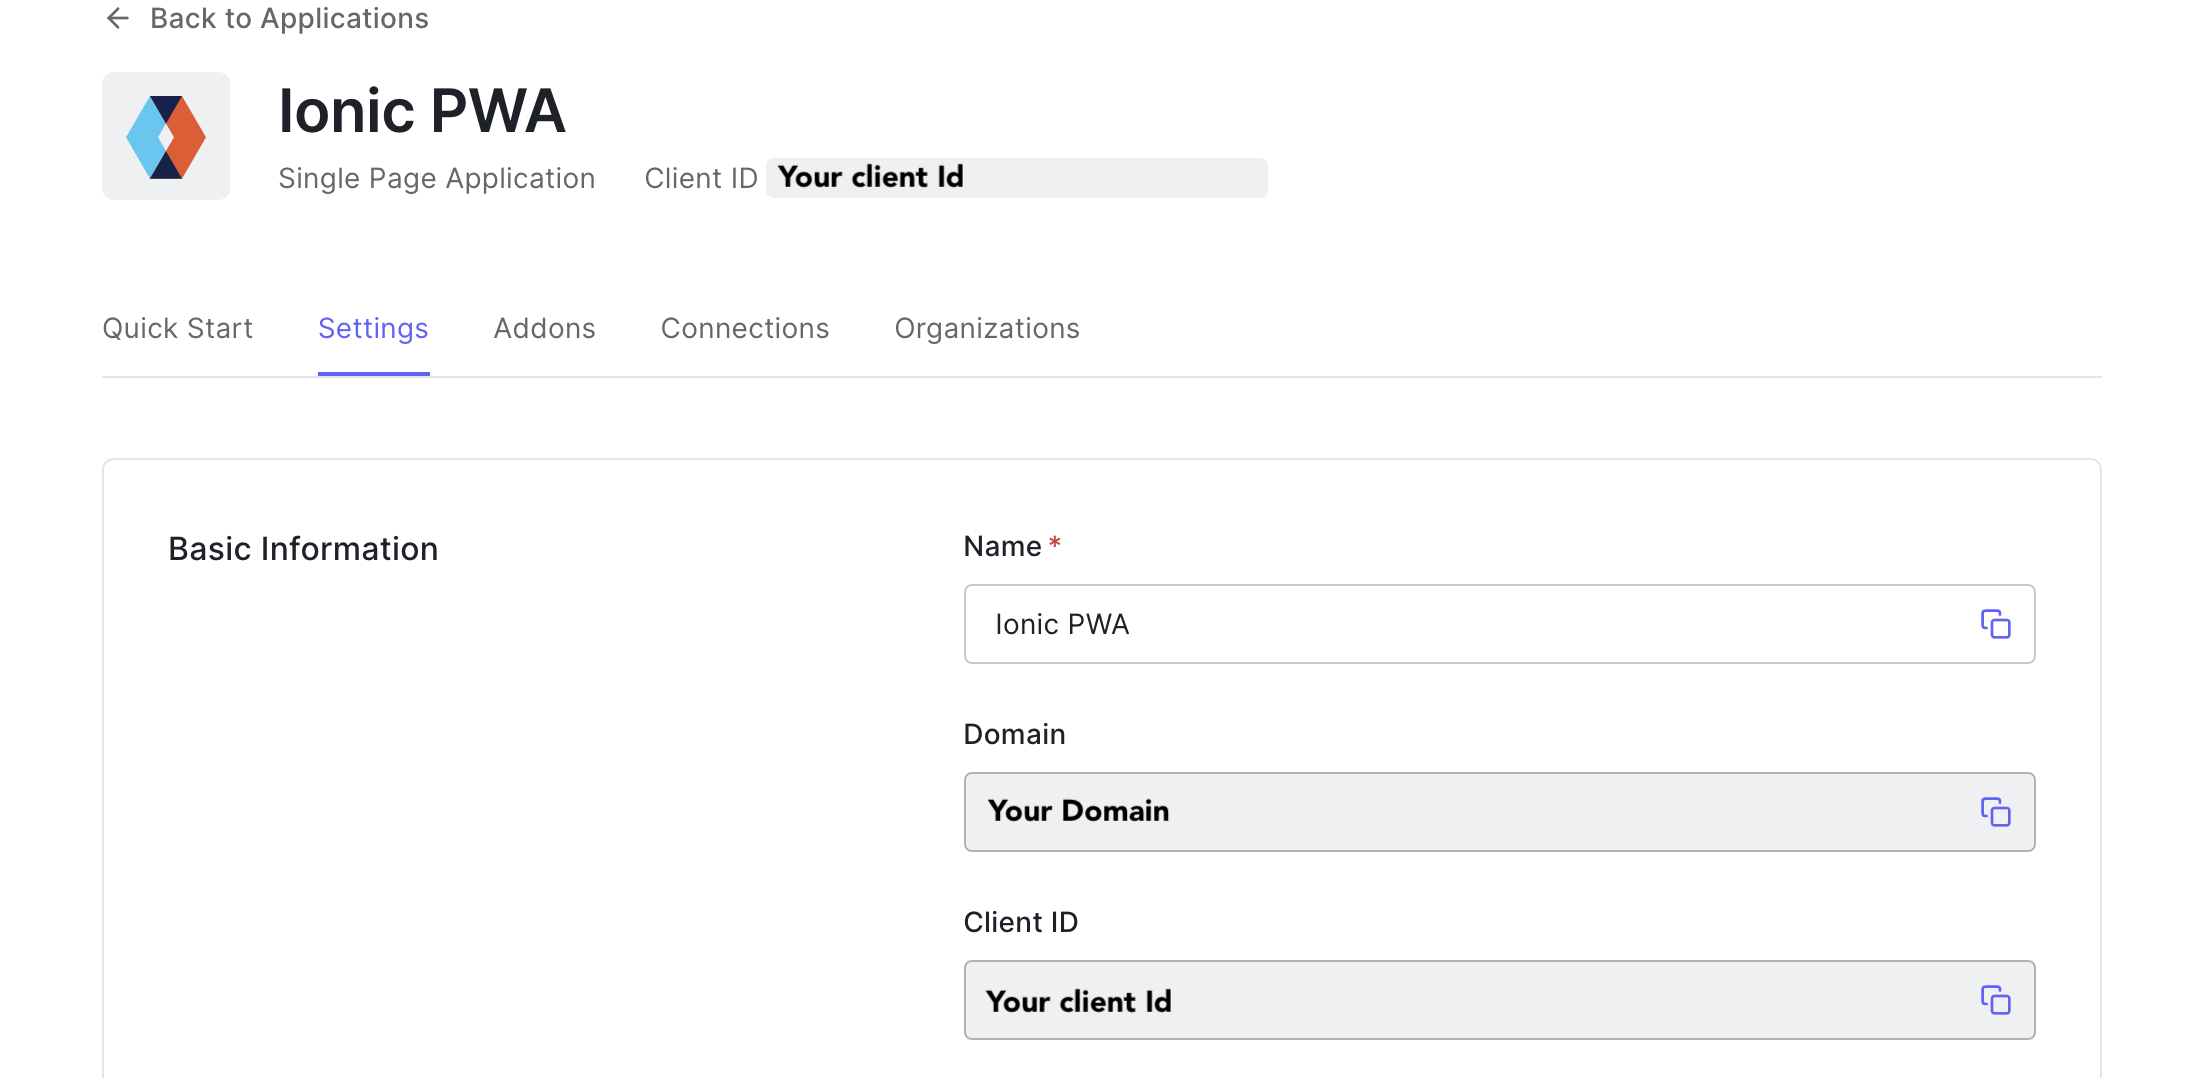
Before anything, let's set you up with Auth0. Please head to https://auth0.com/ and register for a free account. After signing up, you can log in to your account. You will land on the Auth0 dashboard. From the menu on the left, choose the Applications page and click the “Create Application” button.
Click on the option that says a new Single Page Web Applications, choose a name and click create. (PWAs are web apps that behave like a native app)
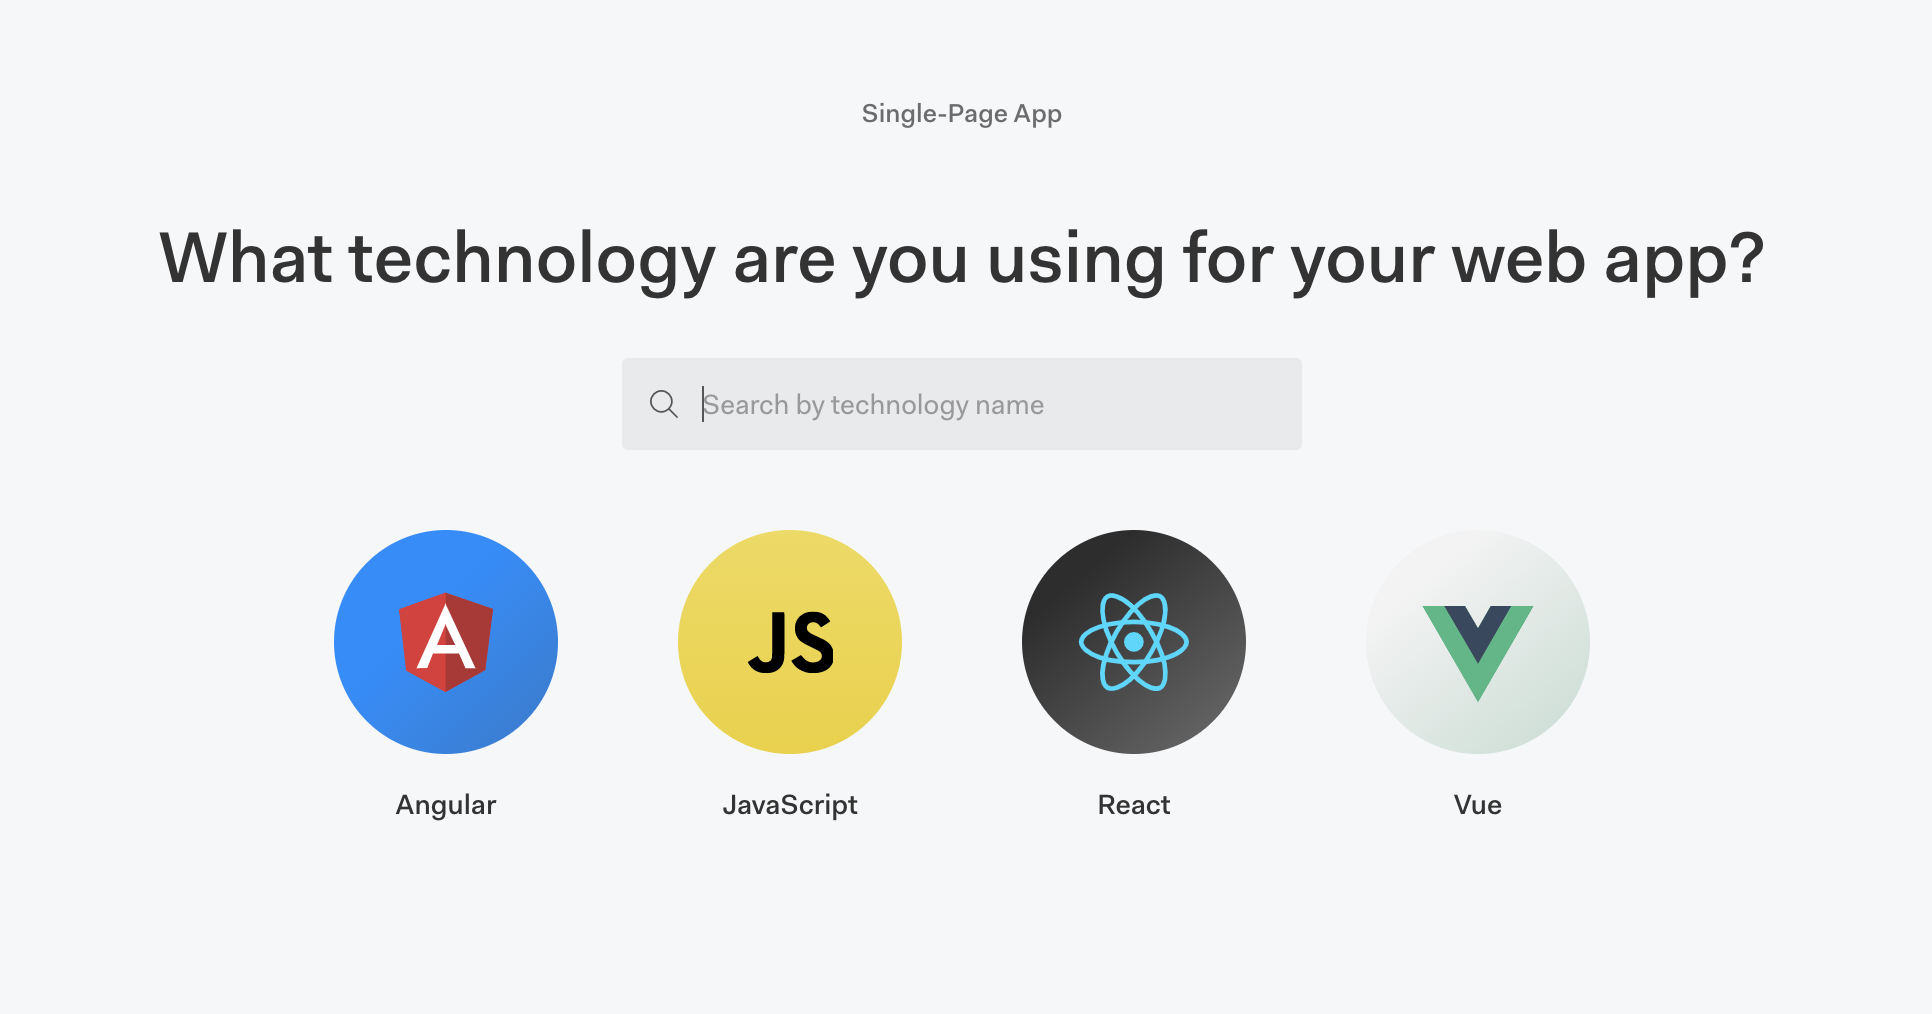
Choose the technology you are using for your front end, or go with the pure JS version. I will go with React here. This selection helps Auth0 to provide relevant examples and code snippets.
After choosing your front end technology, you land on a quick start guide that walks you through integrating Auth0 into your web app. Before doing that, let's create our Ionic app using the Ionic CLI. The code from this app is pretty much what I will use for my Ionic PWA integration.
If you have not installed Ionic CLI before, please head to https://ionicframework.com/docs/intro/cli and follow the instructions to install the CLI.
Next, let's create an app using CLI by running ionic start ionic-auth0-pwa.
CLI should prompt you to choose the front end tech and more options.
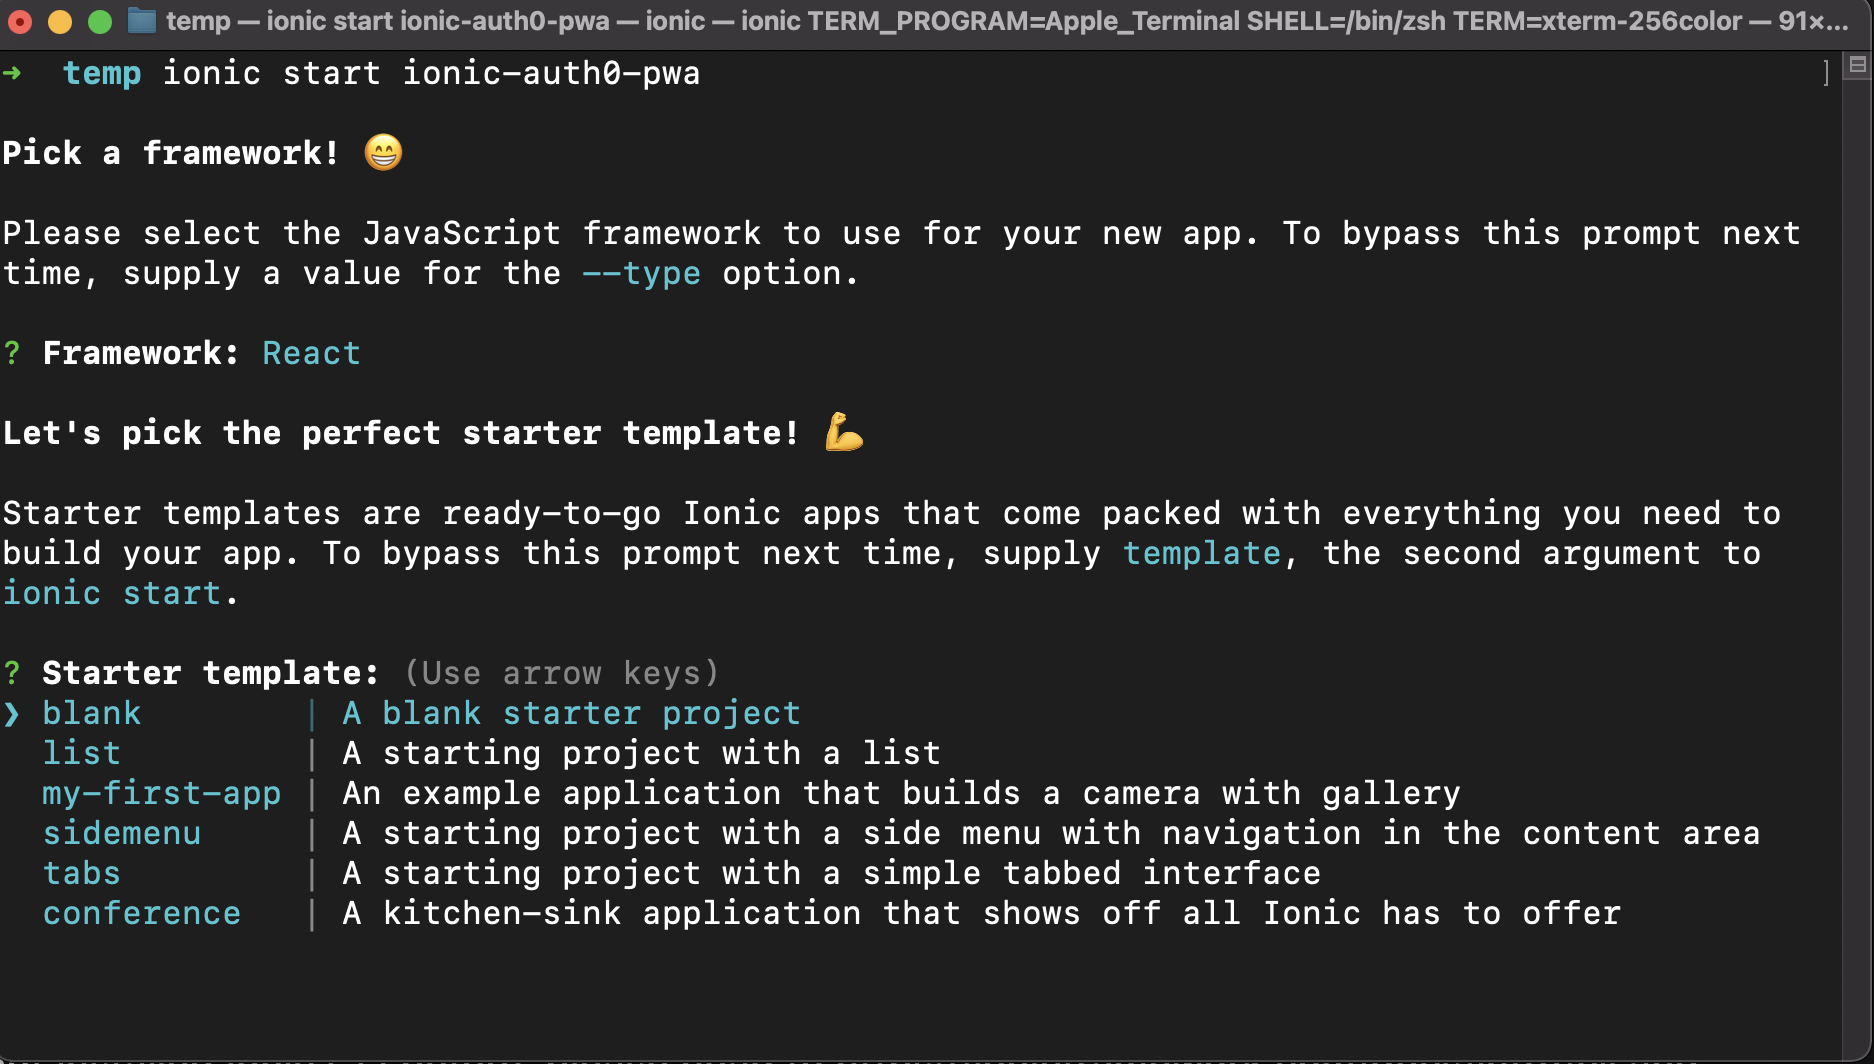
I am going with React and the blank starter project. After selecting the options, CLI will download all required npm packages. (this might take few minutes)
Ionic CLI asks if you would like a free Ionic account after the npm package install. It's not required for this tutorial. You will eventually see some logs indicating that the setup is done.
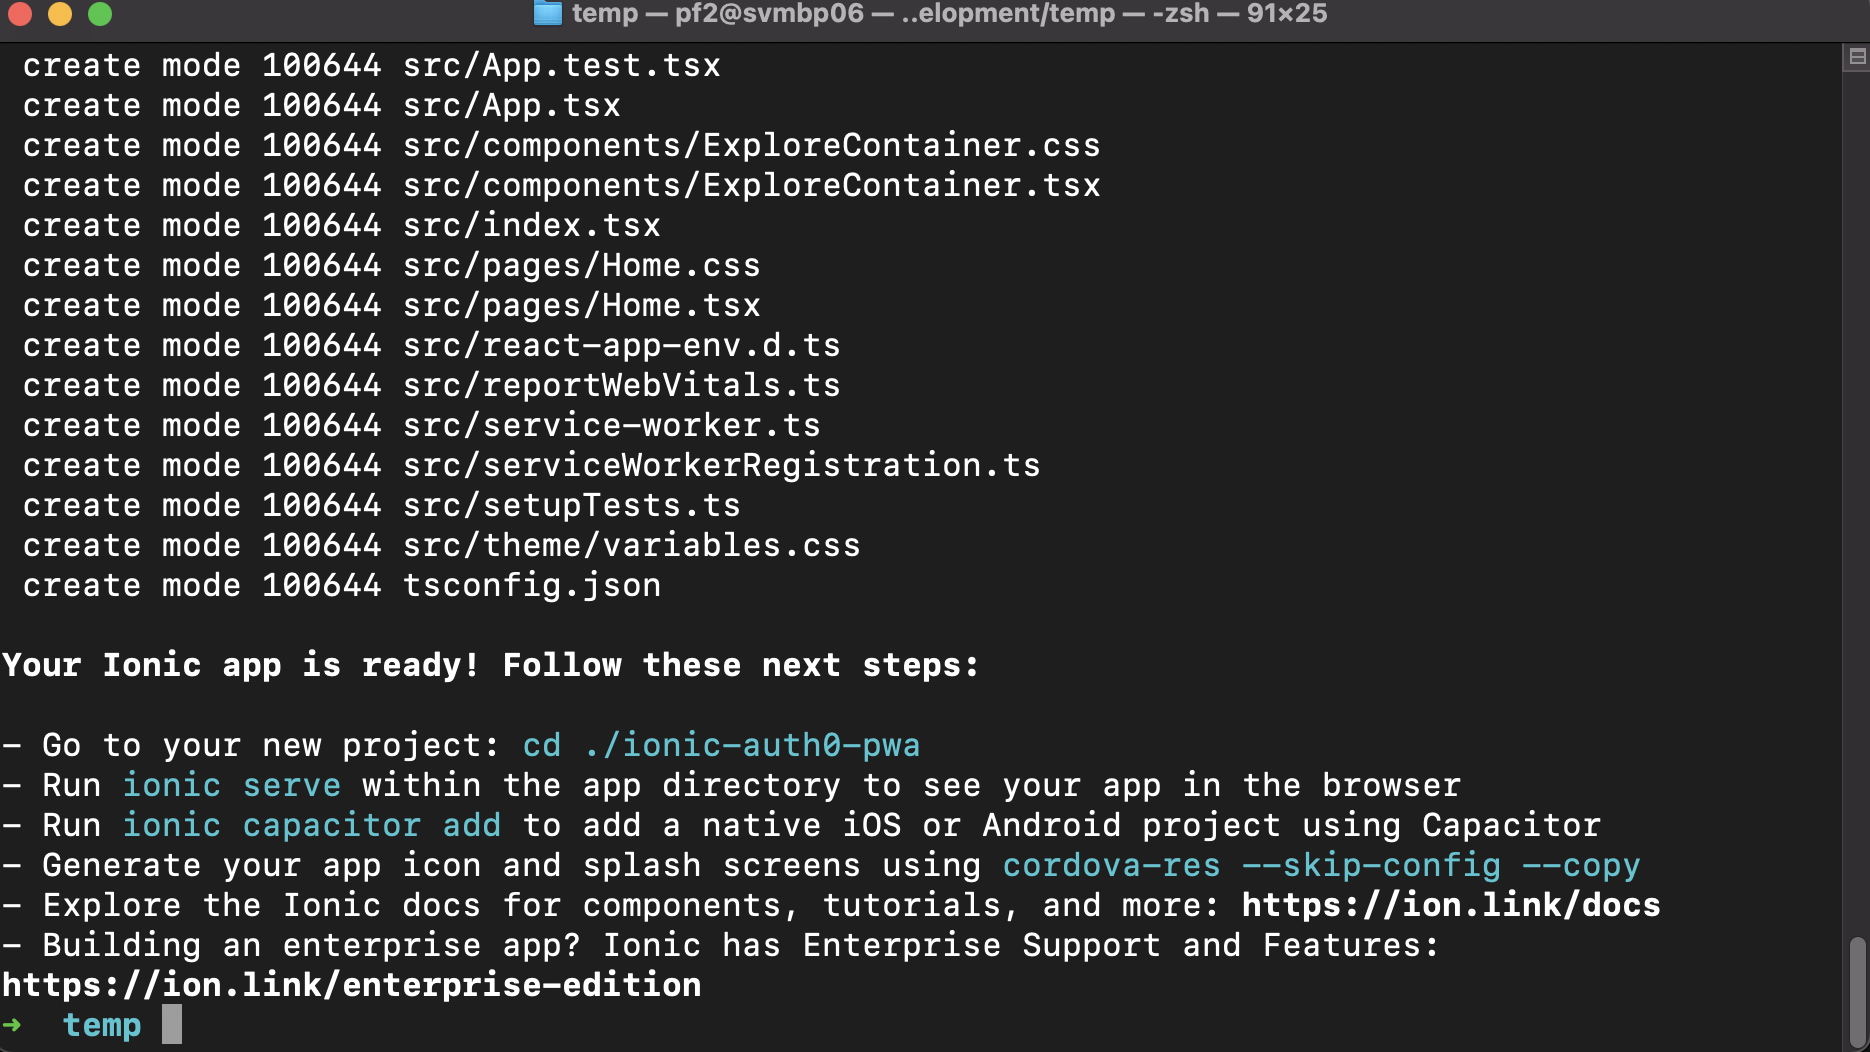
Let's cd to the new project we just created and run ionic serve. This will run a local web server and open the app in your default browser. (by default port 8100)
Now we can add the Auth service based on the example. I am going to follow the instruction from Auth0 React example to add the Auth0 login.
The first step adds the Auth0 React package to my Ionic app.
npm install @auth0/auth0-react
Next open index.tsx and wrap the <App> component in the Auth0Provider like this.
import React from 'react';
import ReactDOM from 'react-dom';
import App from './App';
import { Auth0Provider } from '@auth0/auth0-react';

ReactDOM.render(
    <React.StrictMode>
        <Auth0Provider
            domain="REPLACE_WITH_YOUR_DOMAIN"
            clientId="REPLACE_WITH_YOUR_CLIENT_ID"
            redirectUri={window.location.origin}
        >
            <App/>
        </Auth0Provider>
    </React.StrictMode>,
    document.getElementById('root')
);
The values for ClientId and Domain are populated based on your application. You can also find them in the setting section of your app.
Next, we create two components for Login and Logout.
import React from "react";
import { useAuth0 } from "@auth0/auth0-react";
import { IonButton, IonIcon } from "@ionic/react";
import { logIn } from "ionicons/icons";

const LoginButton = () => {
    const { loginWithRedirect, loginWithPopup } = useAuth0();

    return <IonButton onClick={() => loginWithPopup()}>
        <IonIcon slot="start" icon={logIn} />
        Log In
    </IonButton>;
};

export default LoginButton;
The Login component in the Auth0 example uses the redirect method, which leaves your app for the Auth0 website, does the login and comes back to your app with Auth token. There is another method for loginWithPopup, which I will use for this example. loginWithPopup does not leave your app and makes auth flow a bit simpler.
And here is our LogoutButton component.
import React from "react";
import { useAuth0 } from "@auth0/auth0-react";
import { IonButton, IonIcon } from "@ionic/react";
import { logOut } from "ionicons/icons";

const LogoutButton = () => {
    const { logout } = useAuth0();

    return (
        <IonButton onClick={() => logout({ returnTo: window.location.origin })}>
            <IonIcon slot="start" icon={logOut} />
            Log Out
        </IonButton>
    );
};

export default LogoutButton;
Let's make use of our newly created components. I will replace the content of ExploreContainer.tsx, which is the default homepage of our Ionic app, with the following code.
import './ExploreContainer.css';
import LoginButton from "./LoginButton";
import LogoutButton from "./LogoutButton";
import { useAuth0 } from "@auth0/auth0-react";

interface ContainerProps {
}

const ExploreContainer: React.FC<ContainerProps> = () => {
    const {isAuthenticated} = useAuth0();
    if (isAuthenticated) {
        return (
            <div className="container">
                <LogoutButton/>
            </div>
        );
    }
    return (
        <div className="container">
            <LoginButton/>
        </div>
    );

};

export default ExploreContainer;
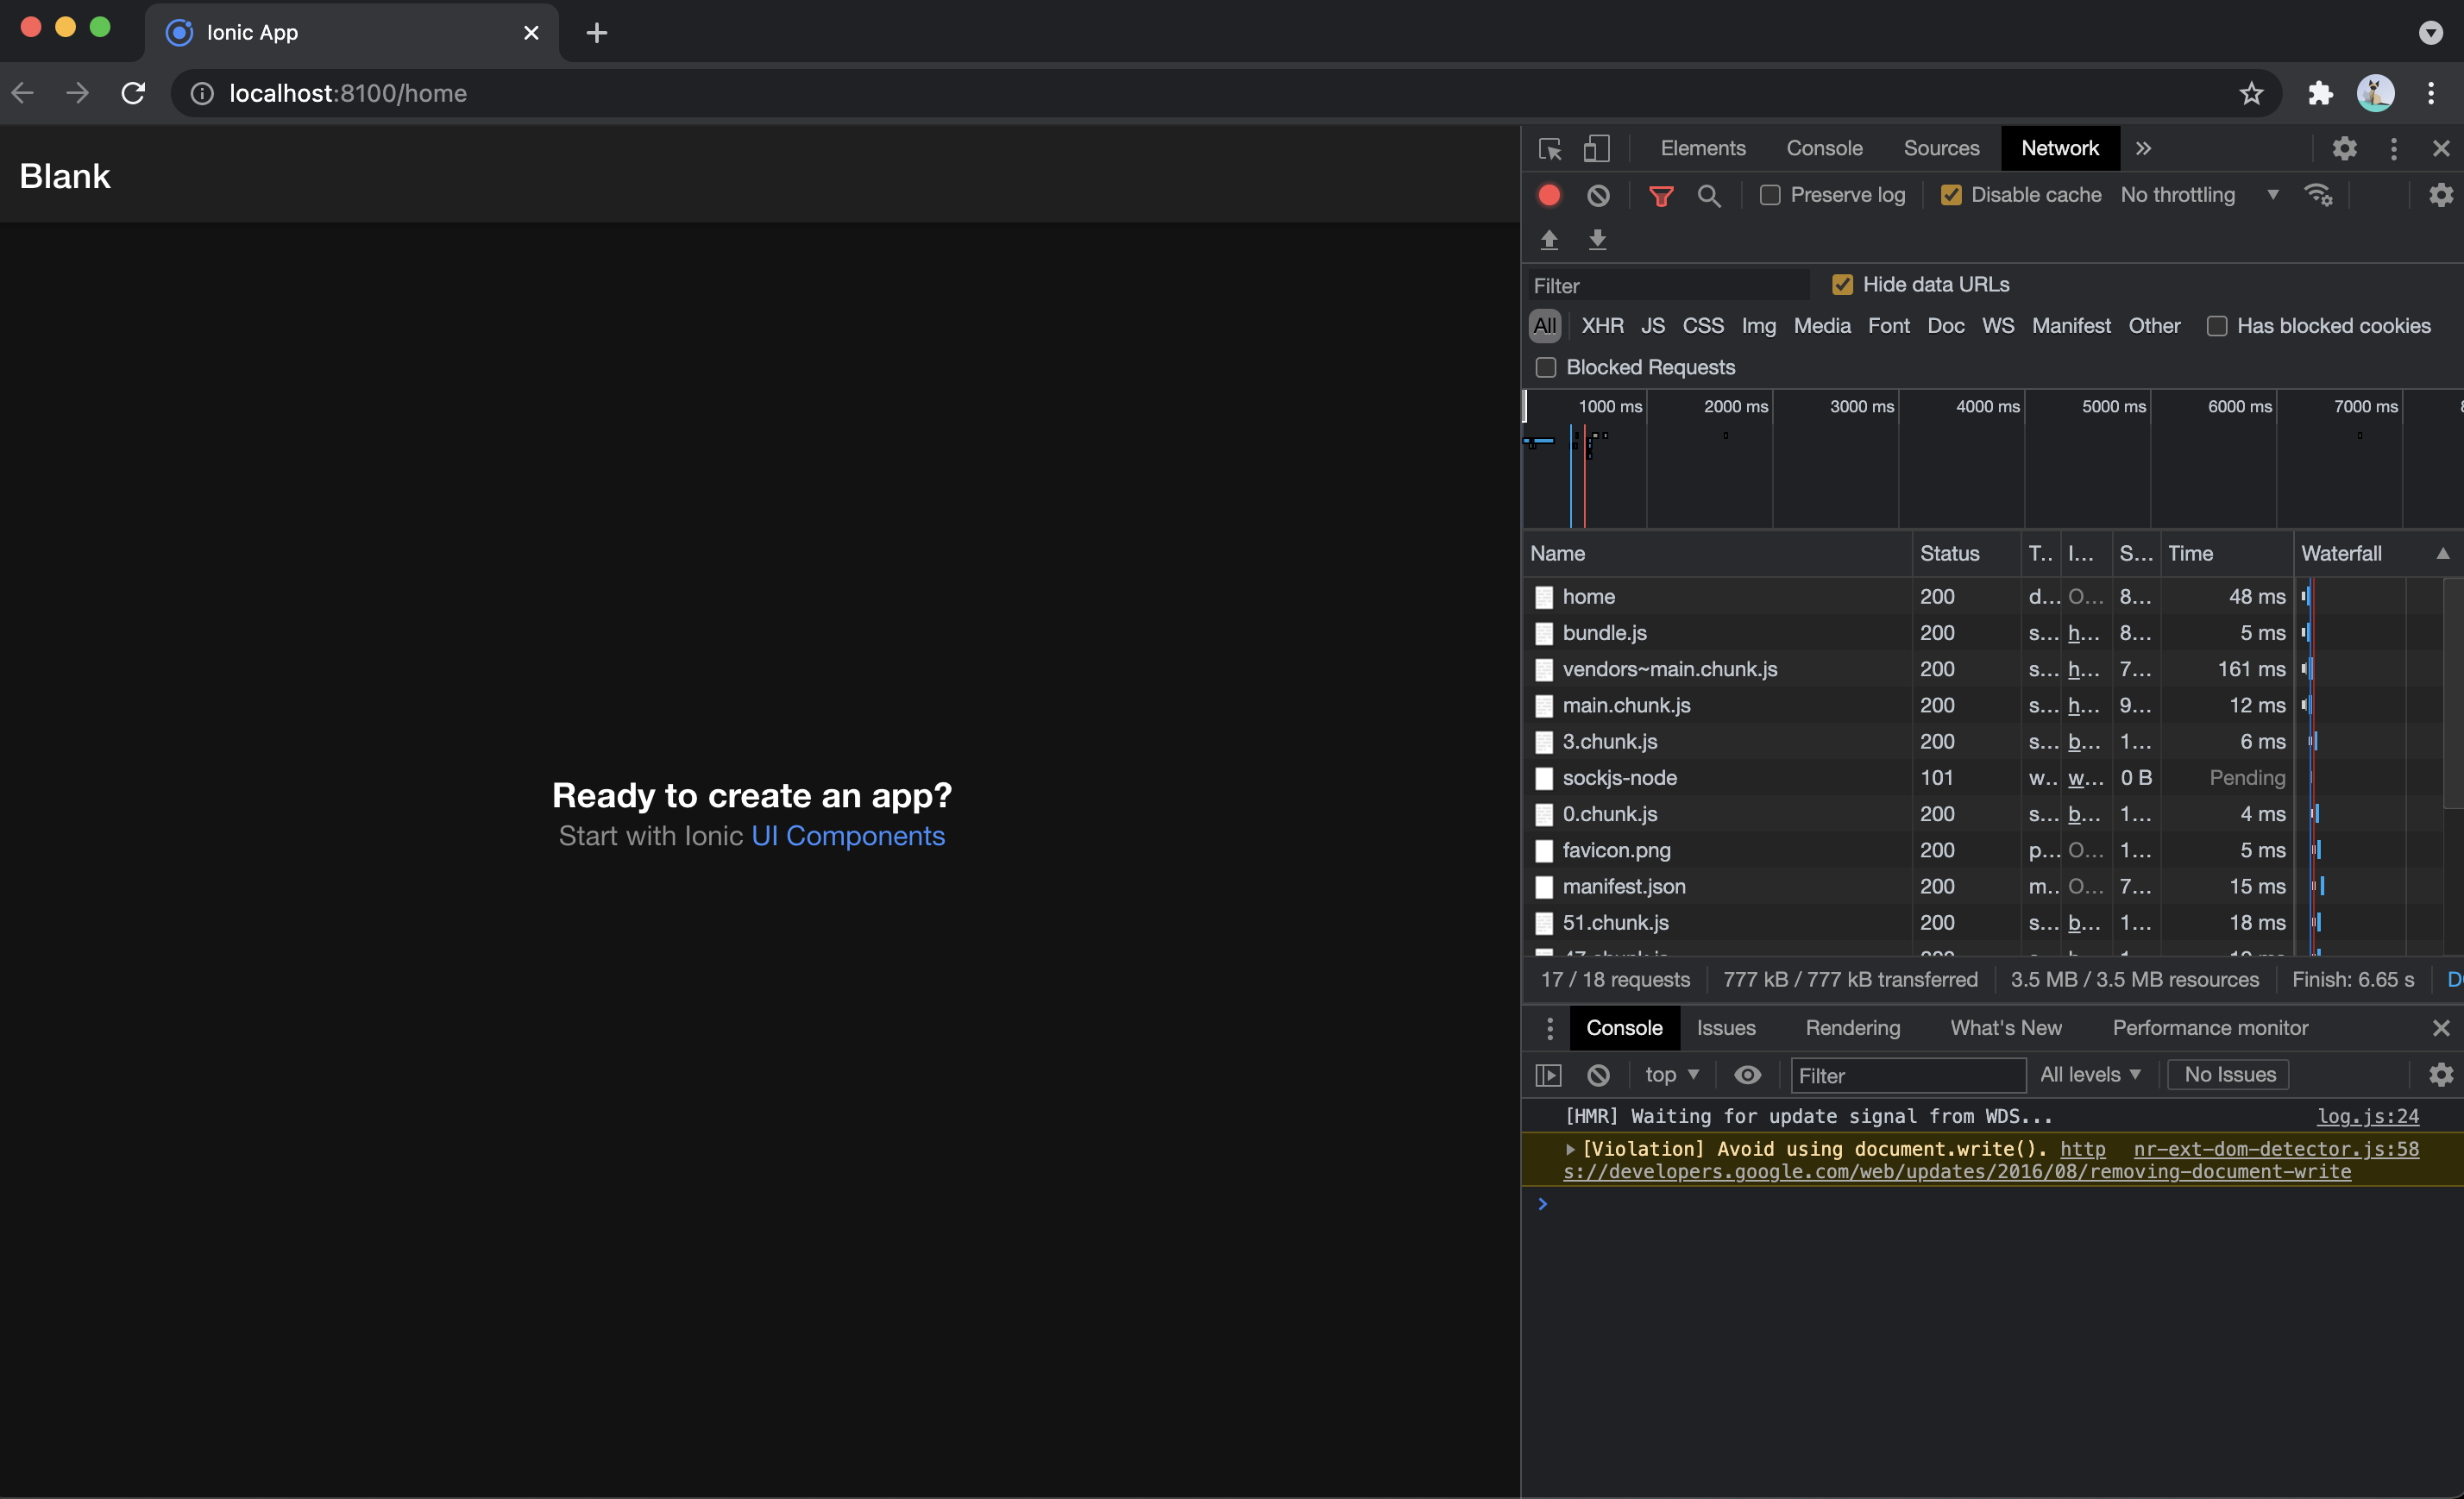
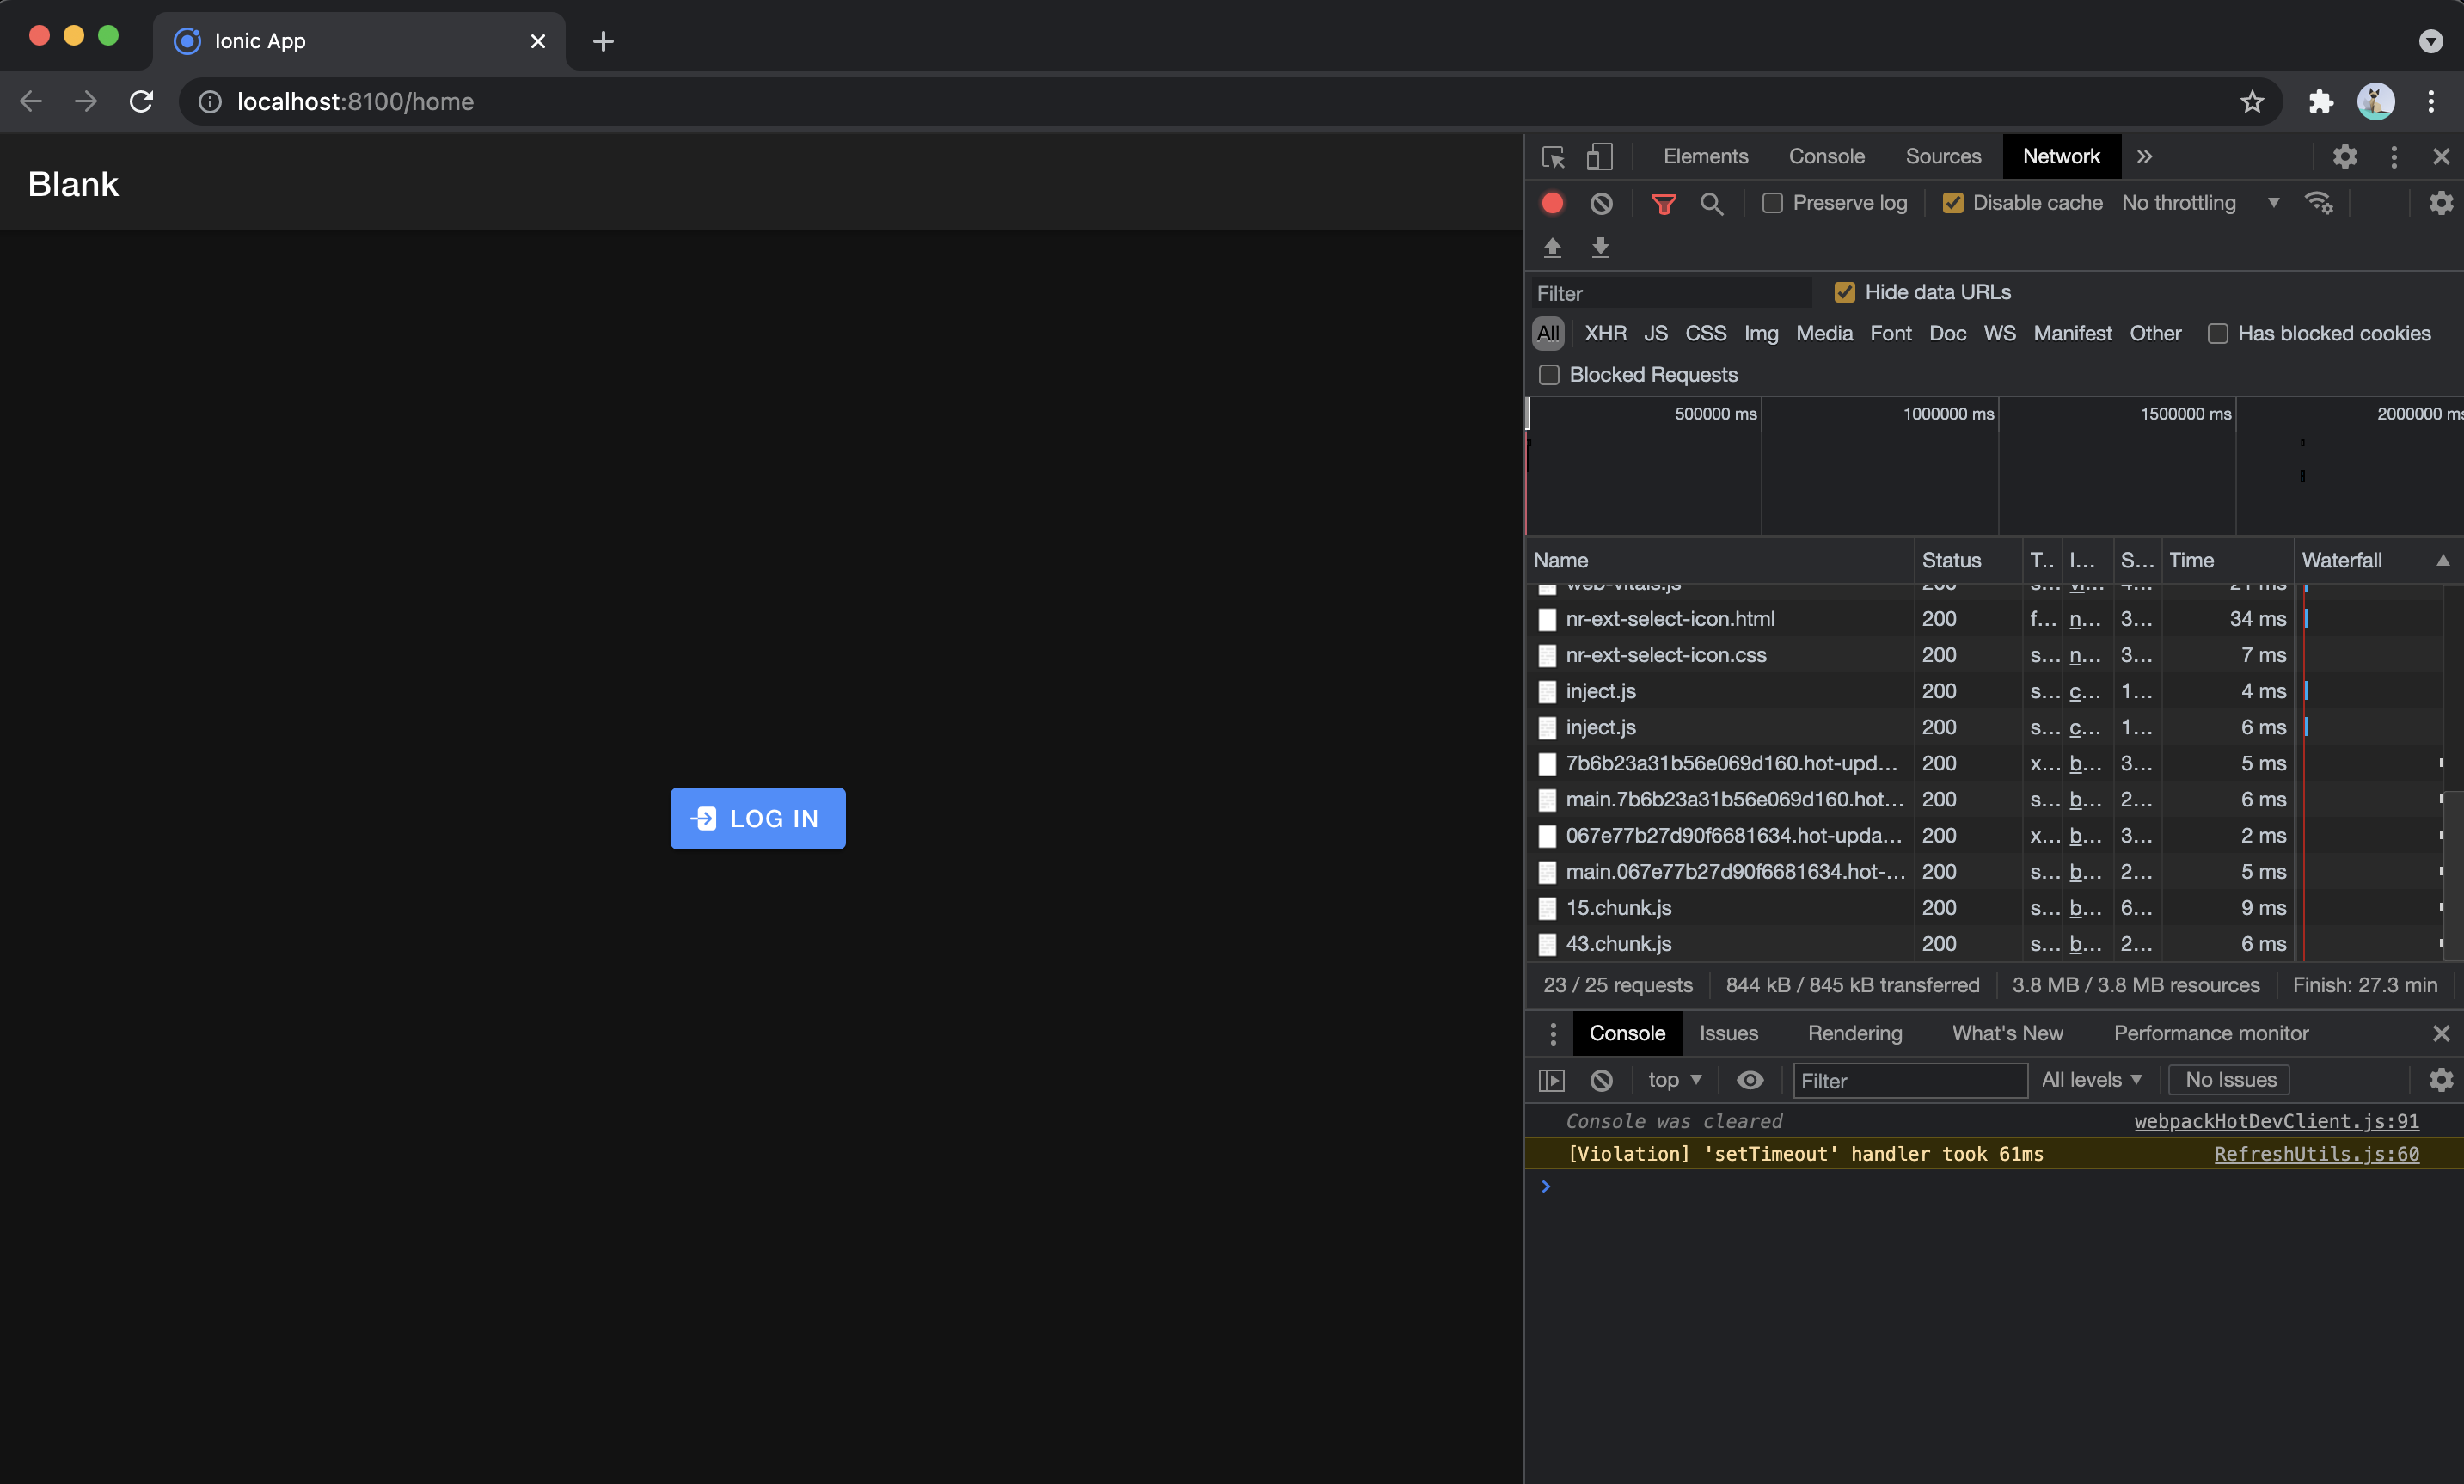
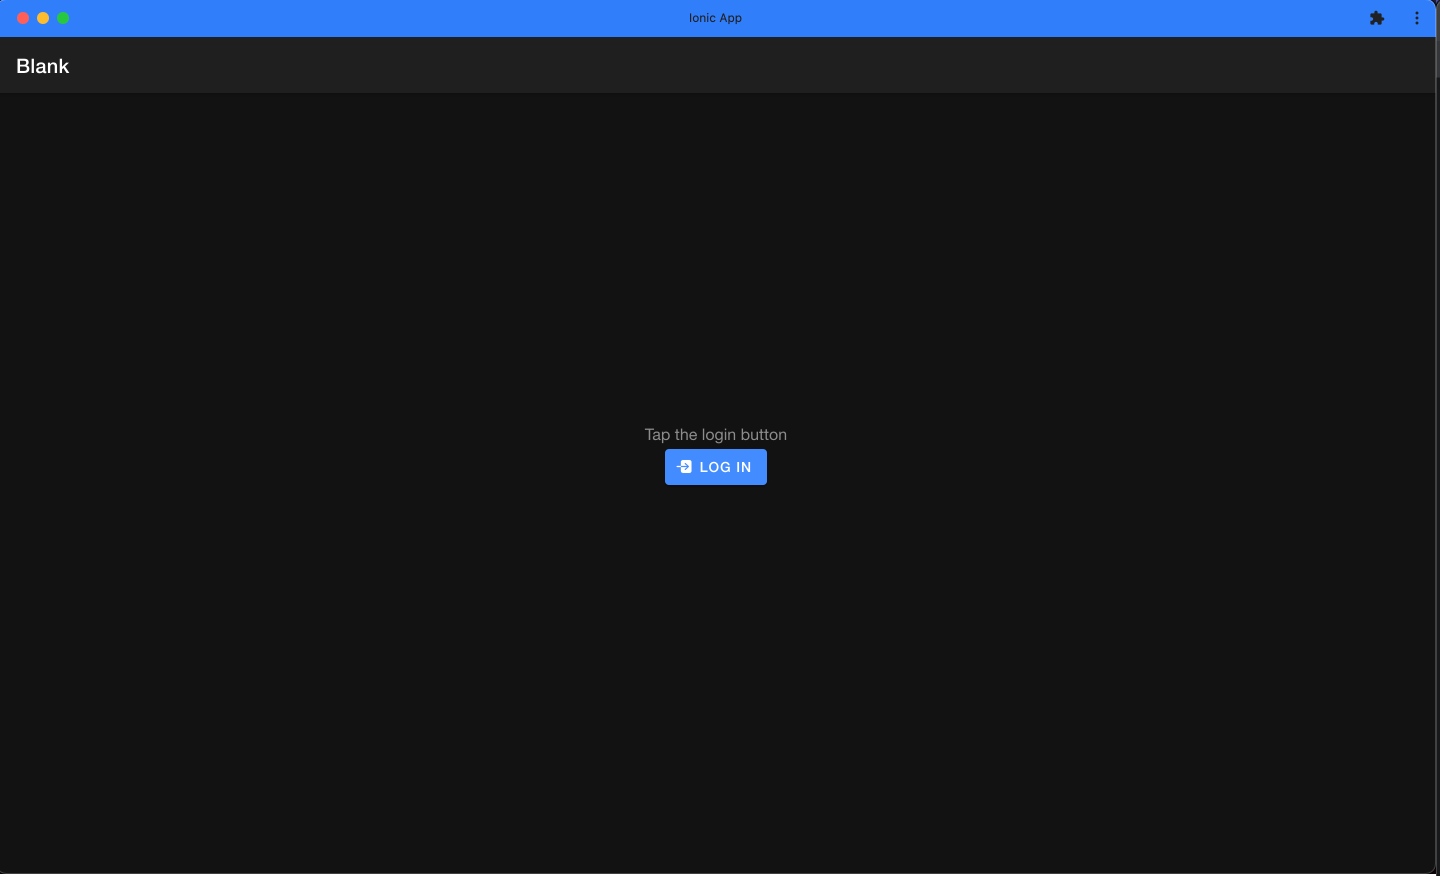
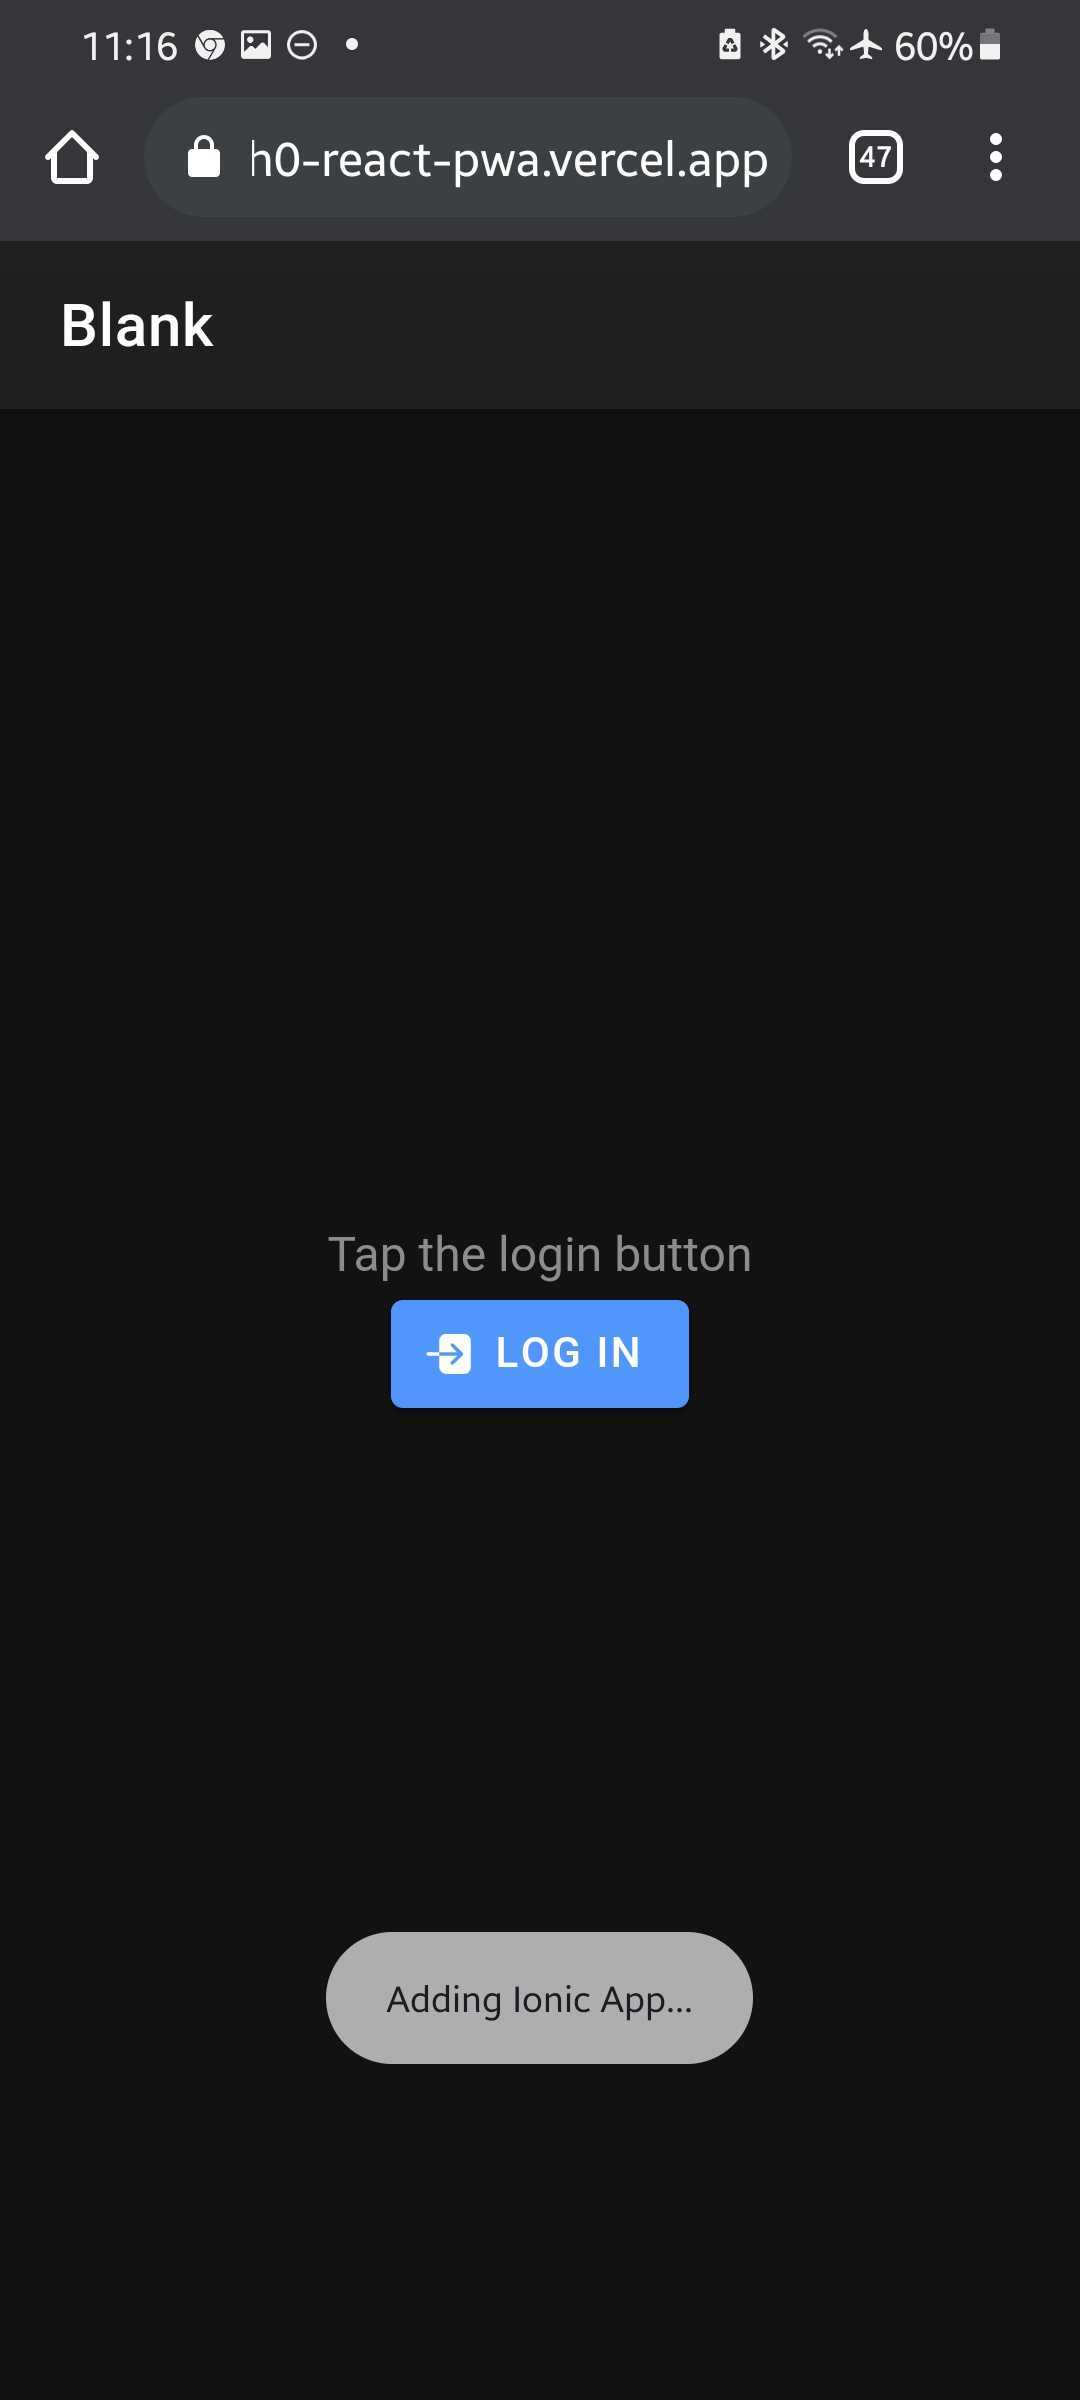
This is to check the isAuthenticated flag and decide to show LoginButton or LogoutButton. The result should be something like this.
Test the Login
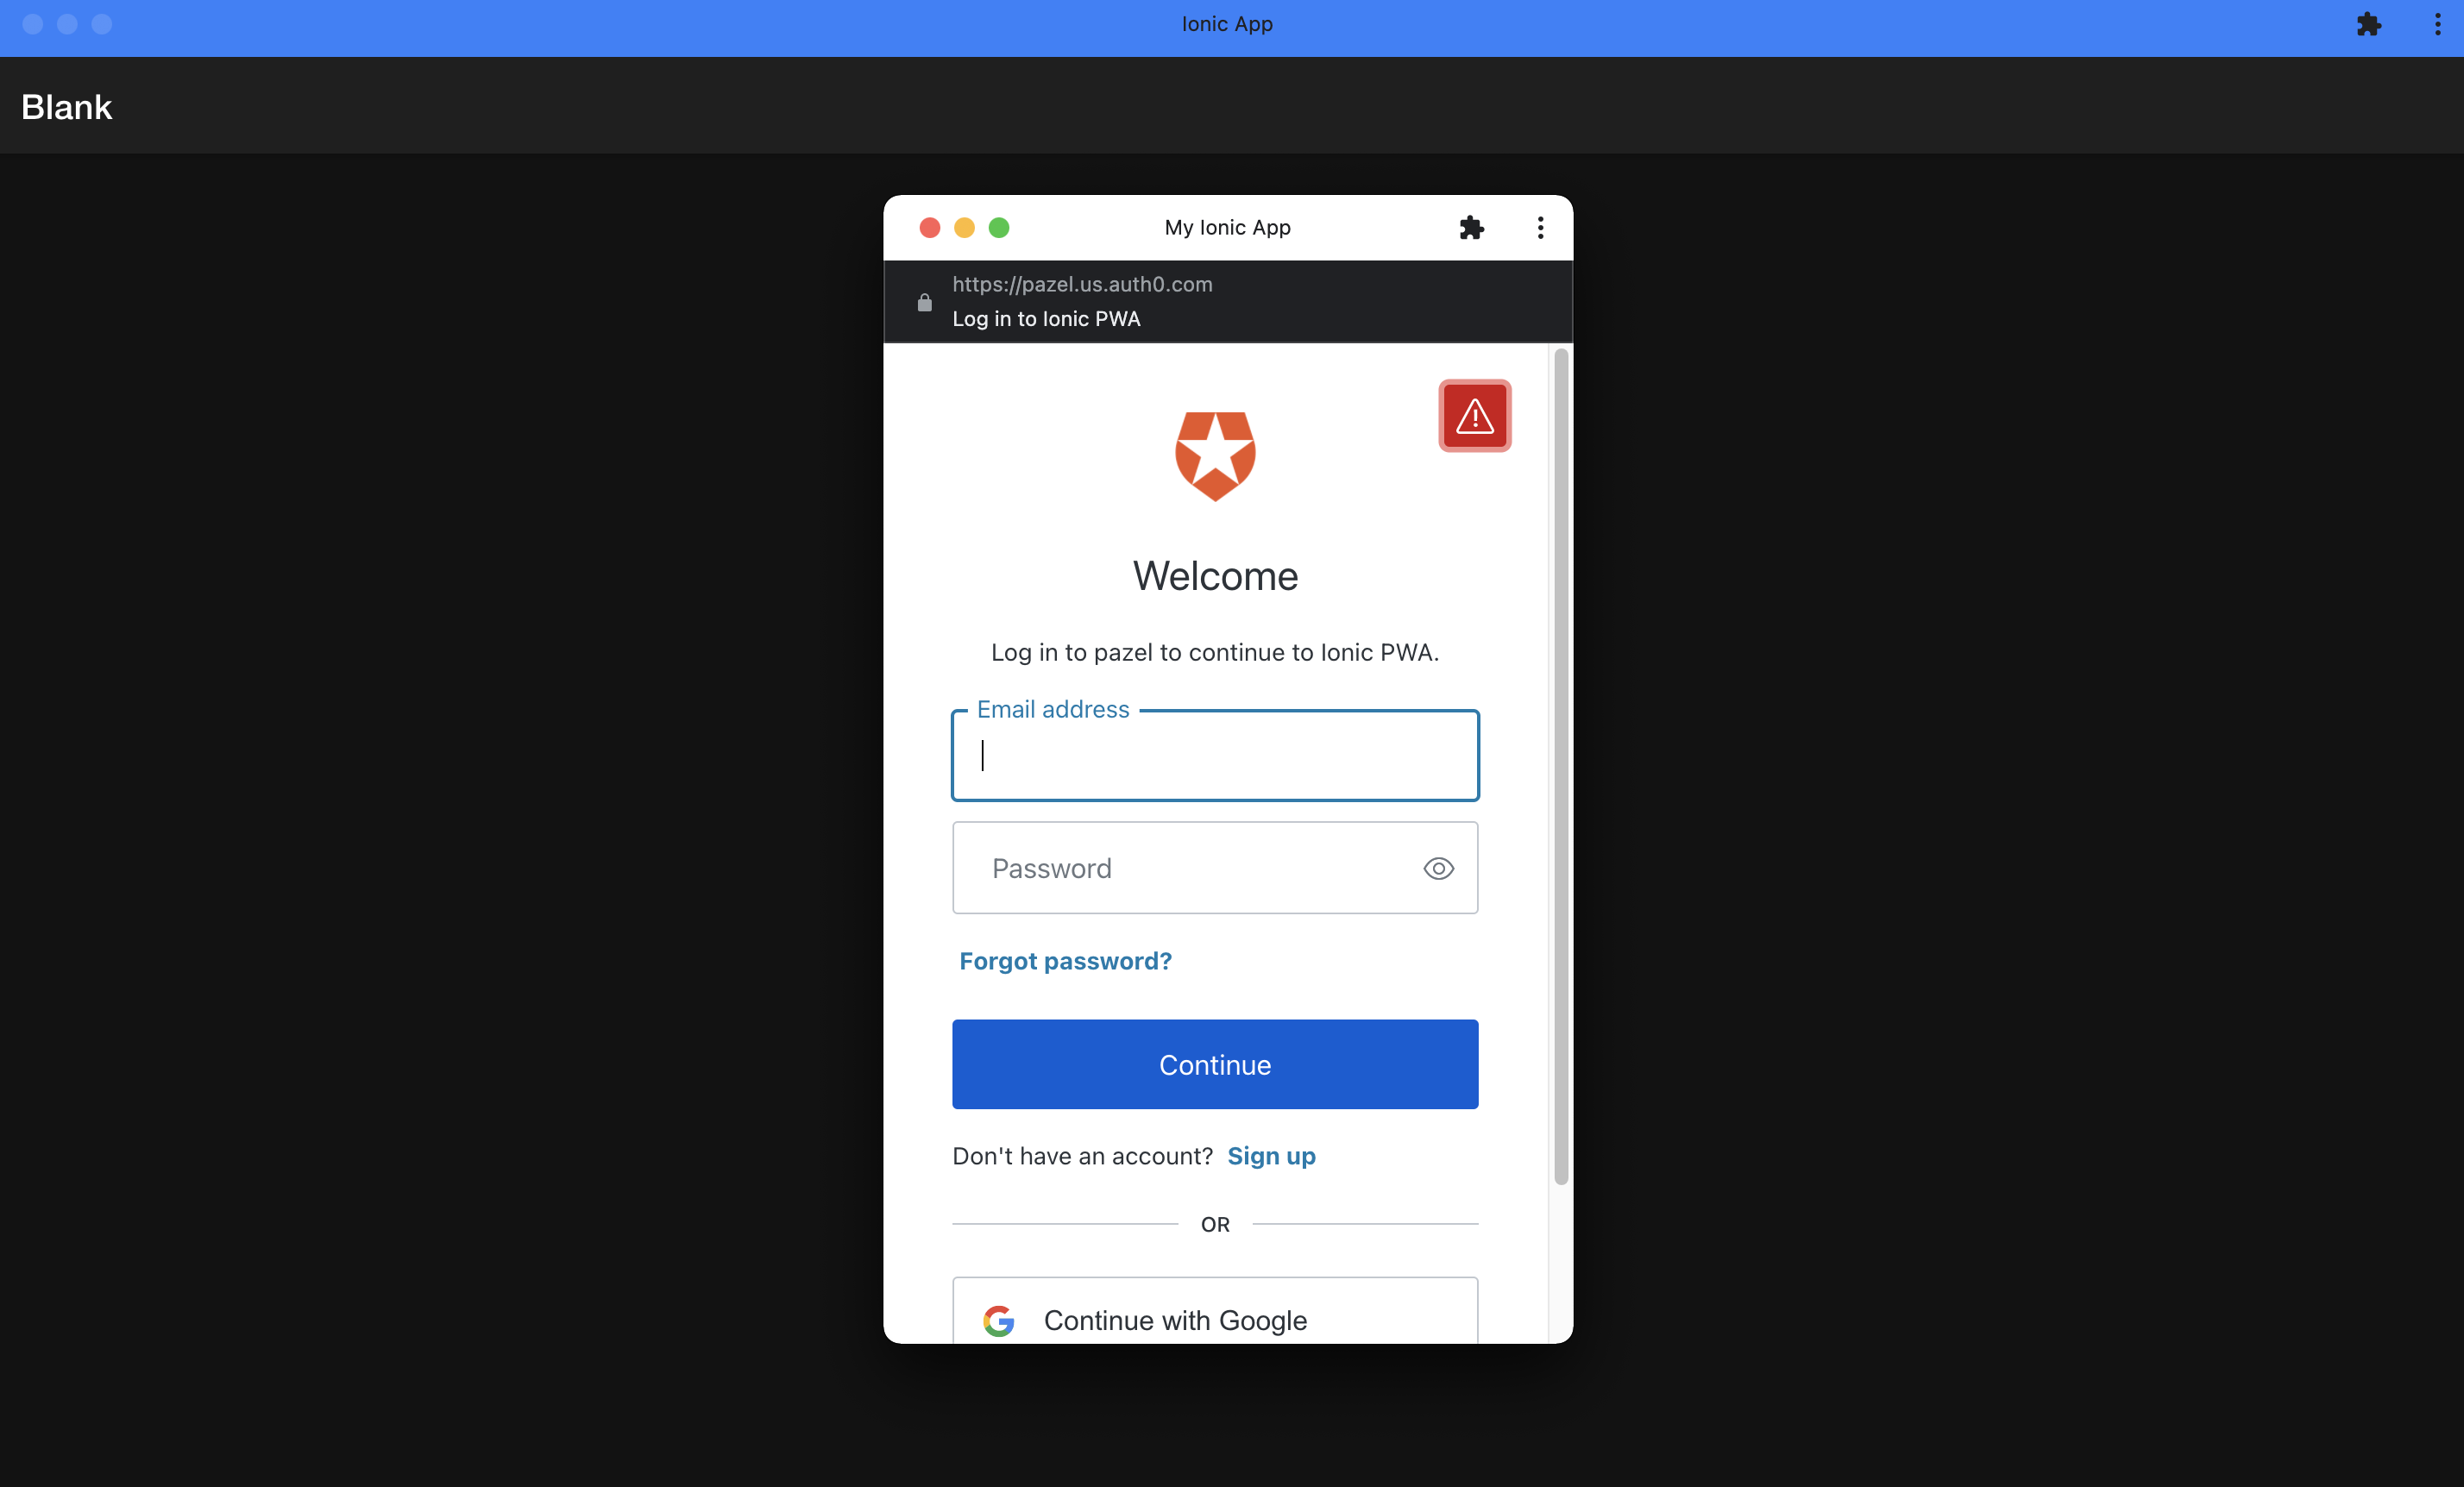
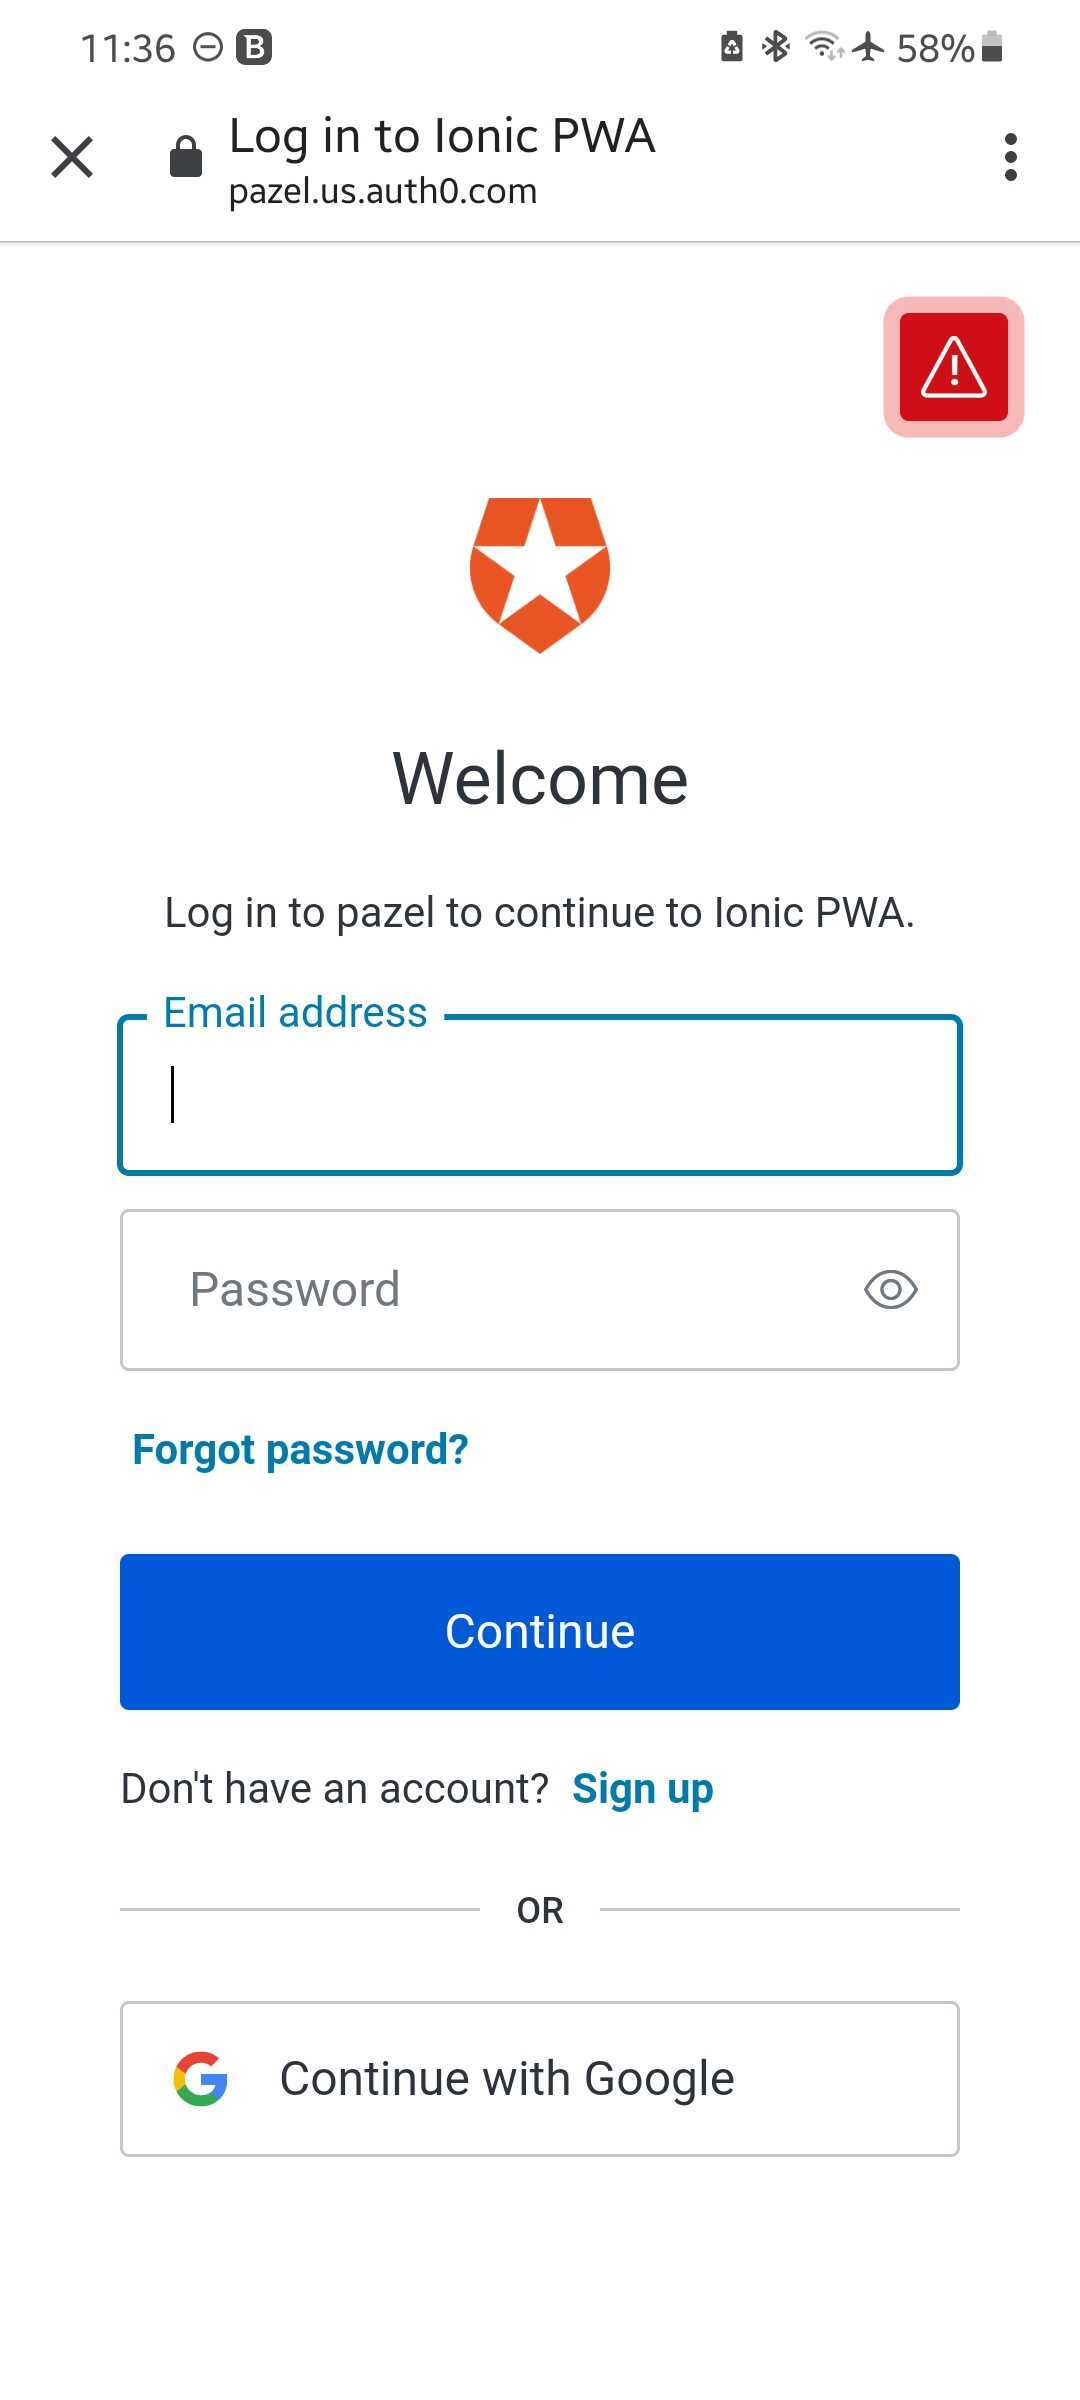
Clicking the login button should open a popup and show the login form. If instead of the login form, you see a message saying, "Oops! something went wrong". You have probably missed the step to set up the callback URLs for your Auth0 app.
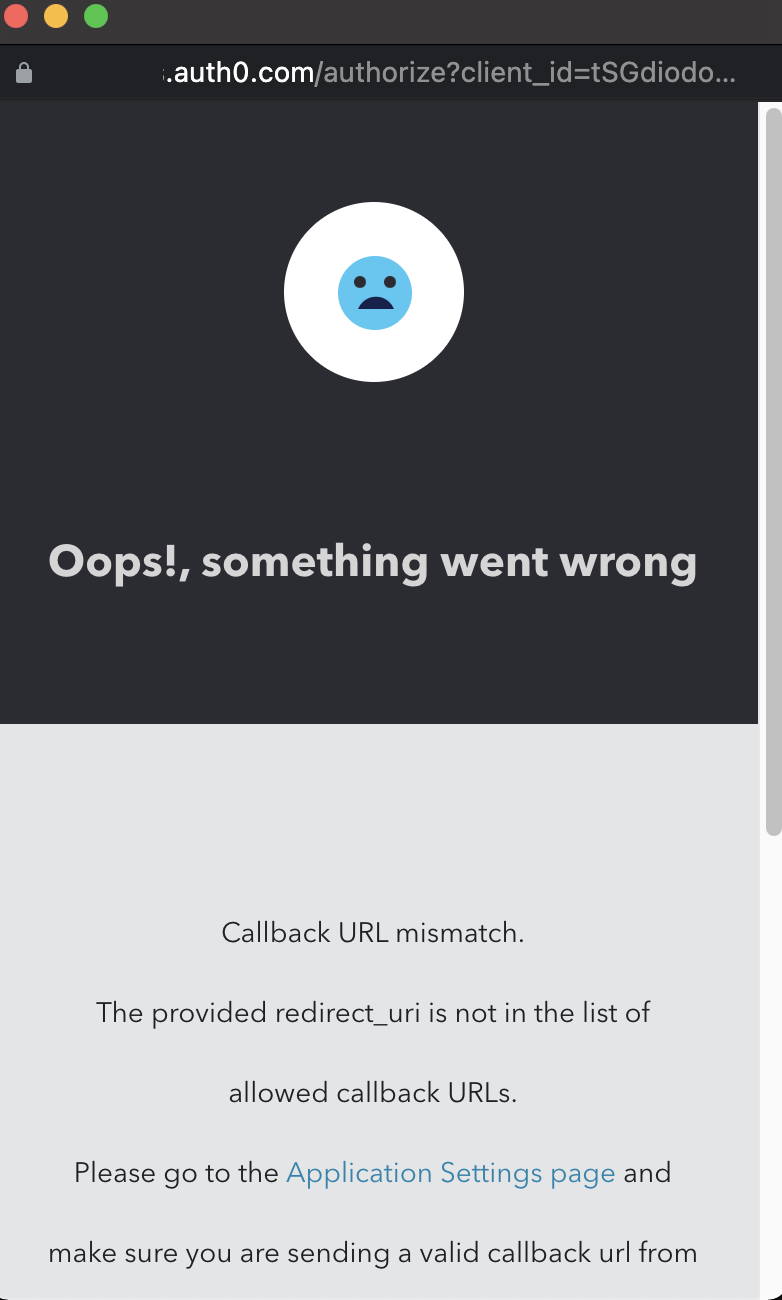
To do this, go to your app settings. Scroll down to the section that says "Allowed Callback URLs" and enter your app URL there. We need to add http://localhost:8100 for the "Allowed Callback URLs", "Allowed Web Origins", and "Allowed Logout URLs".
If you click the login now, you should see this screen.
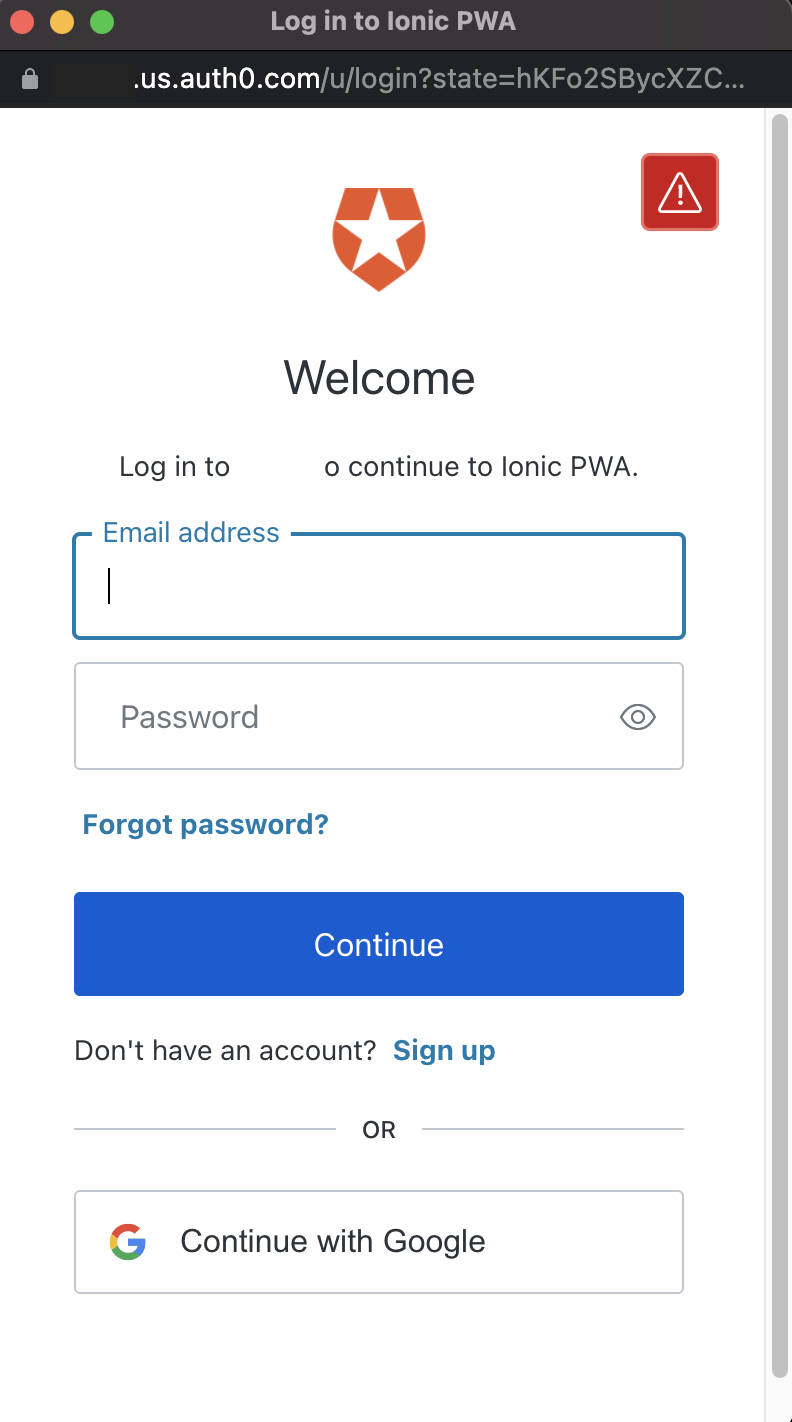
You can signup & log in with a username/password or use a google account to log in. The login options provided are based on the default settings when you added your application in Auth0. You can obviously change these through Auth0 to add other social logins like Facebook, Apple or enable Multi-factor authentication.
Add a User Profile to show user info
Now that we have a login and logout, let's add a UserProfile component to show some user details.
import React from "react";
import { useAuth0 } from "@auth0/auth0-react";

const UserProfile = () => {
    const {user, isAuthenticated, isLoading} = useAuth0();

    if (isLoading) {
        return <div>Loading ...</div>;
    }

    if (isAuthenticated) {
        return <div>
            <img src={user?.picture} alt={user?.name}/>
            <h2>Hello, {user?.name}</h2>
        </div>
    }
    return <p>Tap the login button</p>
};

export default UserProfile;
I will use the new UserProfile component in the ExploreContainer. The new updated code is:
import './ExploreContainer.css';
import LoginButton from "./LoginButton";
import LogoutButton from "./LogoutButton";
import UserProfile from "./UserProfile";
import { useAuth0 } from "@auth0/auth0-react";

interface ContainerProps {
}

const ExploreContainer: React.FC<ContainerProps> = () => {
    const {isAuthenticated} = useAuth0();
    if (isAuthenticated) {
        return (
            <div className="container">
                <UserProfile/>
                <LogoutButton/>
            </div>
        );
    }
    return (
        <div className="container">
            <UserProfile/>
            <LoginButton/>
        </div>
    );

};

export default ExploreContainer;
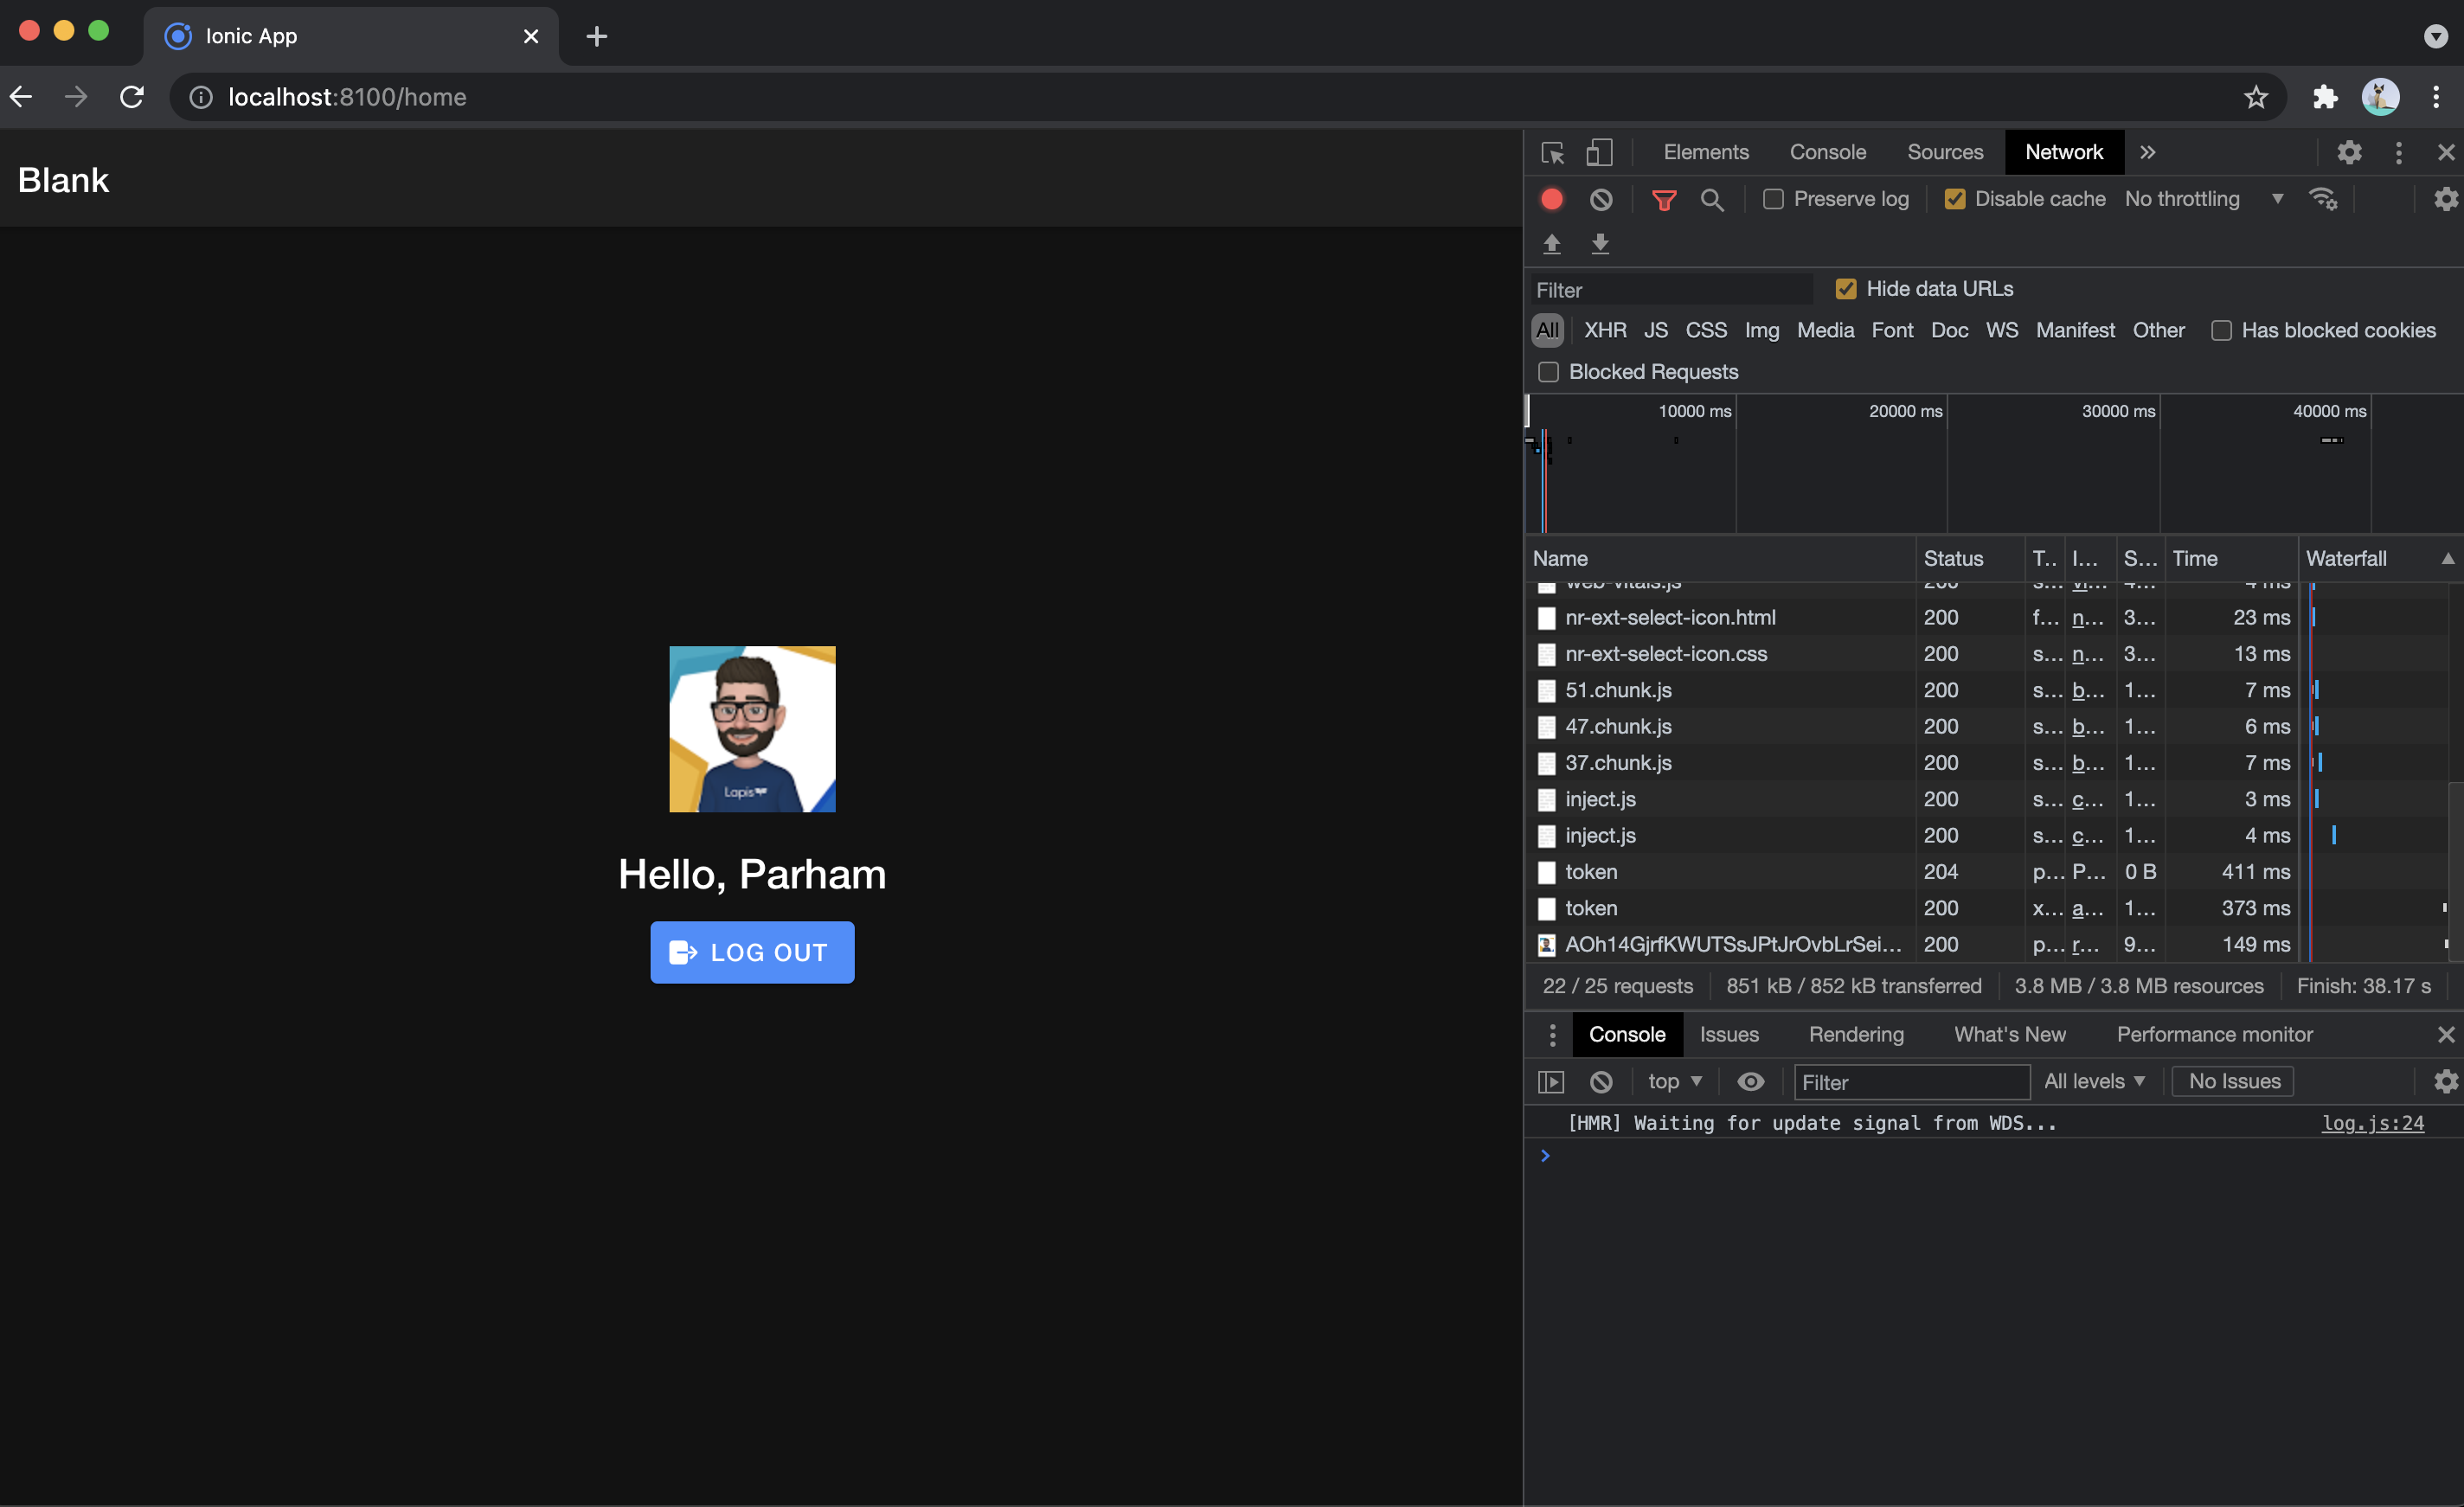
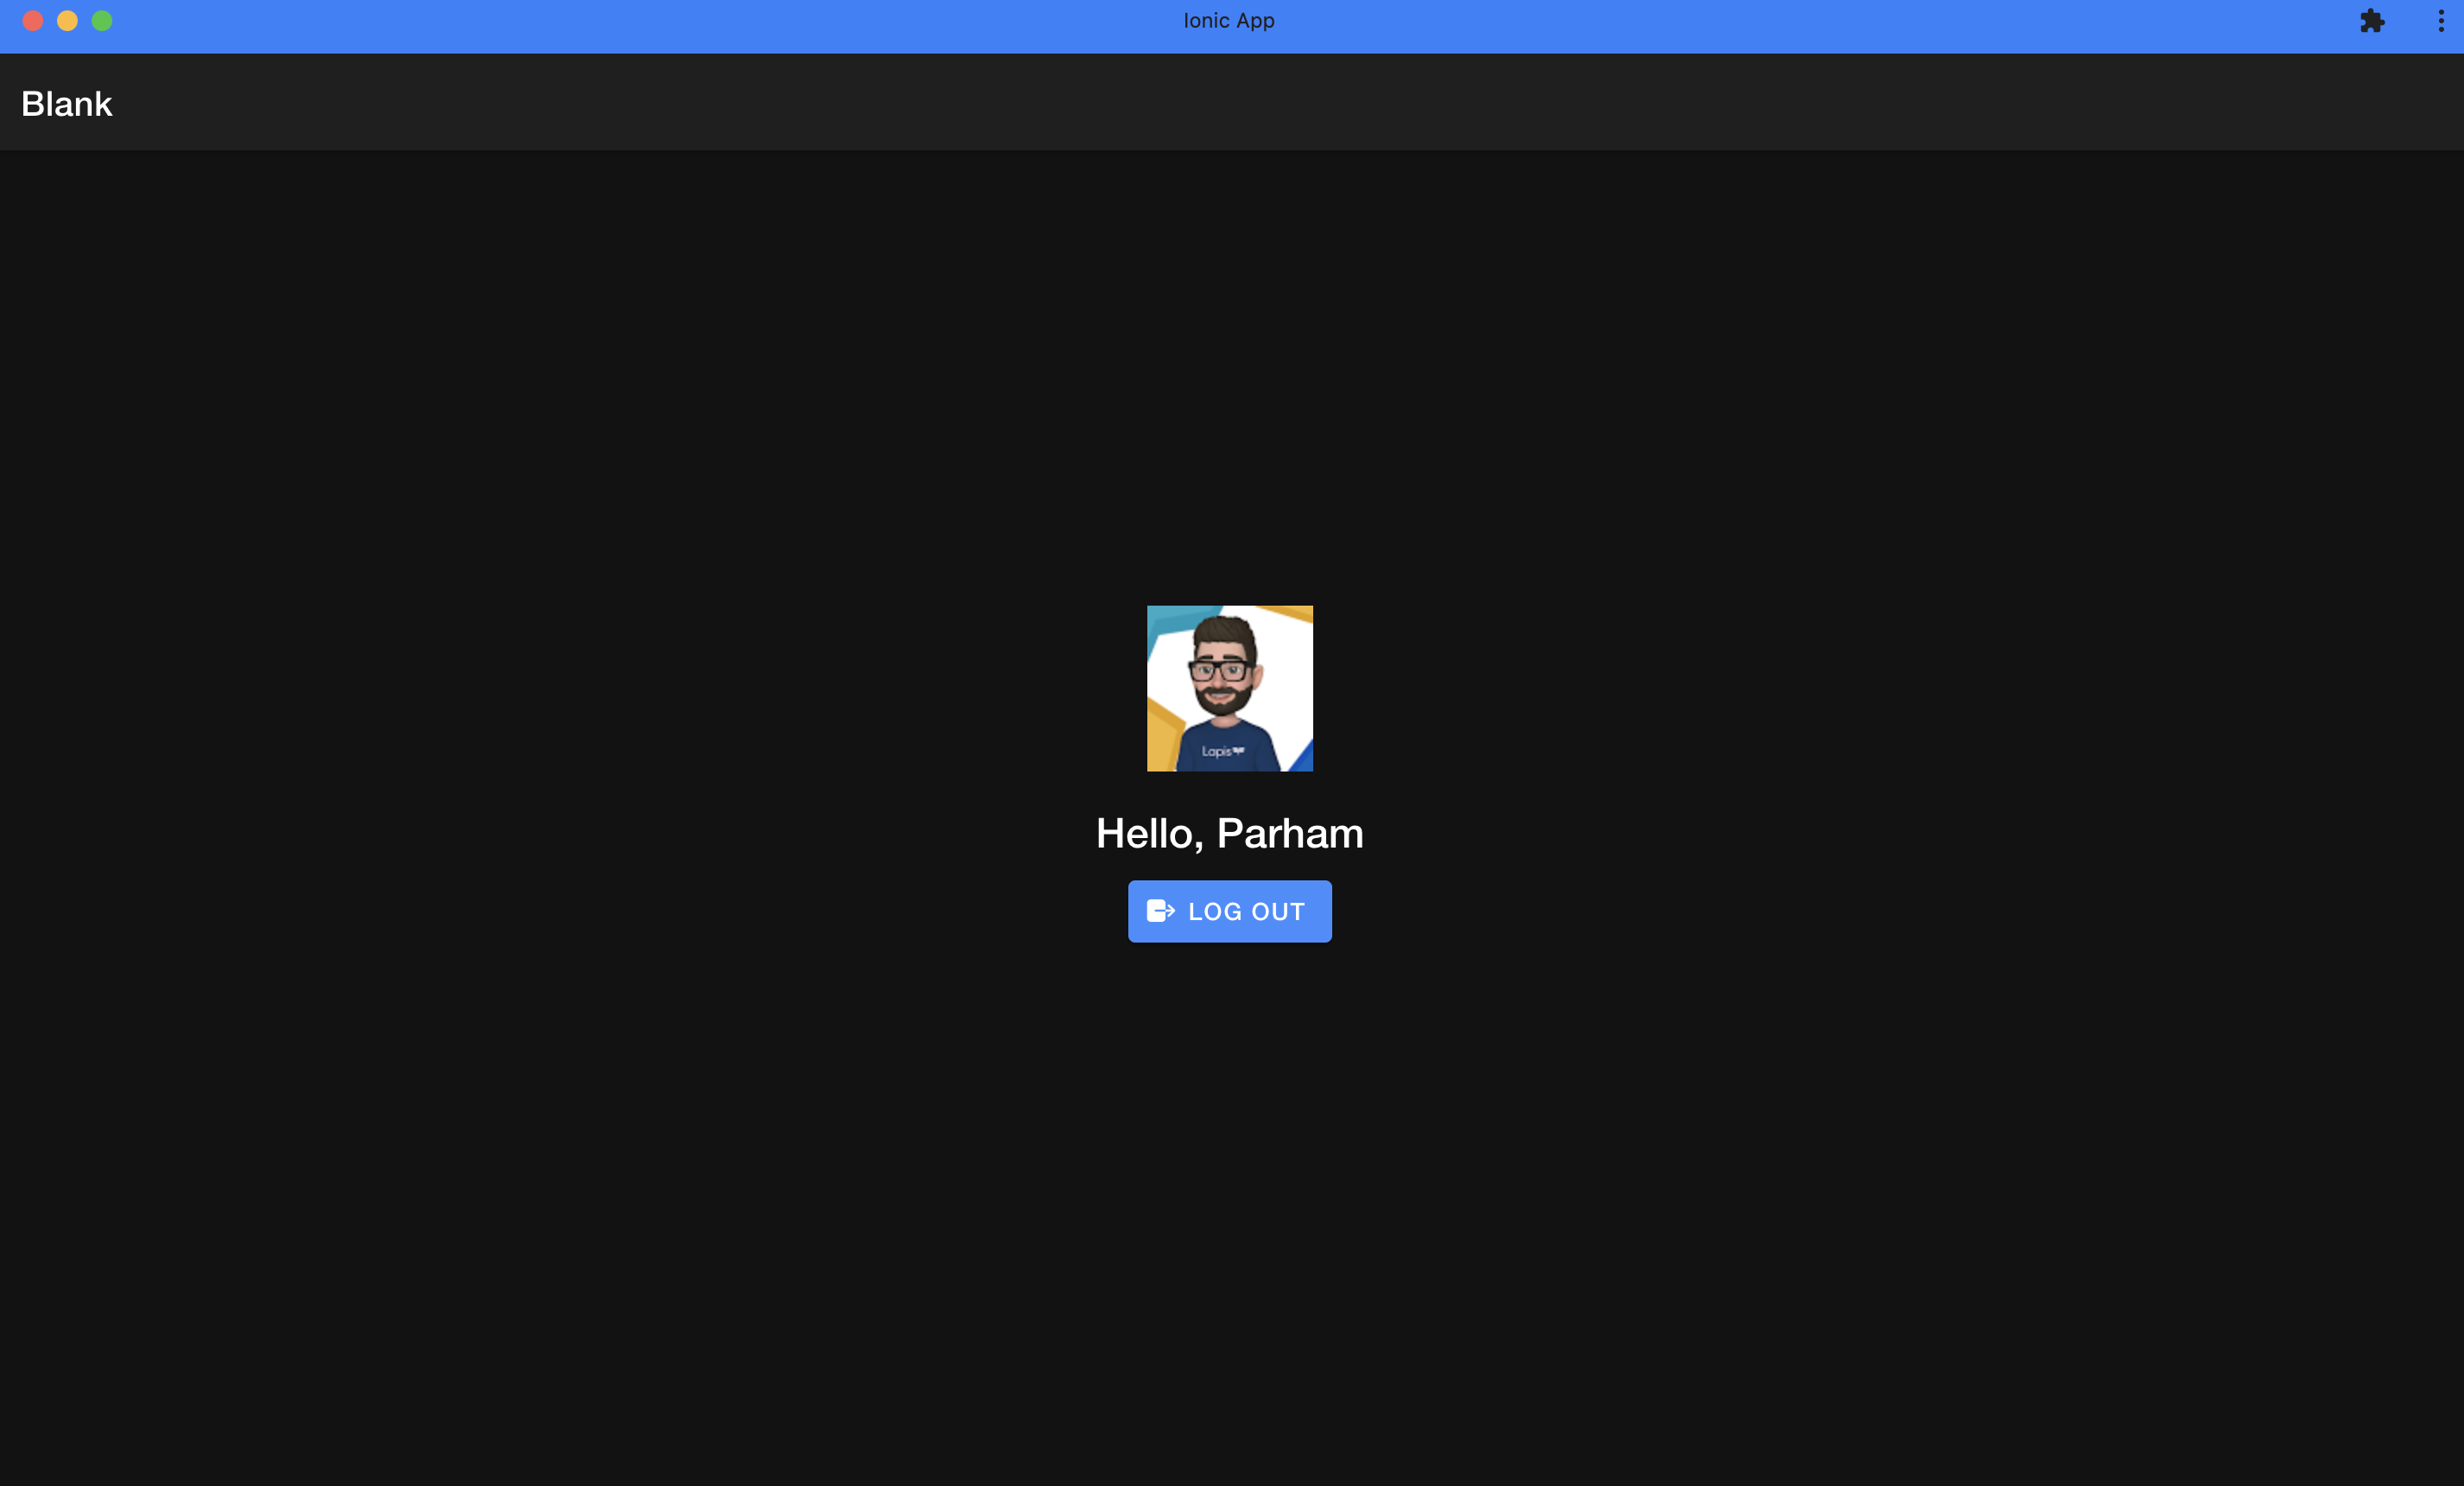
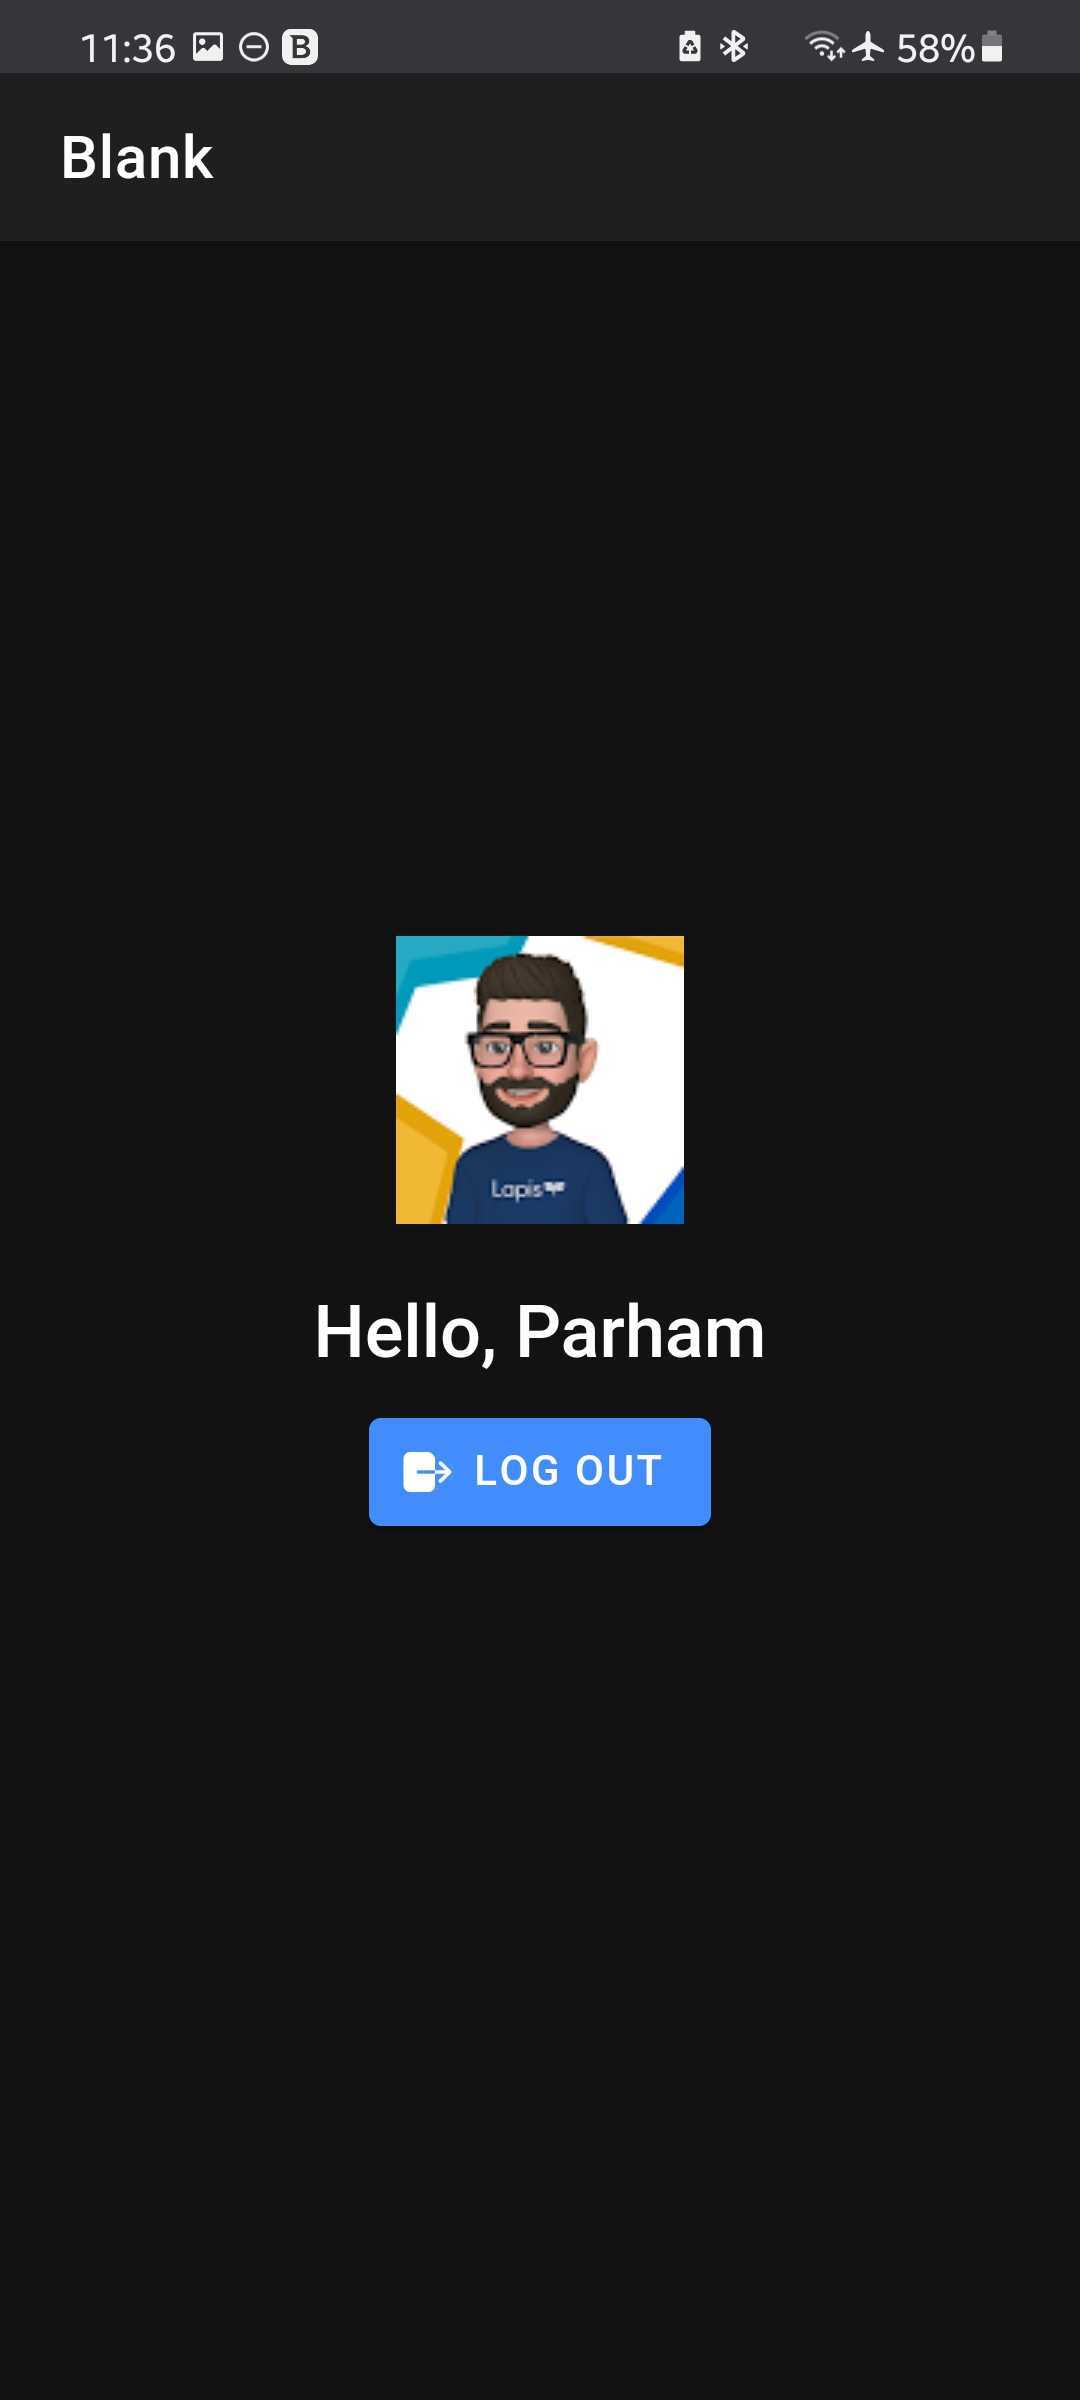
Now, after you log in, you should see your name, avatar and a logout button.
Make it a PWA
We are almost there. All we need to do is to make this Ionic app a PWA.
That is very easy. Open your index.tsx file and find the serviceWorkerRegistration.unregister(); on line 24 and change it to serviceWorkerRegistration.register();
To make sure our PWA is ready, we need to build the app and test it using Lighthouse. Run the ionic build to build the app. This should create a build directory with all of the build files, including the PWA's service worker and manifest file.
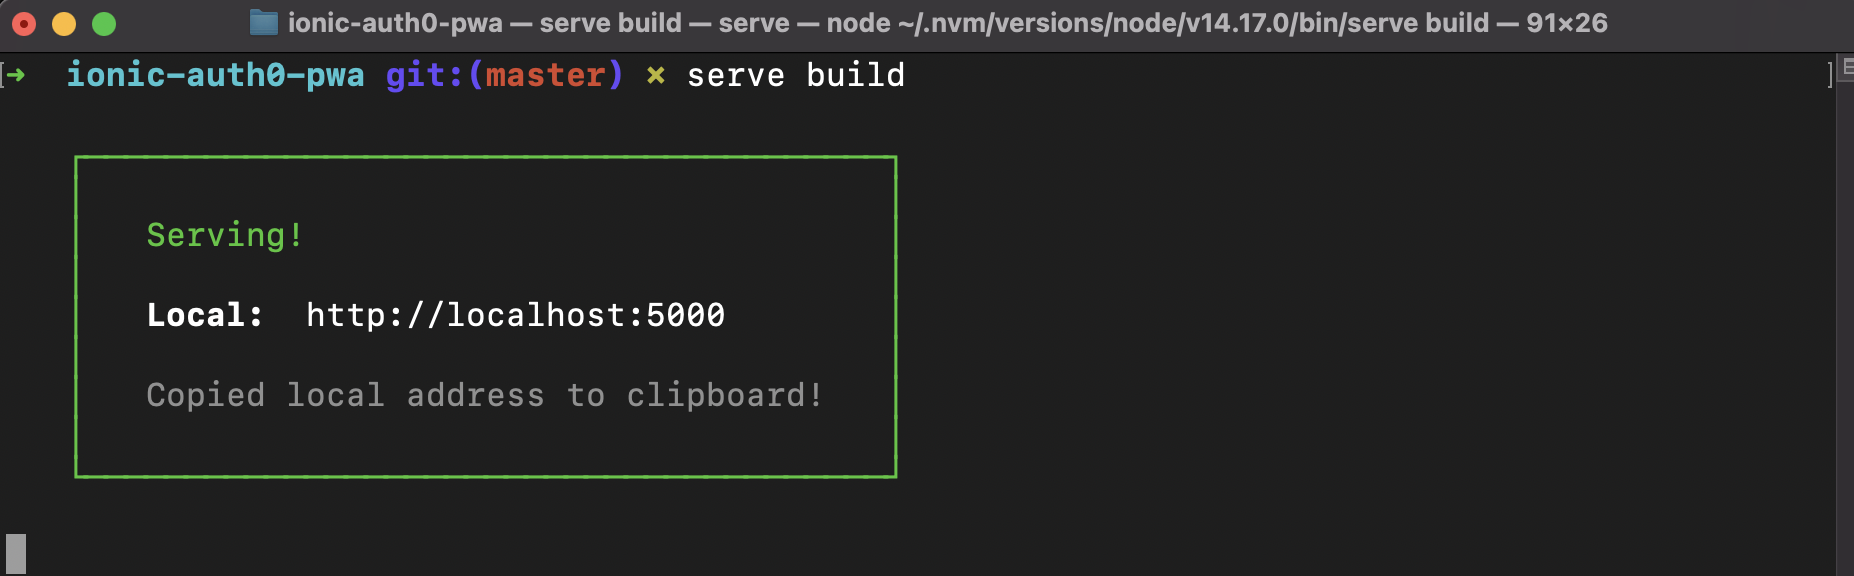
Service Workers require the app to be hosted in a secure context. To serve the build, we use a local node server. Install the https://www.npmjs.com/package/serve by running npm i serve -g.
Next, we can run the serve build command. This runs the app on http://localhost:5000 and luckily with localhost is considered safe, and you do not need HTTPS origin to test our PWA now.
Open an incognito window in chrome and open the http://localhost:5000.
You will notice another issue. When you refresh the page, the app will not load. This is because the serve tries to find localhost:5000/home and expect a home folder with an index.html file in it, and this file does not exist. There are multiple ways to fix this issue. For this tutorial, I will use hash routing.
All you need to change is to go to your App.tsx file and replace IonReactRouter with IonReactHashRouter. Now page URL will look like localhost:5000/#/home, and you can refresh without an issue.
After fixing the routing issue open the http://localhost:5000.Then open Chrome Devtools, open the Lighthouse tab and generate a report for the Progressive web app. This is my test result which shows the PWA app has a couple of issues that need to be fixed.
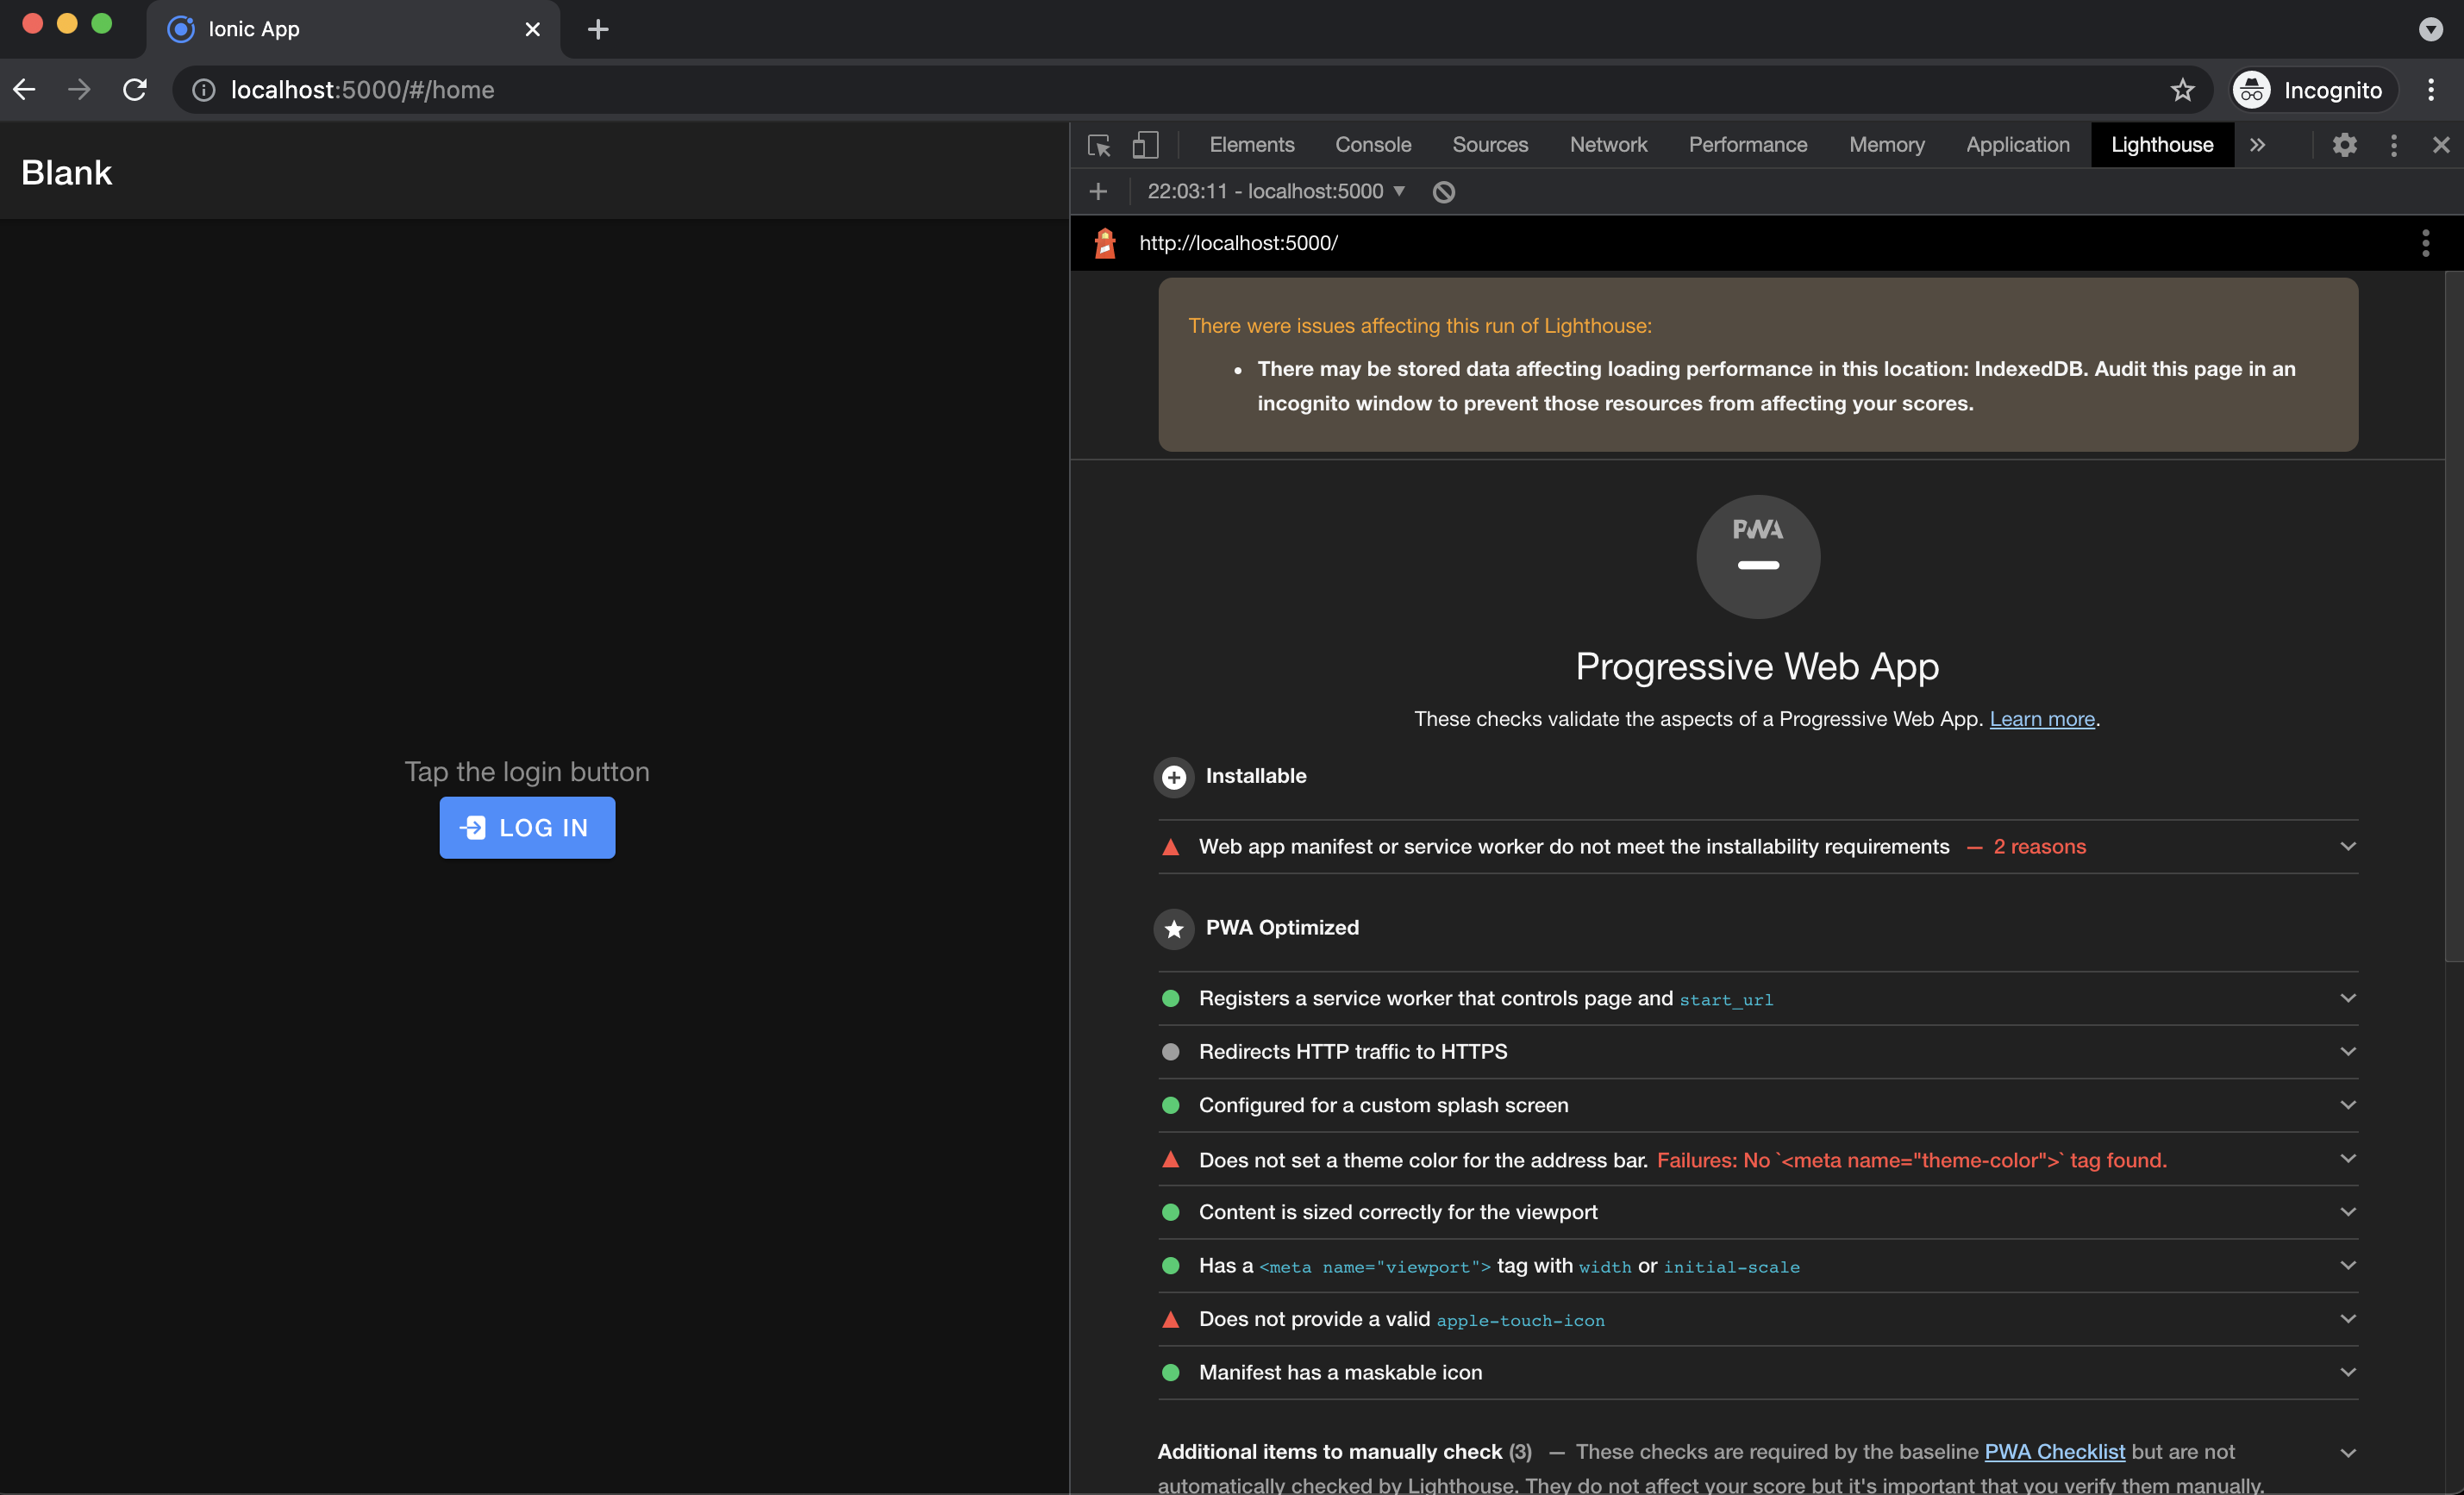
Issues are:
- Some icon sizes are not provided.
- There is no apple-touch-icon.
- There is not theme-color specified in meta tags.
To fix the first one, we need to provide icons for all sizes in the manifest.json file. This file is located in the public folder of your project. I will use an online PWA manifest & icon generator (https://www.simicart.com/manifest-generator.html)
Just specify your app icon with a minimum (512px x 512px) and a name here. Then click generate the manifest to download a zip file. It should contain all the icons we need. I will use the default icon provided by Ionic in the asset folder. Your zip file content should look like this:
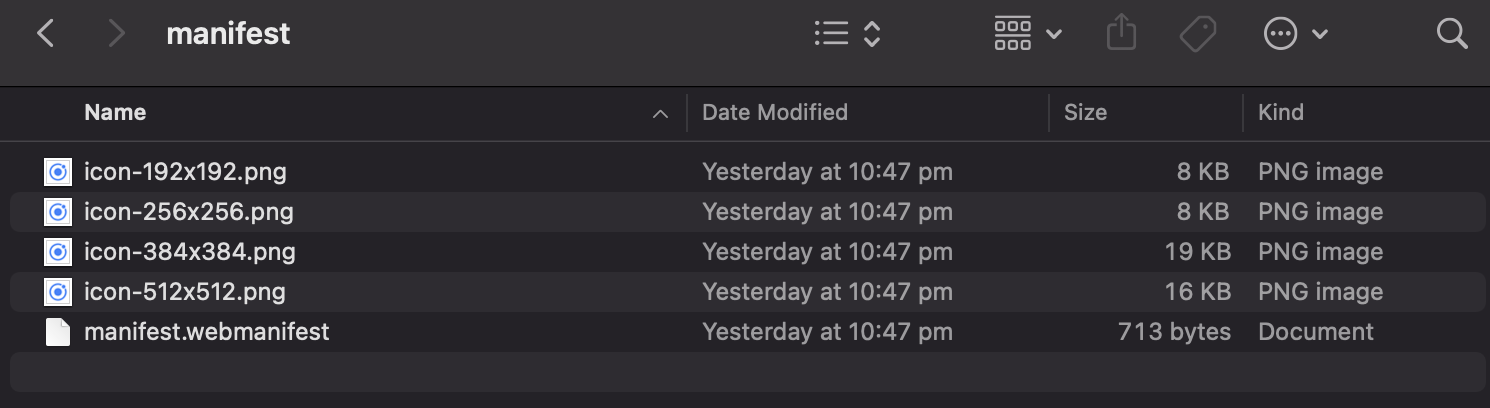
Go ahead and copy all icons to your project under the public -> assets -> icon folder.
Your new manifest.json will include these icons, and it should be like this:
{
  "short_name": "Ionic App",
  "name": "My Ionic App",
  "icons": [
    {
      "src": "assets/icon/icon-192x192.png",
      "sizes": "192x192",
      "type": "image/png",
      "purpose": "maskable any"
    },
    {
      "src": "assets/icon/icon-256x256.png",
      "sizes": "256x256",
      "type": "image/png",
      "purpose": "maskable any"
    },
    {
      "src": "assets/icon/icon-384x384.png",
      "sizes": "384x384",
      "type": "image/png",
      "purpose": "maskable any"
    },
    {
      "src": "assets/icon/icon-512x512.png",
      "sizes": "512x512",
      "type": "image/png",
      "purpose": "maskable any"
    }
  ],
  "start_url": ".",
  "display": "standalone",
  "theme_color": "#ffffff",
  "background_color": "#ffffff"
}
That is the fix for the first issue.
Add the following code to your index.html in the head tag to fix the second and third issues.
<link rel="apple-touch-icon" href="%PUBLIC_URL%/assets/icon/icon-192x192.png">

<meta name="theme-color" content="#ffffff"/>
We are all set. Let's build and test the PWA app one more time.
Run ionic build and then serve build. Open the Chrome incognito window and test using Lighthouse.
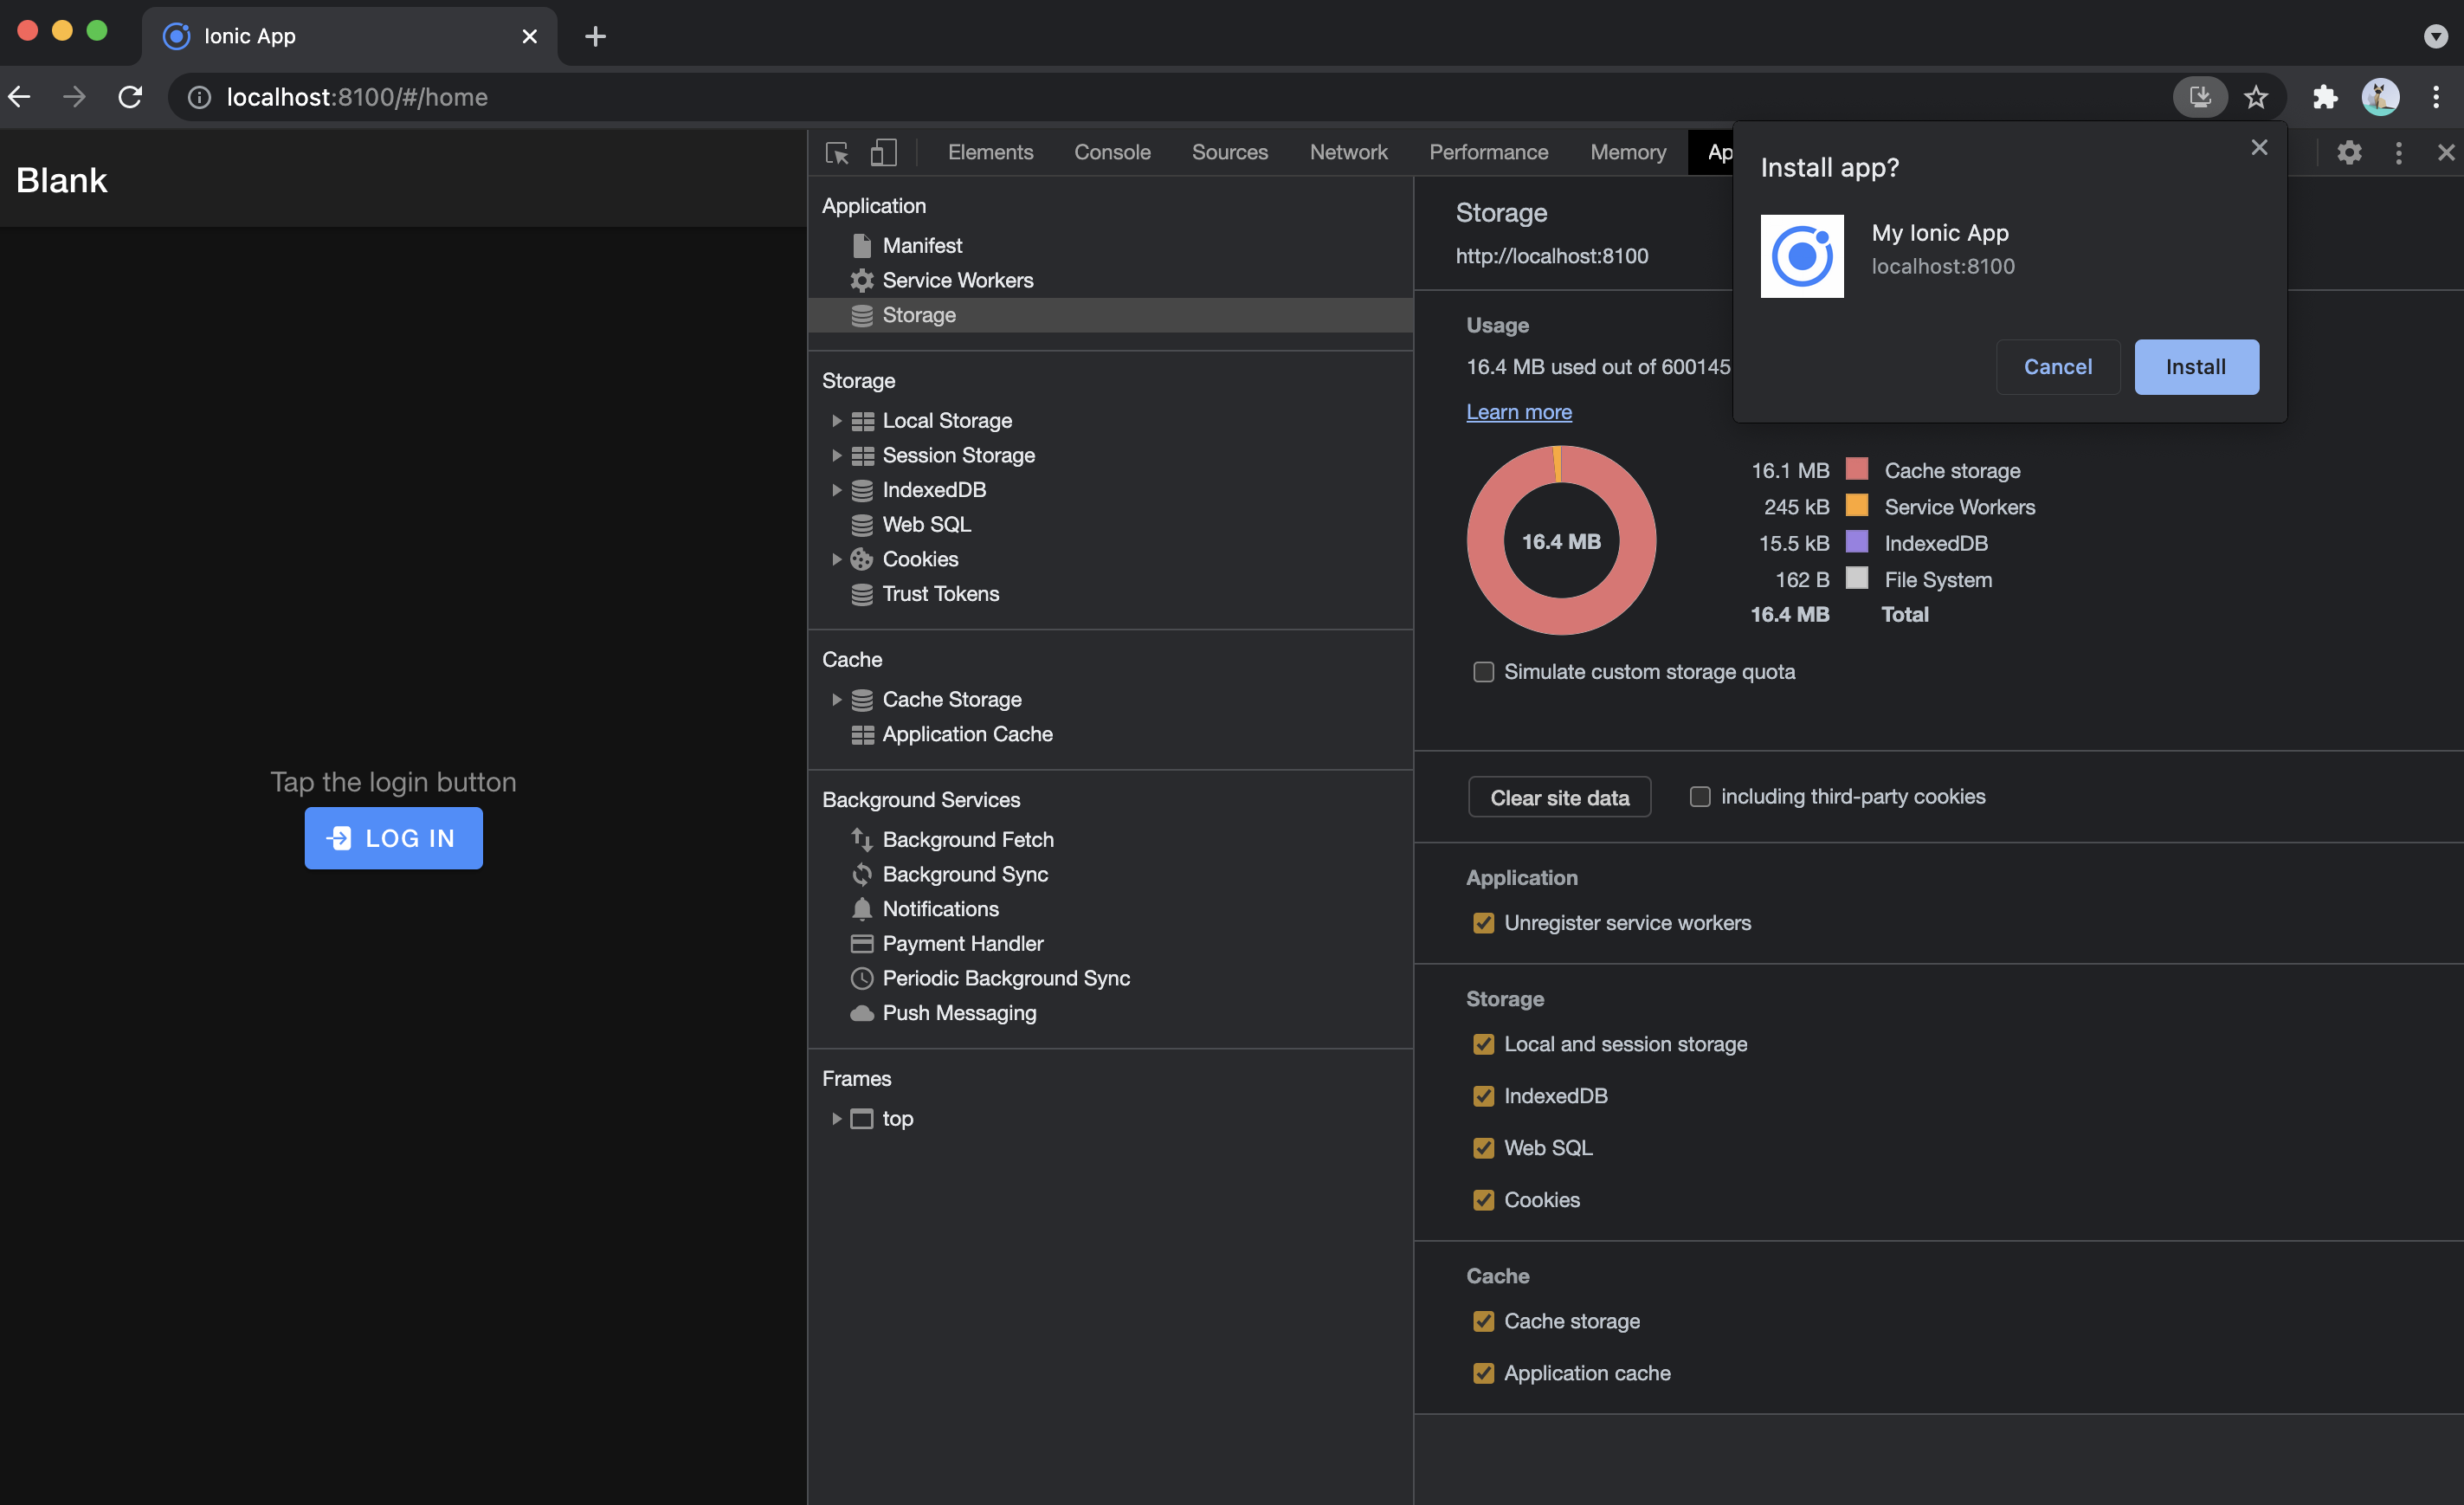
You should see a result like this one, indicating that your PWA is ready and installable.

If you want to test the install, you can open your app on a normal window (not incognito), and you should be able to see the install button in the Chrome address bar.
If you try to log in on the installed version of the app, you will notice that you get the same error as before, saying, "Oops! something went wrong". This is because the origin is changed to localhost:5000. You can add the new origin to Auth0 settings or specify the port when running the server. serve build -p 8100
Some screenshots of how the app works after installing on desktop.
Congrats!! 🥳 🎉 👏 🥂
Now you have a functional PWA app with Auth0 login!
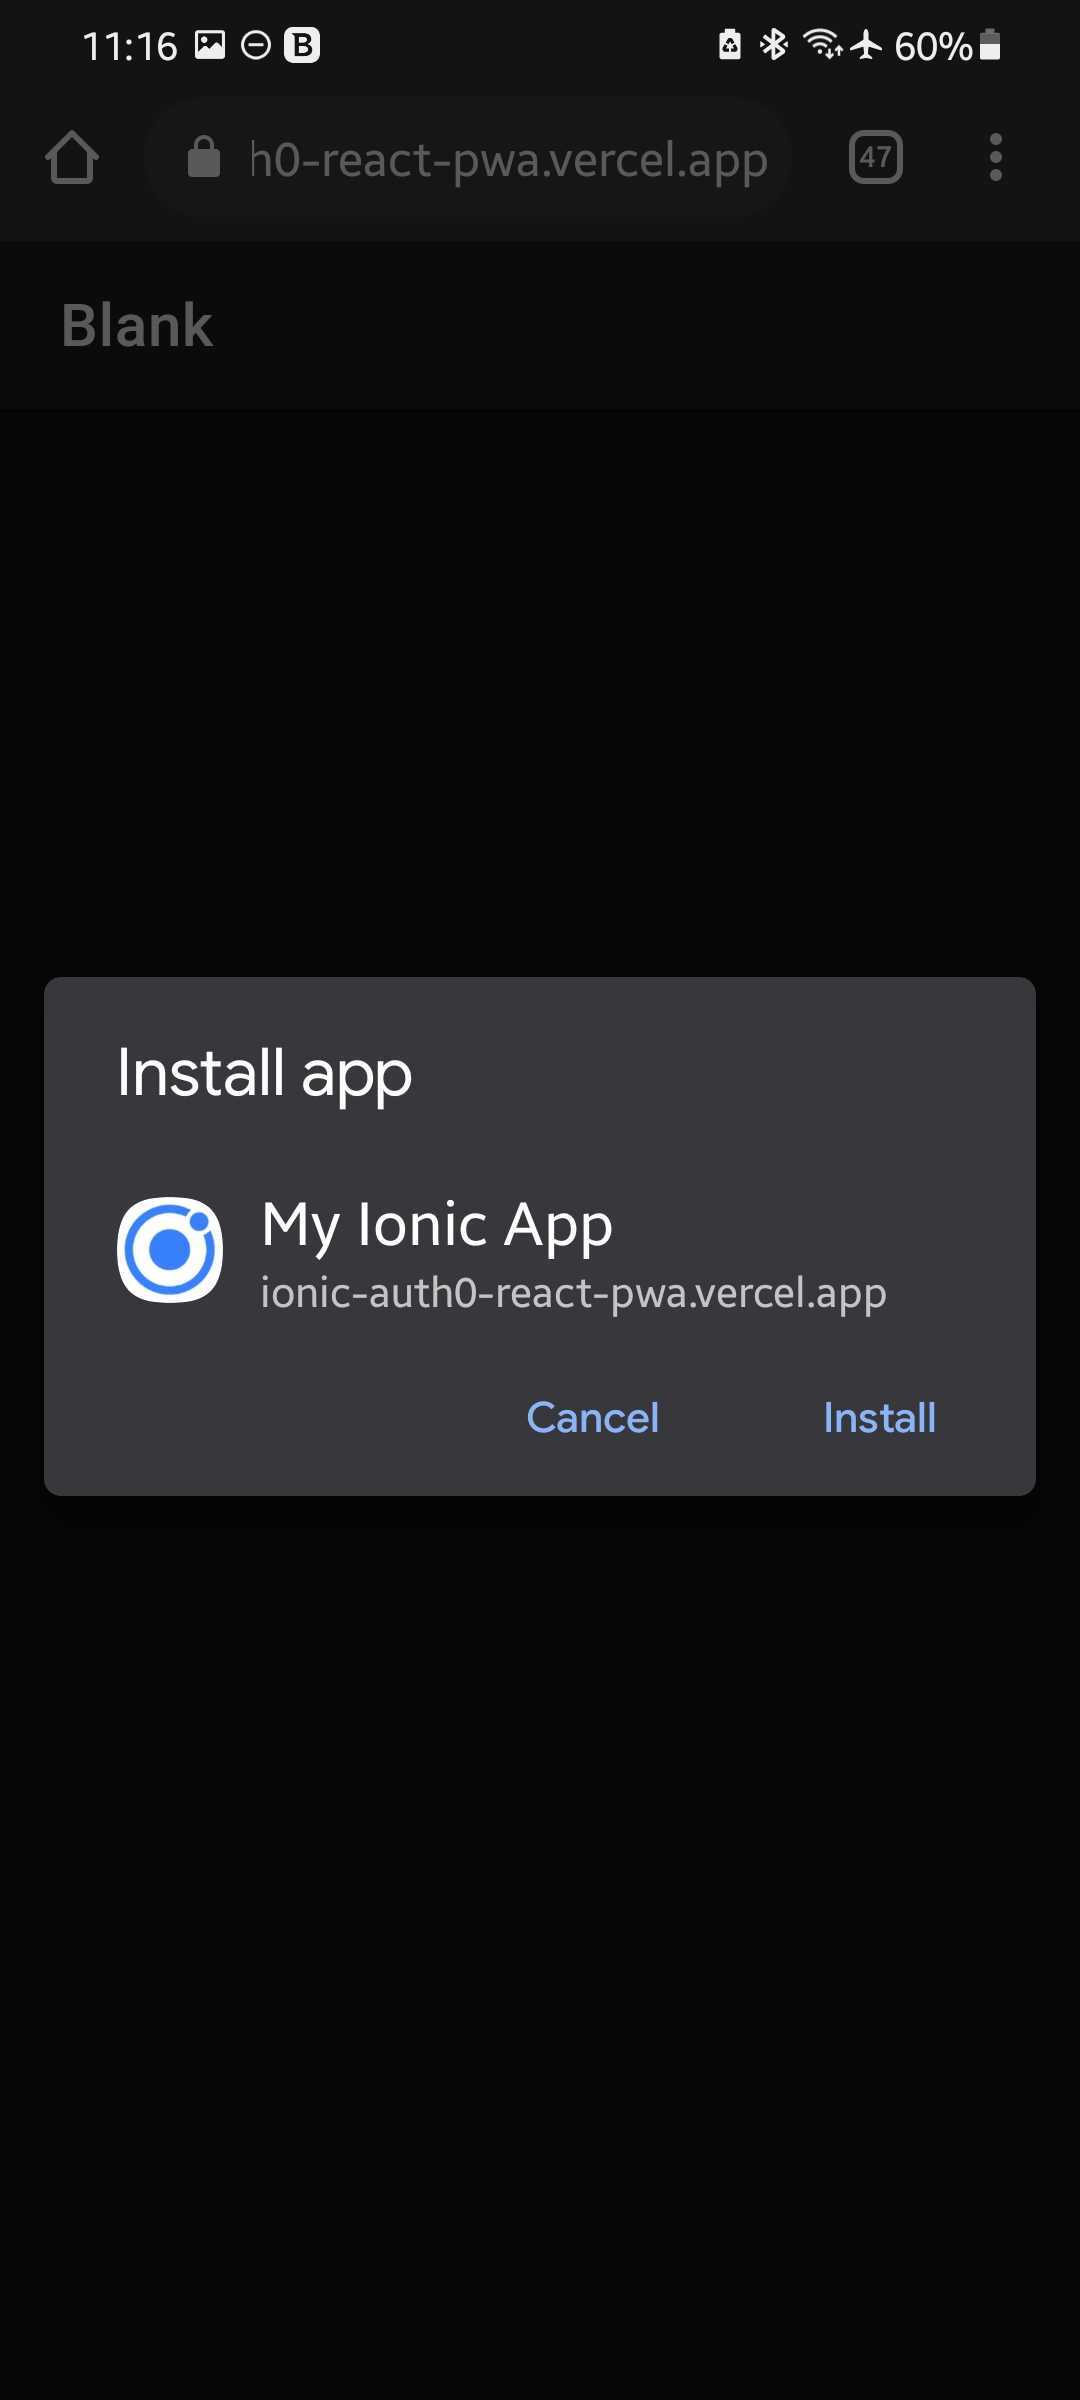
You can use this the same on the phone and install it as a PWA app.
You can download the code (project) I build as part of this blog from Github.
https://github.com/pazel-io/ionic-auth0-react-pwa
Bonus point - Deploy your new app using Vercel in less than 5 mins
To test our PWA on phone it would be easier if we deploy the app so we can easily access it through a URL over HTTPS. I will use Vercel for this. Vercel is a zero-configuration cloud CI/CD that can understand the structure of our Ionic project and deploy it out of the box.
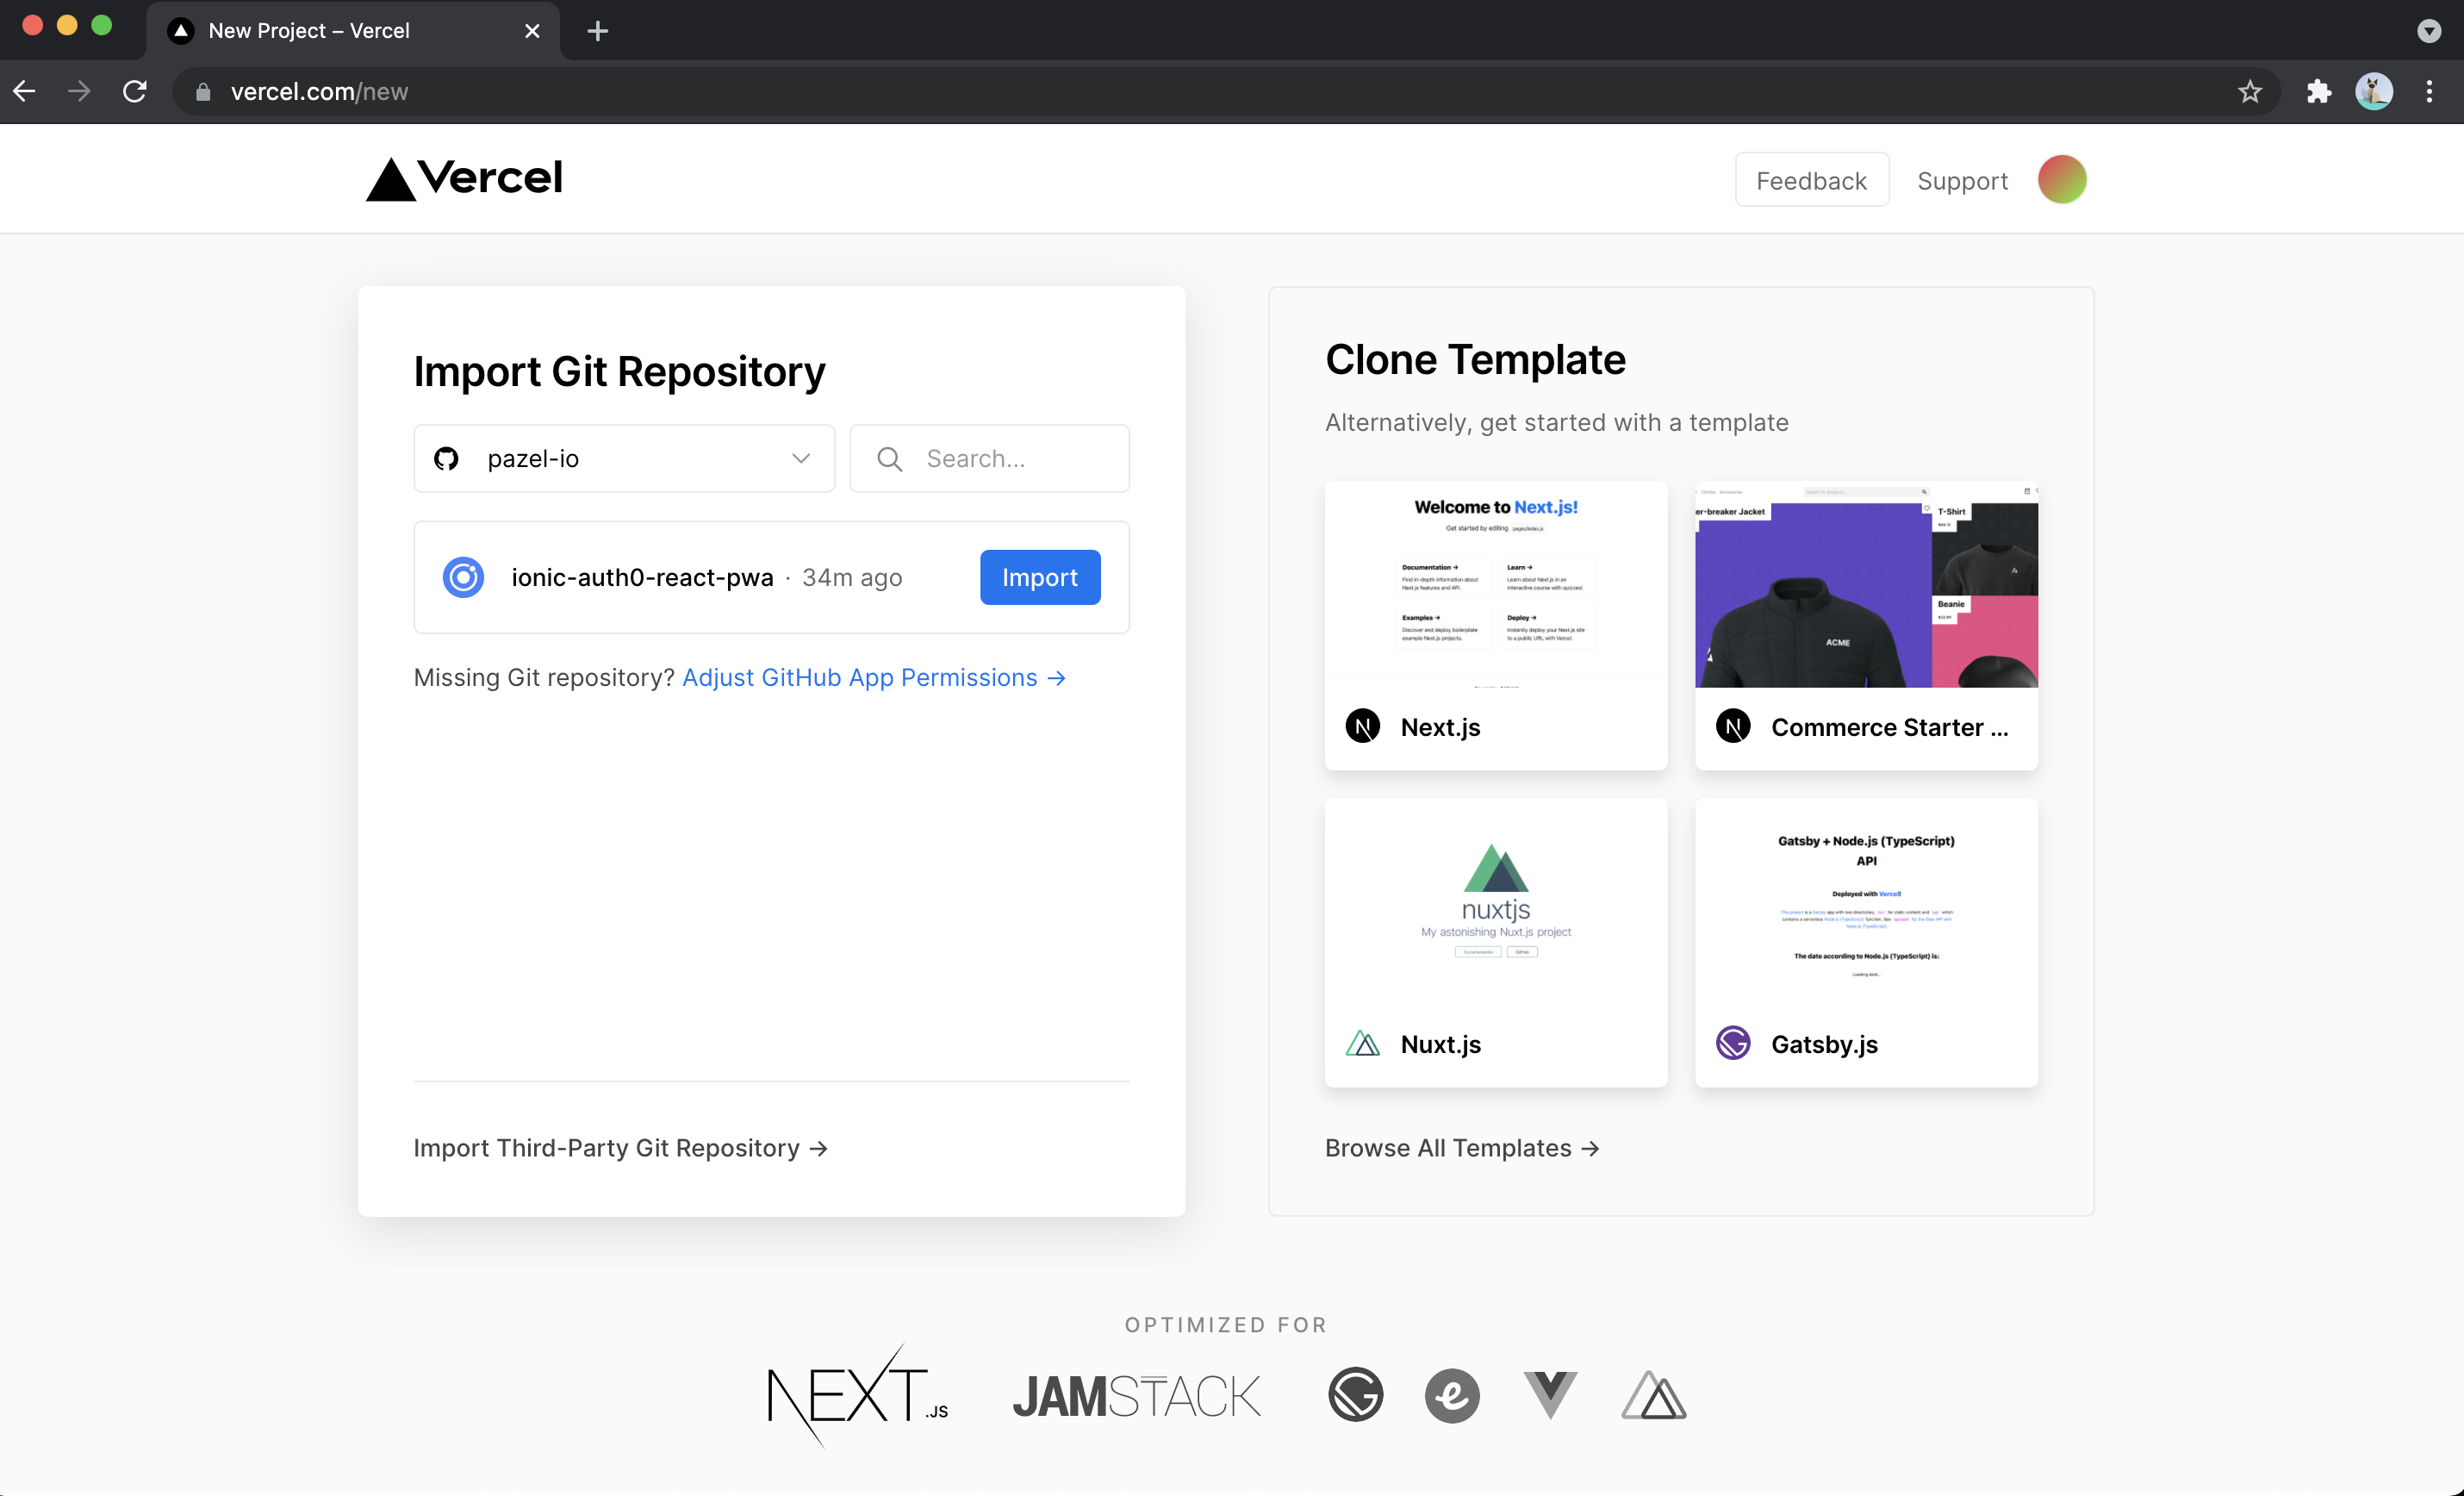
To do this please go to https://vercel.com and register for a free account.
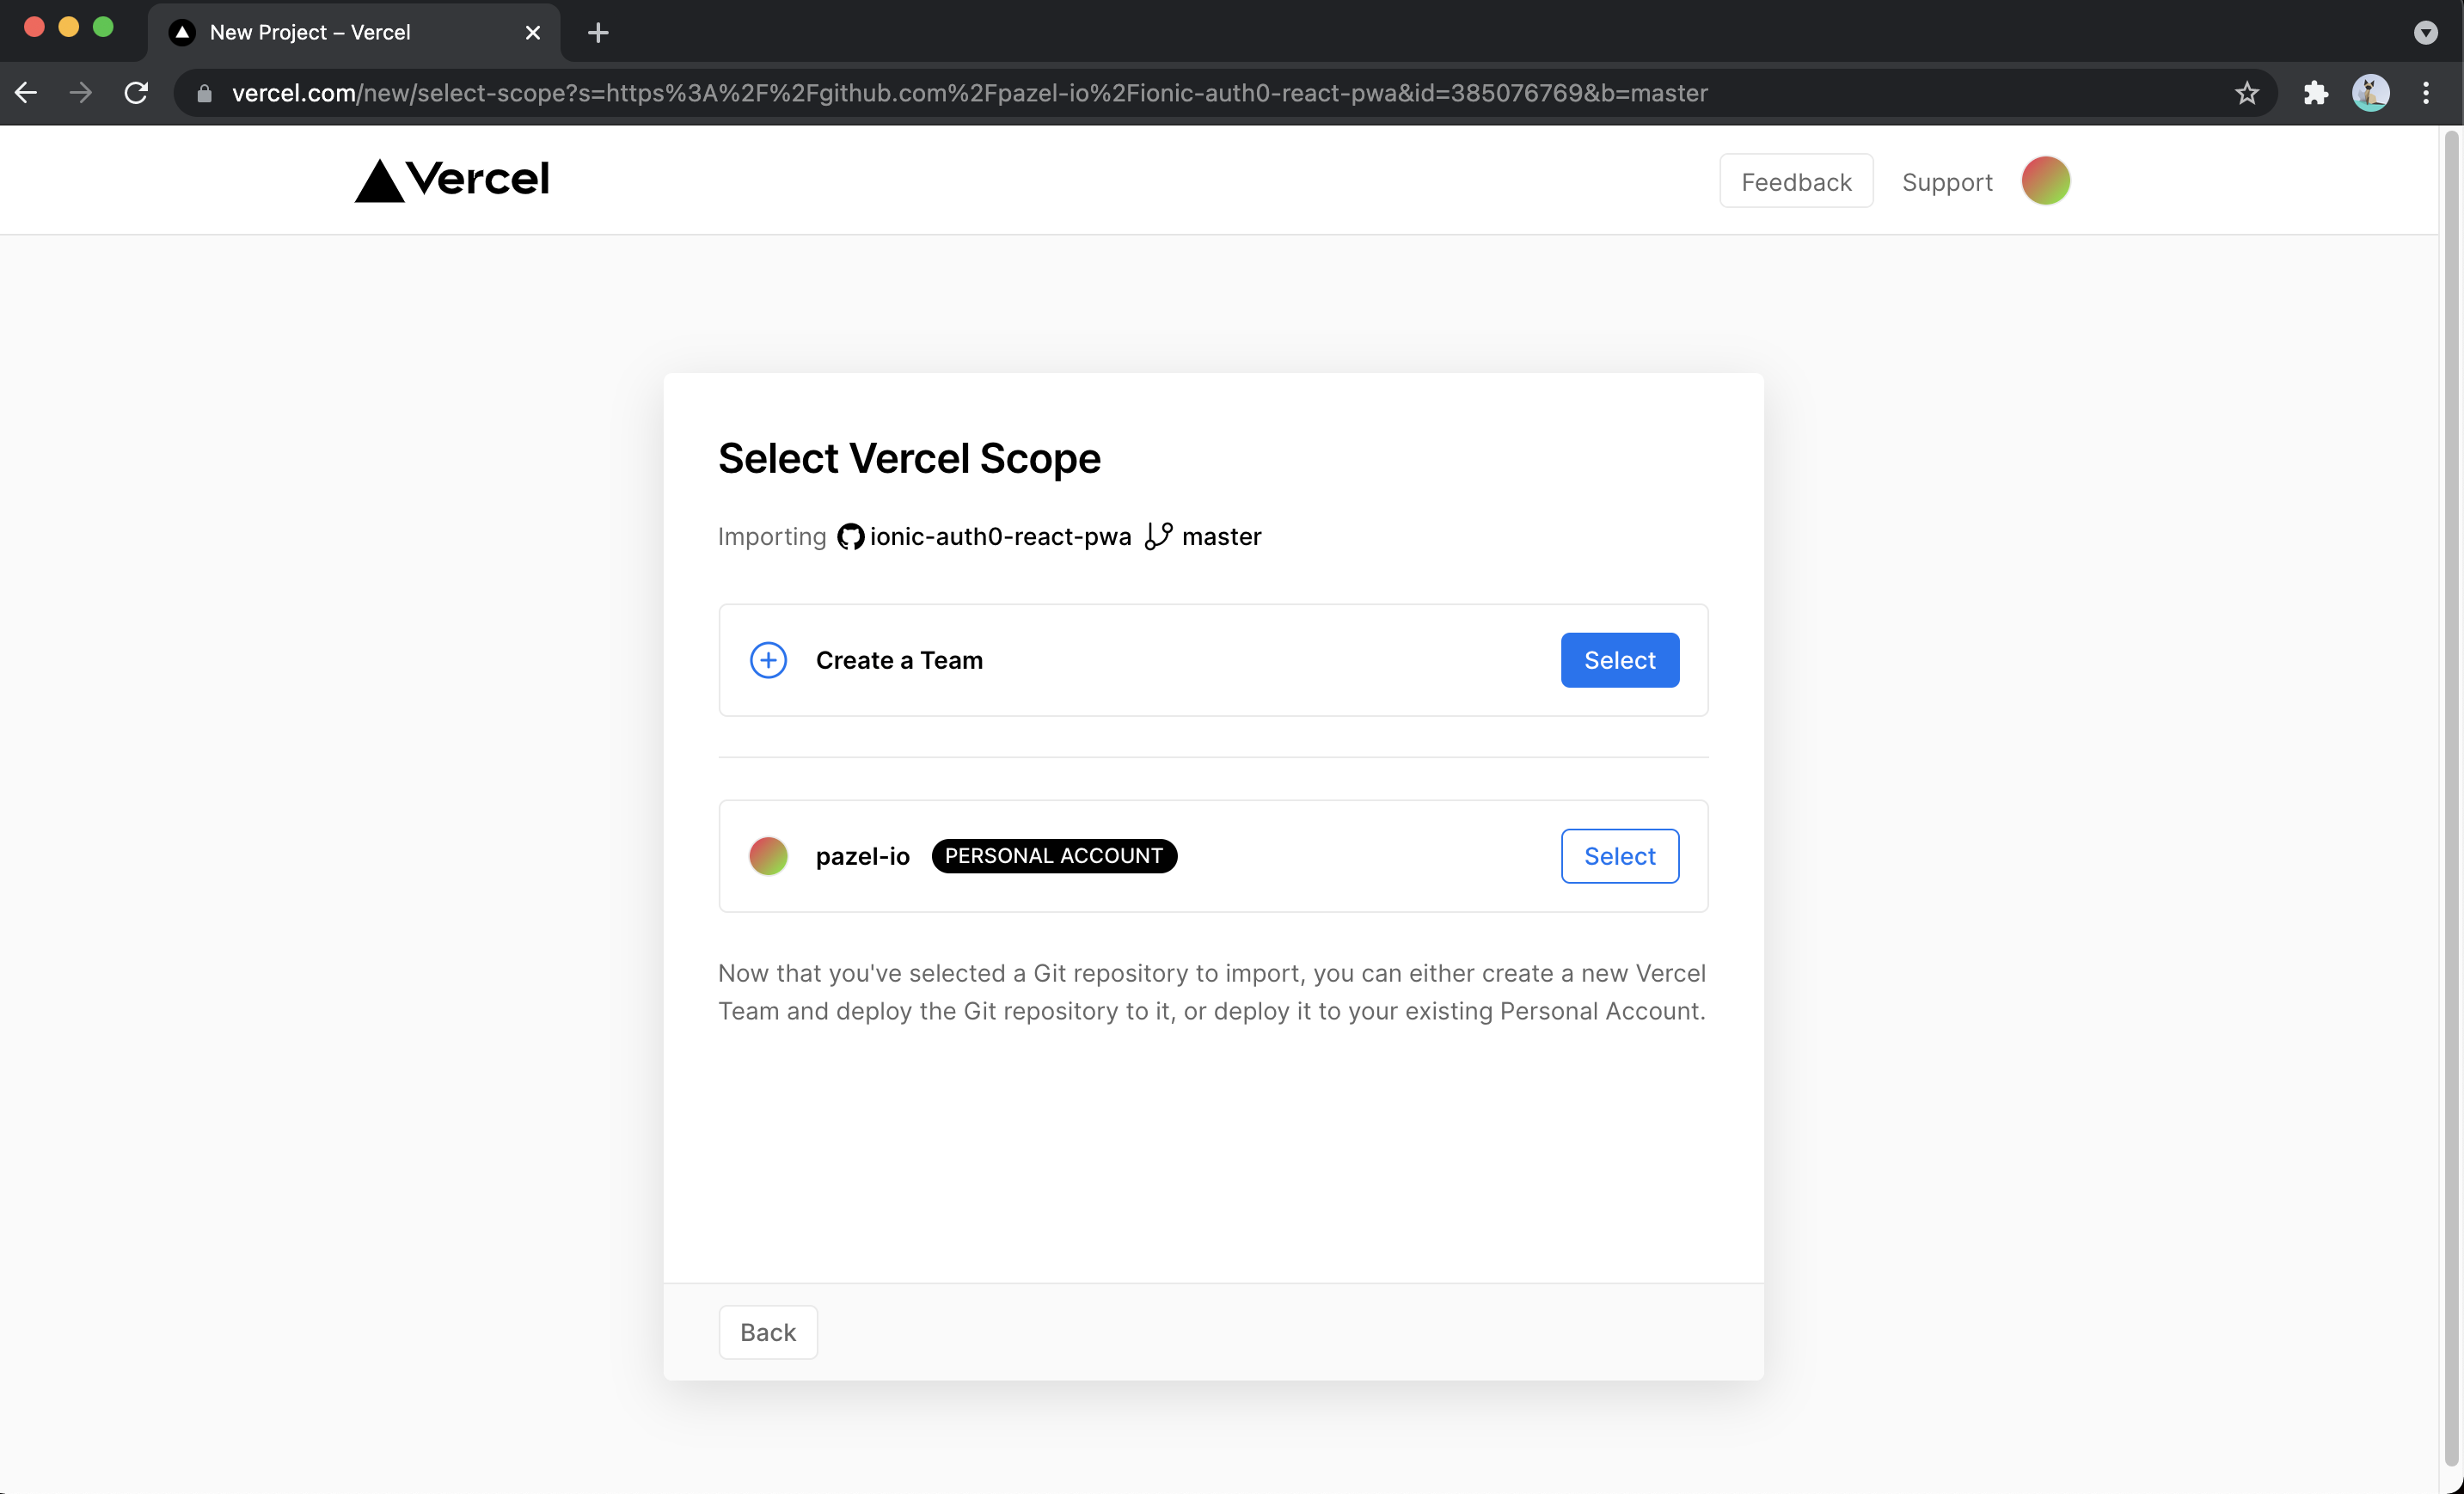
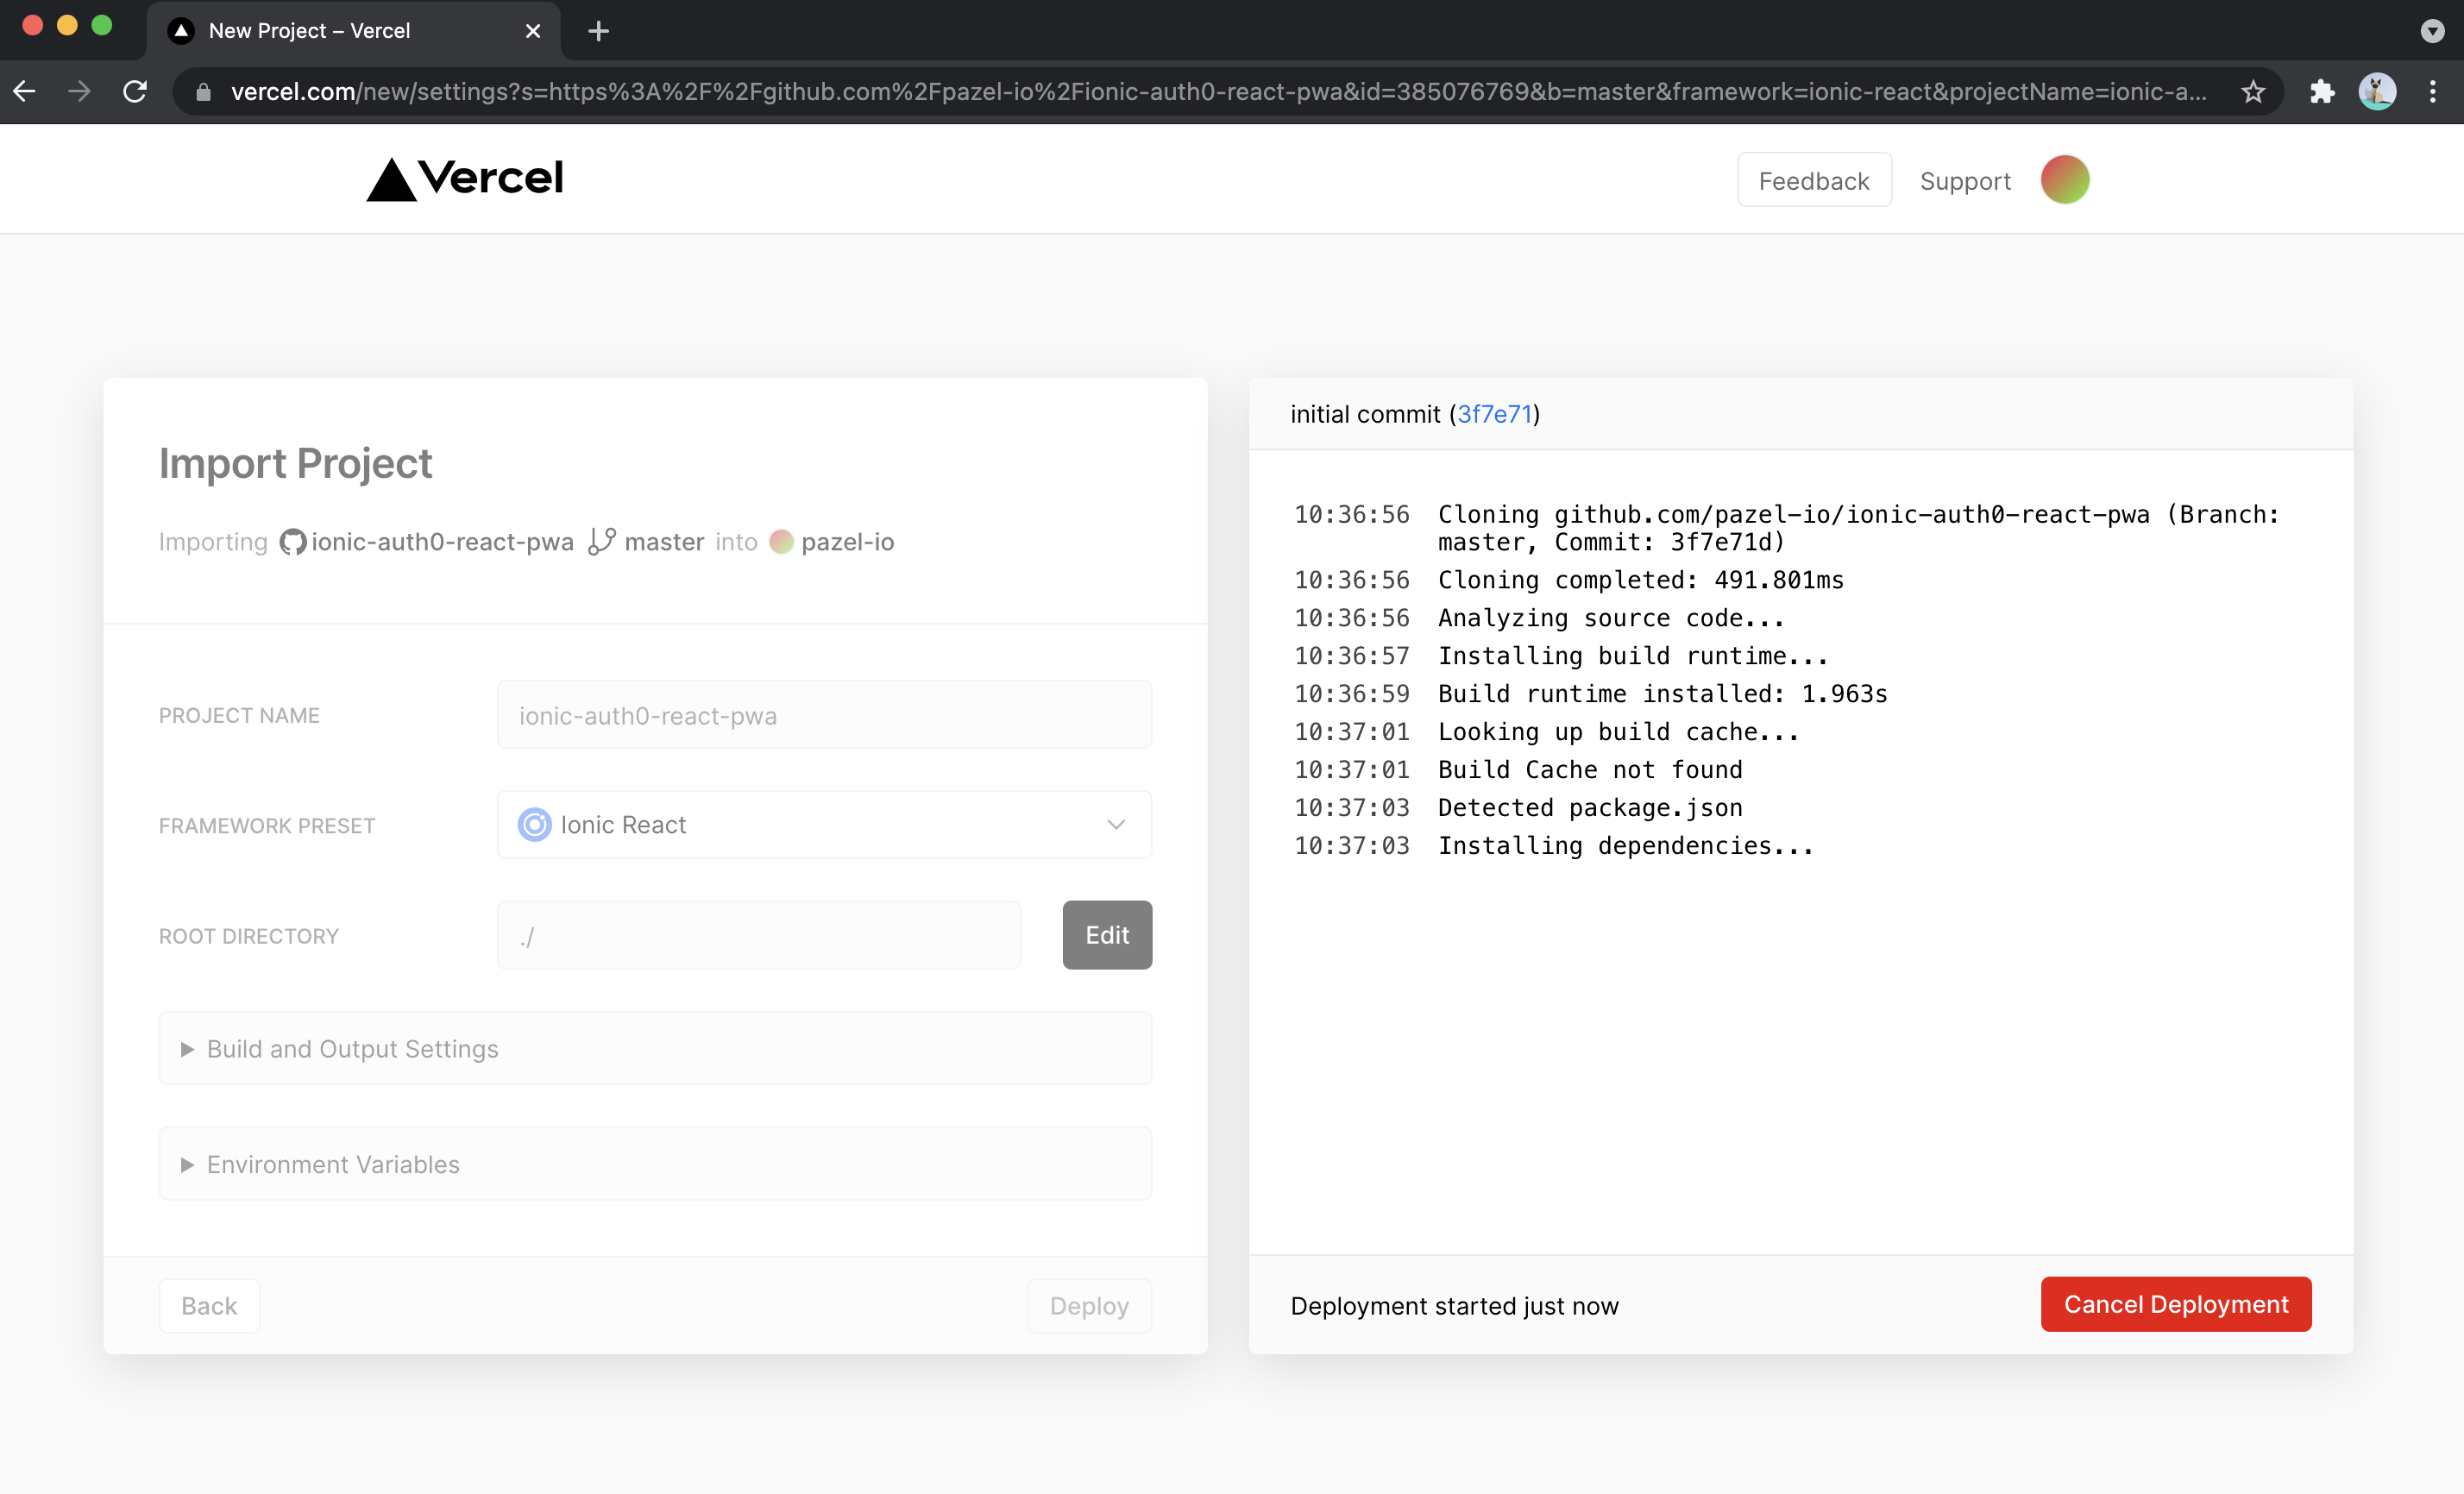
Log in and you have the option to import a project from your Git repo. I am using Github as mentioned before. So I will import the project from my Github.
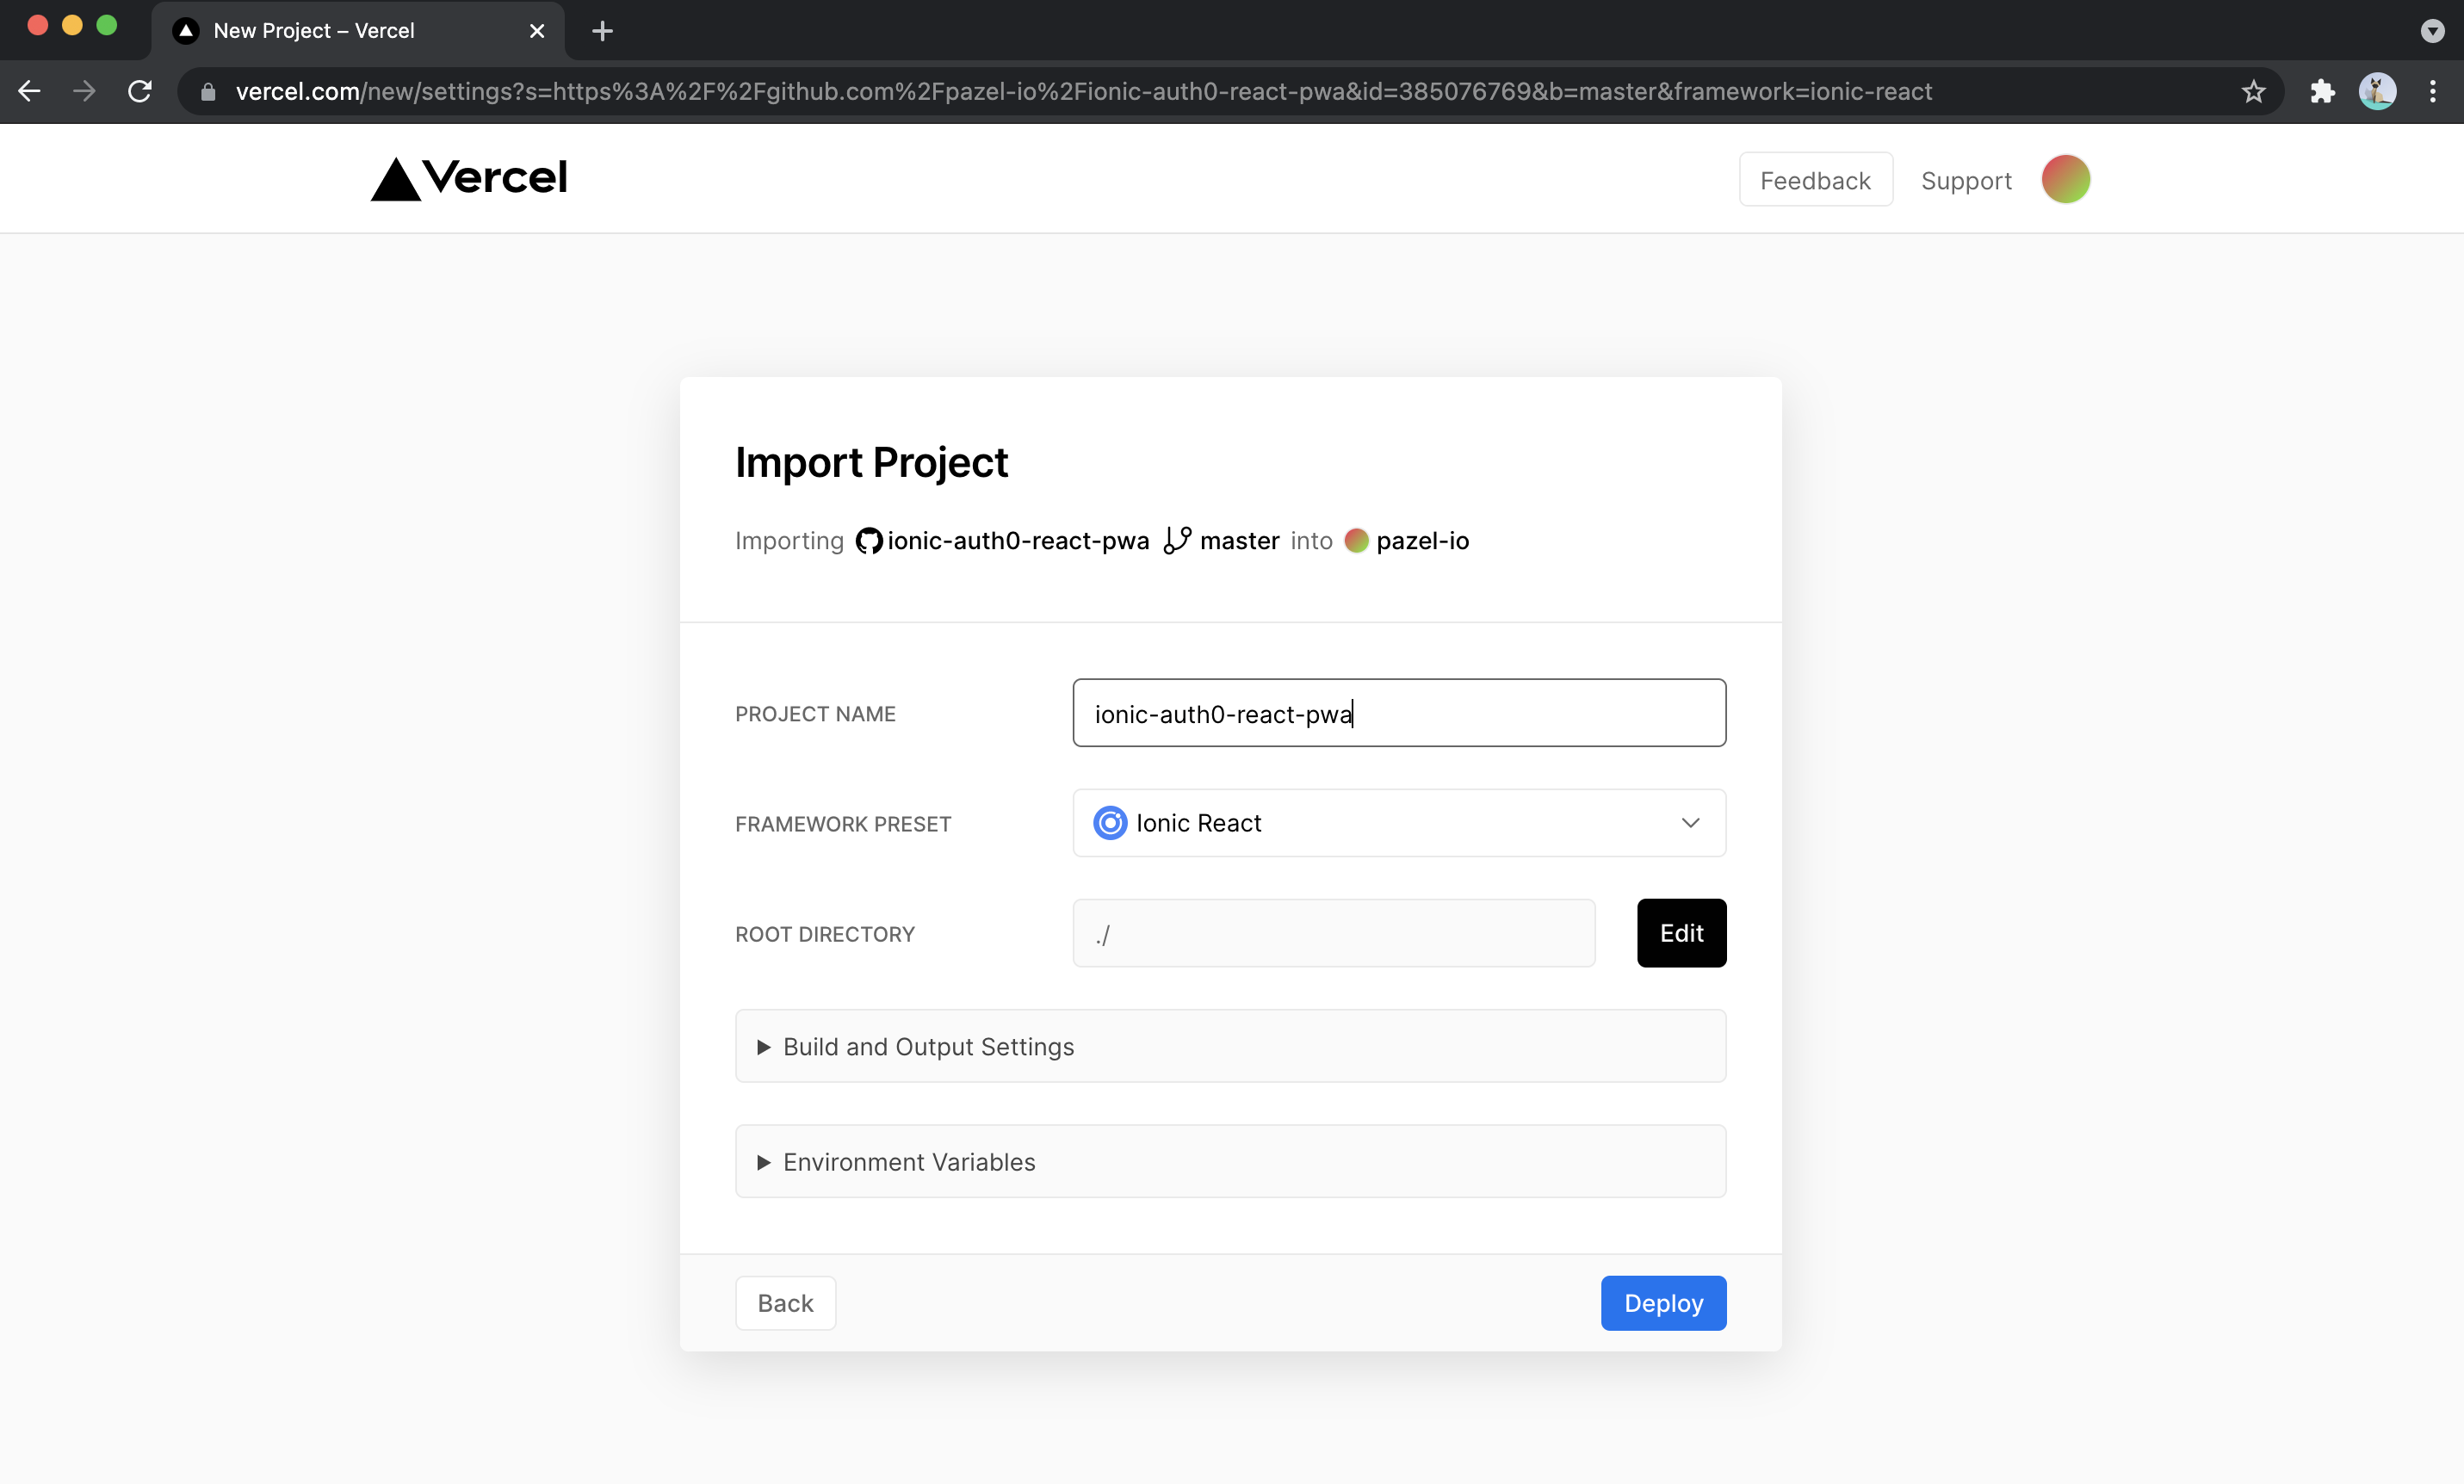
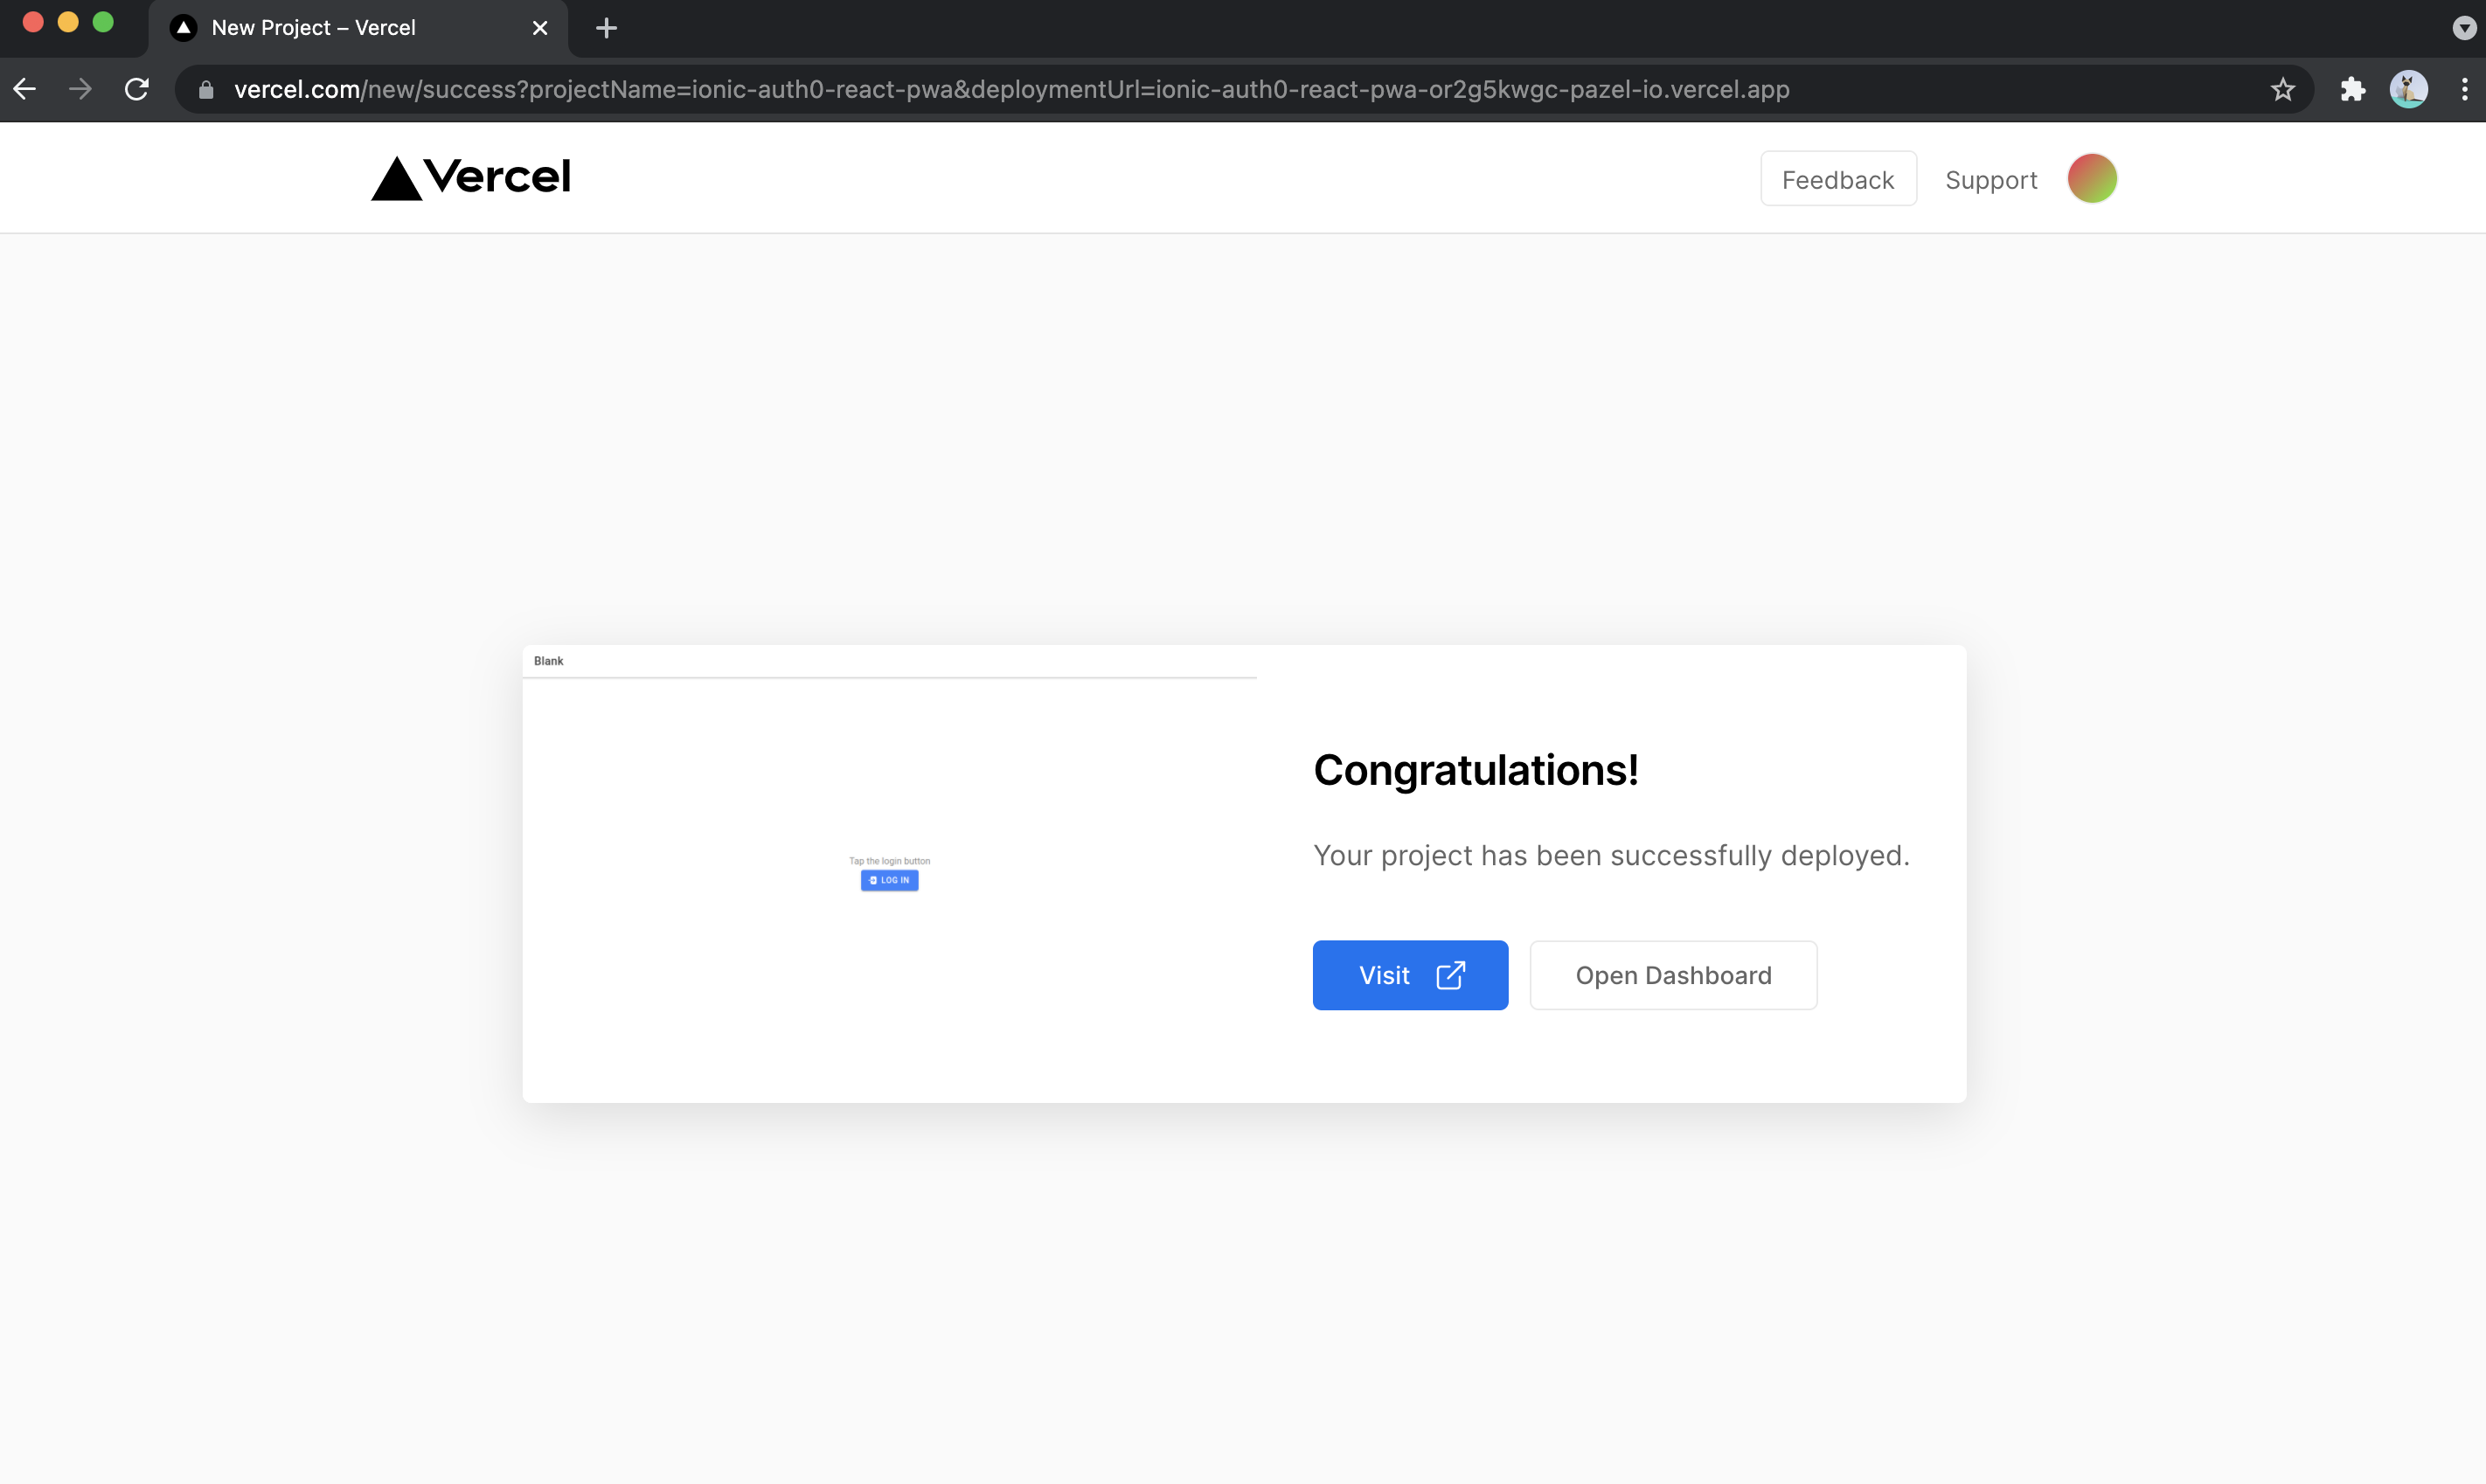
Vercel already knows that your project is Ionic React and knows what command to run to build it. Just go ahead and click deploy. This will run the build and give you a URL that your project will be available on.
Simply click the button that says "Visit" to access your deployed app.
Remember you will need to add the new origin (Vercel deployment domain) to Auth0 settings for Allowed Callback URLs, Allowed Logout URLs and Allowed Web Origins so you login successfully. You can add the new one like this. Replace the YOUR_APP_NAME with your own Vercel app.
http://localhost:8100, https://{YOUR_APP_NAME}.vercel.app
Now I can test it on a phone.
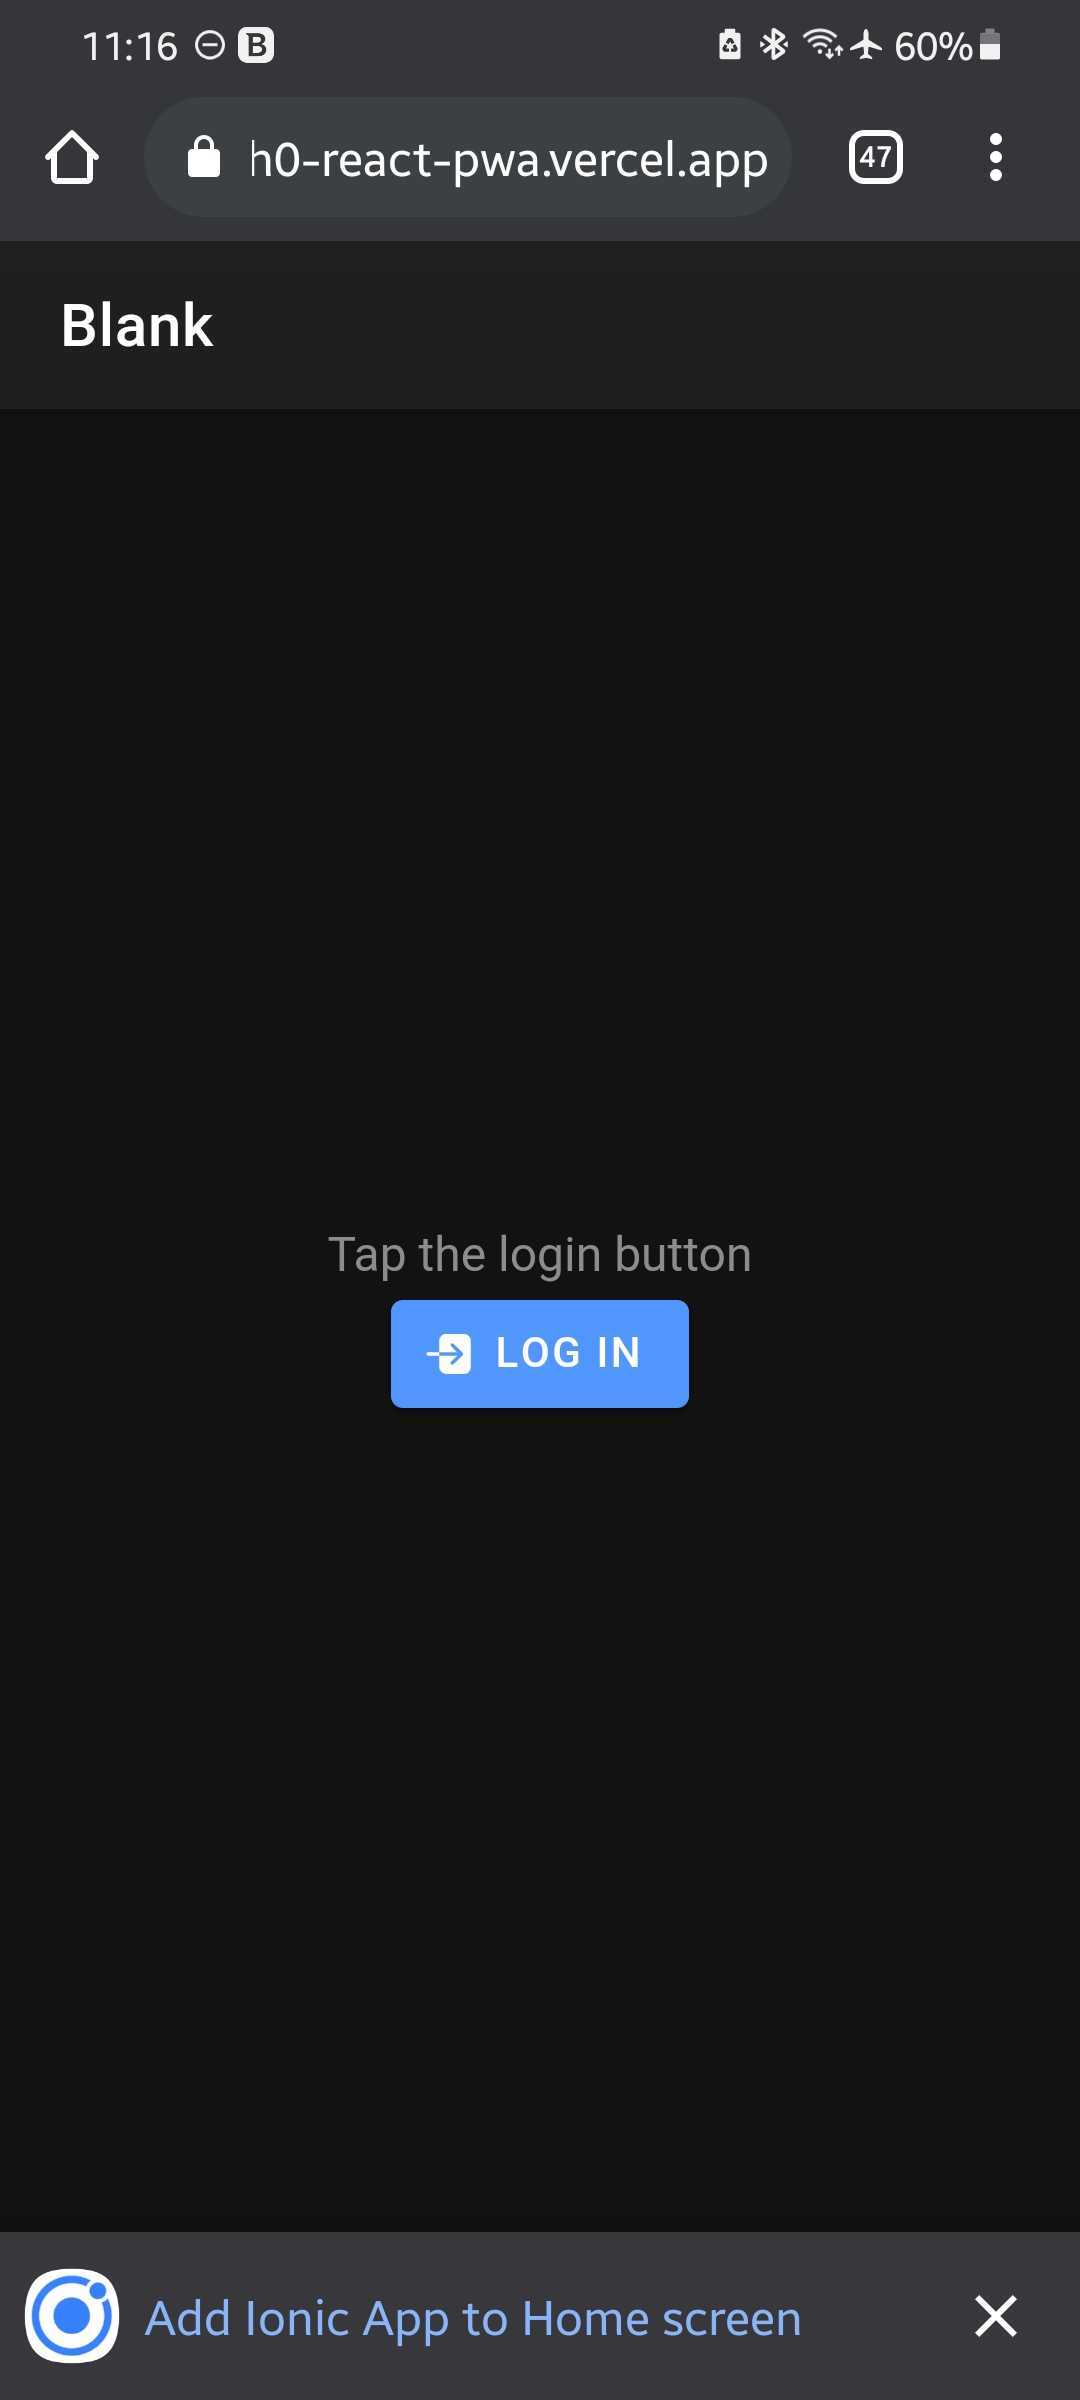
Go ahead open the installed version of the app and try to log in.
That's it for this tutorial. This implementation is good enough for Web and Mobile as long as you run it in a browser or installed it as PWA.
I will be writing on Ionic & Capacitor integration with Auth0 as a native app in my next article.
Thanks for reading. I am available if you have any questions. Leave me a comment here or DM me on Twitter.
Git repo: https://github.com/pazel-io/ionic-auth0-react-pwa
Demo: https://ionic-auth0-react-pwa-deploy.vercel.app/#/home
Twitter: _pazel